 Tutorials
Books
Videos
Forums
Tutorials
Books
Videos
Forums


This is an archived tutorial from the kirupa.com legacy collection. It covers software that may no longer be available, but it is kept online because the ideas still hold up.
A nice effect I often see in movie intros is one where individual letters in a block of text are faded out. There is just something fascinating about it. Below is an example of what I am referring to:
Notice that each letter fades out - leaving absolutely nothing of the original text towards the end. By the end of this tutorial, you will learn how to create this effect.
Because this effect contains many little steps spanning both design as well as code, I feel it would be helpful to get a quick glimpse of the steps involved before you dive into the details of them:
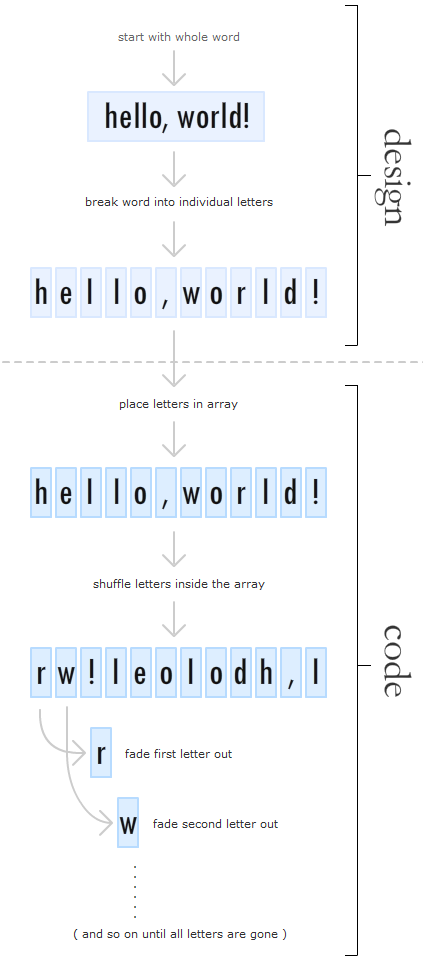
The diagram does omit some small but crucial details, but it should give you a preview of what to expect. Let's start by designing the text.
The first thing we are going to do is get our text ready:

[ resize your stage to be 350 x 150 ]
Quisque porta tincidunt elit, vestibulum sagittis ipsum semper ac. Nam.
Your stage should now look as follows:
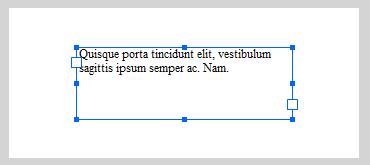
[ my text has been entered ]
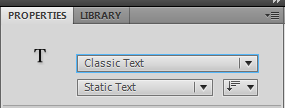
[ set your Text Engine to the older Classic Text ]
If you don't see Classic Text displayed, go ahead and select Classic Text from the drop-down.
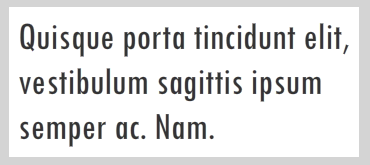
[ 40pt, Tw Cen MT Condensed, #333333, full of win ]
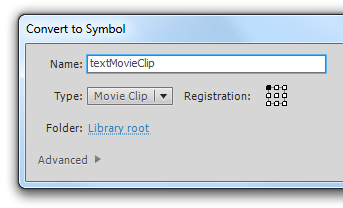
[ convert your text into a Movie Clip ]
Click OK once you are done to dismiss this dialog and to convert your text into a movie clip.
[ the breadcrumb bar tells you that you are inside the movie clip now ]
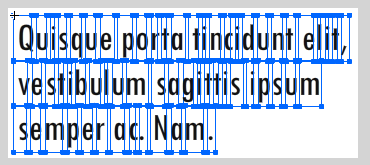
[ break the text into the individual letters ]
Next, select all of the characters if they aren't selected already. Right click on the selected characters and select Distribute to Layers. After a few seconds, look at your timeline. You will see that each character now has its own layer:
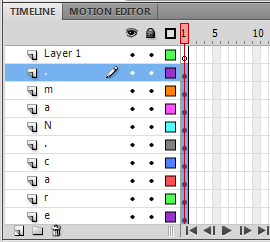
[ each letter will have is own layer ]
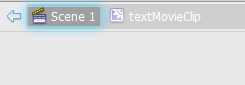
[ let's leave the movie clip and go back to our root ]
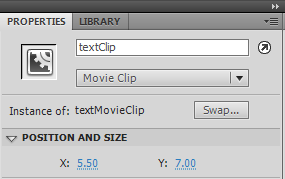
[ give your movie clip the instance name textClip ]
If you haven't done so already, go ahead and Save this file. Give it any name you want, but just remember where you saved it for you will be adding more files in the same directory as this file really soon.
You just finished the "designing" part of this tutorial where you took some text, broke the text into individual letters, and molded it into a shape that you can easily work with using code. We'll have to now shift gears from doing things visually to doing things using code...in the next section!
In the previous section, with a few detours along the way, you created the text whose letters you want faded out. In this and subsequent pages, let's add the code and learn more about how it works!
The first thing we need to do is associate a class whose code will execute automatically when our SWF file is run. The way you do this is by specyfing your document class. Click on any empty area of your artboard to display the document's properties in the Properties Panel:
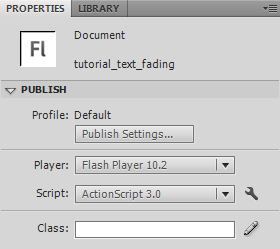
In the Class field, enter the name MainDocument and click on the pencil icon found next to it. You'll now be in AS file editing mode. Hit Ctrl + S or go to File | Save to save this file as MainDocument.as into the same folder as where your FLA is saved:
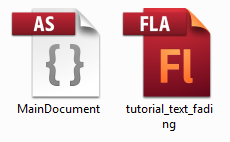
Everytime your SWF file is run, the code in MainDocument gets executed. This means that the code we would want to start our animation can happily live here.
Your MainDocument class connects the visual part of what you have done with the code part that you will be doing. In this section, let's fully add the code that will fade the letters in our text out so that you have a working example. We will then go through and look at why the code works the way it does!
First, overwrite all of the contents inside your MainDocument class with the following code:
package
{
  import flash.display.MovieClip;
  import flash.utils.Timer;
  import flash.events.TimerEvent;
  import com.greensock.TweenLite;
  import com.greensock.easing.*;
  public class MainDocument extends MovieClip
  {
  var animationSeconds:Number = 1;
  var delayMilliseconds:Number = 100;
  var currentCount:Number = 0;
  var letters:Array;
  var timer:Timer;
  public function MainDocument()
  {
  Setup();
  }
  public function Setup()
  {
  letters = new Array();
  for (var i:int = 0; i < textClip.numChildren; i++)
  {
  letters.push(textClip.getChildAt(i));
  }
  ShuffleArray(letters);
  SetupTimer();
  }
  public function SetupTimer()
  {
  timer = new Timer(delayMilliseconds);
  timer.addEventListener(TimerEvent.TIMER, TimerTick);
  timer.start();
  }
  public function TimerTick(e:TimerEvent)
  {
  if (currentCount < letters.length)
  {
  AnimateLetter();
  }
  else
  {
  timer.stop();
  timer.removeEventListener(TimerEvent.TIMER, TimerTick);
  }
  }
  public function ShuffleArray(input:Array)
  {
  for (var i:int = input.length-1; i >=0; i--)
  {
  var randomIndex:int = Math.floor(Math.random() * (i + 1));
  var itemAtIndex:Object = input[randomIndex];
  input[randomIndex] = input[i];
  input[i] = itemAtIndex;
  }
  }
  public function AnimateLetter()
  {
  TweenLite.to(letters[currentCount], animationSeconds, {alpha:0, ease:Cubic.easeIn});
  currentCount++;
  }
  }
}
You are not quite done yet. This code relies on the TweenLite library to perform the animations, so make sure to download the TweenLite library and copy the com folder in the same directory as your FLA and AS file:
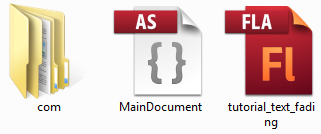
If you are not sure how to do this, do check out my introductory Animating with TweenLite tutorial that goes into greater detail on this.
Once you have your com folder from the TweenLite library copied/pasted into the same location, you are good to go. If you press Ctrl+Enter or Control | Test Movie | Test, you will see letters from your text fading out as the animation plays:
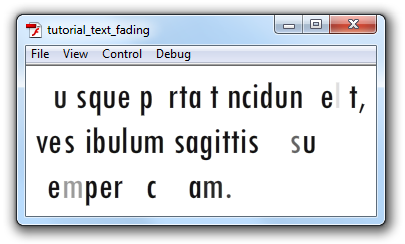
Ok, now that you have a working example, let's start figuring out why it actually works by looking at the code.
The code for making this all work may look like a lot, but it really isn't. At a high level, our code does the following four things:
Let's start at the very top and look at how these four things are translated into code.
The first thing you see are the import statements that inform the compiler where the various classes come from:
import flash.display.MovieClip;
import flash.utils.Timer;
import flash.events.TimerEvent;
import com.greensock.TweenLite;
import com.greensock.easing.*;
What you see are our import statements. When typing the code yourself, the appropriate import statement for the built-in Flash class you just typed will automatically get added. I never consciously added a reference to MovieClip, Timer, or TimerEvent.
For 3rd party libraries, you have to add the import statement manually though. I added the two TweenLite import statements when I used some of the TweenLite classes.
Next up, let's look at the variables that will be available for the entire MainDocument class to use:
var animationSeconds:Number = 1;
var delayMilliseconds:Number = 100;
var currentCount:Number = 0;
var letters:Array;
var timer:Timer;
There is nothing particularly interesting here. Briefly take note of the variable names and any initial value they may be set to. I'll call out anything that is relevant when these variables are used in our main code!
When your animation loads, the MainDocument class gets insantianted. As part of the instantiation, the MainDocument constructor gets called:
public function MainDocument()
{
  Setup();
}
The MainDocument constructor is responsible for calling the Setup function. Let's look at that function next:
public function Setup()
{
  letters = new Array();
  for (var i:int = 0; i < textClip.numChildren; i++)
  {
  letters.push(textClip.getChildAt(i));
  }
  ShuffleArray(letters);
  StartAnimation();
}
The Setup function is responsible for accessing the individual letters and storing them in a random order for animating. The first thing we do is initialize the letters variable to be a new Array object:
letters = new Array();Once we have our array object, it's time to populate it with the individual letters that are contained inside our textClip movie clip:
for (var i:int = 0; i < textClip.numChildren; i++)
{
  letters.push(textClip.getChildAt(i));
}
The way we populate our array is by going through every child inside our textClip movie clip and adding it. The children of textClip are just the individual letters - TextField objects to be more precise. By using a combination of numChildren to know when to stop and getChildAt to know which child to add to our array, our letters array will contain a reference to every letter that makes up the text we wish to animate!
If I were to trace the contents of our letters array, this is what you will see:
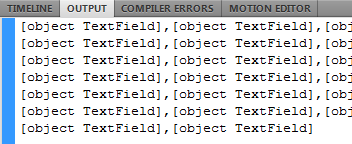
The order in which the letters get stored in our array is the order in which they appear in our text. Animating all of the letters in order may not be what you want. The easiest way to animate the letters out of order is to simply shuffle the contents of our array so that our letters are jumbled.
The shuffling of our array is handled by our ShuffleArray function that takes our letters array as an argument:
ShuffleArray(letters);I won't describe the ShuffleArray function in this tutorial because the Shuffling an Array tutorial covers everything you need to know about this function instead!
After the call to ShuffleArray, the contents of your array are...well, shuffled! All that is left is to start the animation by making a call to StartAnimation:
SetupTimer();With this function, we move on to Step 2 of what our code does.
The SetupTimer function is responsible for starting the timer that is responsible for gradually fading all of the letters out:
public function StartAnimation()
{
  timer = new Timer(delayMilliseconds);
  timer.addEventListener(TimerEvent.TIMER, TimerTick);
  timer.start();
}
As you can imagine, the Timer class and its related functions are central to making this all work:
timer = new Timer(delayMilliseconds);
timer.addEventListener(TimerEvent.TIMER, TimerTick);
timer.start();
First, I initialize my timer variable to store a Timer object. As part of the construction of my Timer object, I pass in a number (delayMilliseconds) that specifies how often to have my timer tick:
timer = new Timer(delayMilliseconds);The value for delayMilliseconds, as specified towards the top of our code file where this varialbe is declared, is 100. This means, every 100 milliseconds (.1 second), our Timer will will tick.
Getting into specifics, our "tick" is actually a TimerEvent.TIMER event that is fired by our timer object. In order to do something at each tick, we need to listen to this event and react accordingly. That is handled by the following line of code:
timer.addEventListener(TimerEvent.TIMER, TimerTick);Just like listening for any event, you use the addEventListener function to specify the event you are listening for (TimerEvent.TIMER), and the function / event handler to call when you hear the event. In this case, our event handler is called TimerTick. Every 100 milliseconds, the TimerTick event handler will get called.
The last thing left is to actually start our timer:
timer.start();Starting a timer is handled by the appropriately named start function!
Every time our timer ticks, you saw earlier that the TimerTick event handler (referred to as a function from now on) gets called:
public function TimerTick(e:TimerEvent)
{
  if (currentCount < letters.length)
  {
  AnimateLetter();
  }
  else
  {
  timer.stop();
  timer.removeEventListener(TimerEvent.TIMER, TimerTick);
  }
}
This function is responsible for checking whether there are any letters left to fade:
if (currentCount < letters.length)
{
  AnimateLetter();
}
else
{
  timer.stop();
  timer.removeEventListener(TimerEvent.TIMER, TimerTick);
}
The currentCount variable, which you will see used shortly, keeps track of the number of letters you have animated through. The number of letters is stored by our letters Array's length property. As long as the number of letters we have animated is less than the total number of letters, we call the AnimateLetter function:
AnimateLetter();If there are no more letters left to animate, then we stop the timer and remove the event:
timer.stop();
timer.removeEventListener(TimerEvent.TIMER, TimerTick);
We'll look at both of these cases in greater detail.
The AnimateLetter function is responsible for fading out a letter when called:
public function AnimateLetter()
{
  TweenLite.to(letters[currentCount], animationSeconds, {alpha:0, ease:Cubic.easeIn});
  currentCount++;
}
The animation is done entirely by using the TweenLite library. The first argument I pass in to the to function is the letter I wish to animate, and that is accessed from our letters array by passing in our currentCount value as the index at which to find the item at.
The second argument specifies the duration of the animation. Tha value is stored by our animationSeconds variable which was declared and initialized much earlier with a value of 1. You can increase or decrease this number to slow down or speed up the animation respectively.
The third argument takes a collection of properties that define some animation properties. Since I am wishing to fade my text out, I set the alpha value of the text to 0. What this means is that the end result of this animation should be that our text is not visible. The other property I pass in is the easing function I wish to use.
If you want to learn more about TweenLite, the Animating with TweenLite tutorial goes into greater detail.
The last thing we will look at is stopping our animation once all of the letters have been faded out. That is handled by the following code which you briefly saw earlier:
timer.stop();
timer.removeEventListener(TimerEvent.TIMER, TimerTick);
The first thing we do is stop our timer so that our TimerTick function doesn't get called. The next thing we do is remove the association between the TimerEvent.Timer and the TimerTick function using removeEventListener. While you don't have to do this, it is a good habit to clean up event associations when you no longer need them!
Just a final word before we wrap up. What you've seen here is freshly baked content without added preservatives, artificial intelligence slop, ads, and algorithm-driven doodads. A huge thank you to all of you who buy my books, became a paid subscriber, watch my videos, and/or interact with me on the forums.
Your support keeps this site going! 😇


:: Copyright KIRUPA 2026 //--