 Tutorials
Books
Videos
Forums
Tutorials
Books
Videos
Forums


This is an archived tutorial from the kirupa.com legacy collection. It covers software that may no longer be available, but it is kept online because the ideas still hold up.
Ever since this site started covering Flash a few years ago, the topic of preloaders was always the one that was most popular. In case you do not know what a preloader is, it is a small animation or transition that plays while your main content is being loaded.
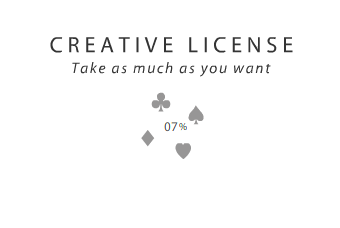
For example, one of my favorite animations is Adobe Cards, and as you are waiting for the animation to load, you are greeted with a brief animation that displays some progress info as your download commences:
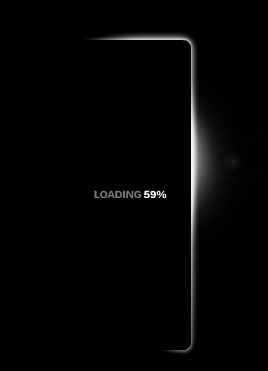
There are also more elaborate preloaders that you can find such as the one on the Zune Journey site that employs a flare effect that, as more of your content gets loaded, better defines the outline of the hardware along with displaying the current progress:
There are numerous examples of preloaders on the web, but all of them have one characteristic in common. They are designed to keep your attention while the main content is being loaded.
They keep your attention in various ways. Many display a numerical load percentage so that you can gauge how much of your content has been loaded and how long you will have to wait. Some are more visual and display the progress using other means such as progress bars, filling animations, etc.
Regardless of what shape the visual presentation a preloader takes, behind the scenes, they are all similar. By the end of this tutorial, you will have learned how to create a preloader and have it work when I load an image from an external location.
Your preloader will similar to what I am showing in the following image:
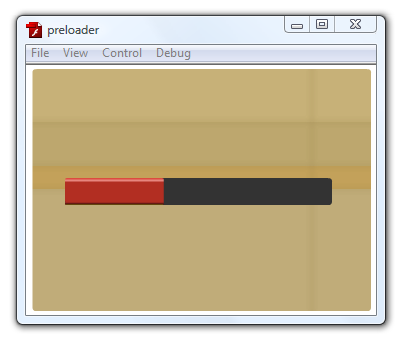
[ a progress bar indicating how much of your content is being loaded ]
After the preloader has finished loading, the image will become visible:
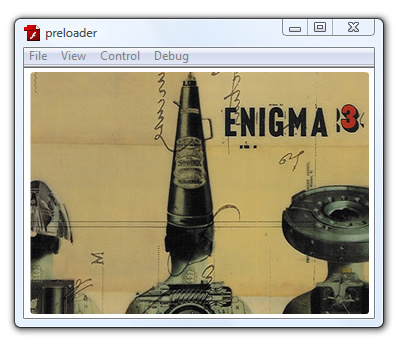
[ your content has loaded - which in my case is an album cover from Enigma ]
Ok, so now that you have an idea of what a preloader is and what you will create in this tutorial, let's start discussing how we will implement our preloader by going to the next section.
In the previous section you received an overview of preloaders and what this tutorial will help you to create. To simplify this tutorial, I am going to break it up into two parts.
One part will focus on how to create the preloader animation and code, and the second part will discuss integrating your preloader with an existing application such as one that loads an image from an external location.
In this section, let's create just the preloader. The preloader consists of the UI and the code required to power the UI. What we are going to do is create a small movie clip that contains all of the visuals and code necessary to run our preloader. As you will see when we get to integrating part, just copying your movie clip into your new application and writing some code makes things easier.
Let's get started:
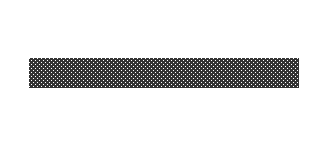
[ draw a 270 by 30 rectangle ]
Change the color your rectangle to whatever you want. I have mine set to a dark gray color.
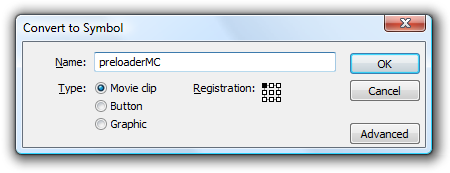
[ turn your rectangle into a movie clip ]
Click OK to accept your changes and to convert your rectangle into a movie clip.
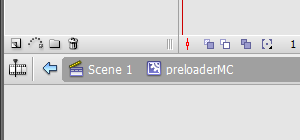
[ you should now be inside the movie clip you created just a step earlier ]
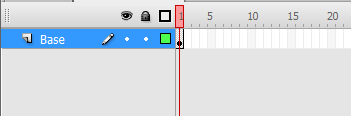
[ Layer 1 now becomes the Base layer ]
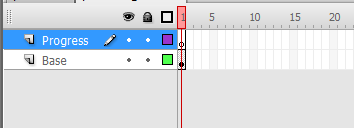
[ insert a new layer and call it Progress ]

[ draw another rectangle and place it directly over your base movie clip ]
Notice that in my version, my progress rectangle has a green color. Whatever color you pick, make sure that it is visible when placed over your base movie clip.
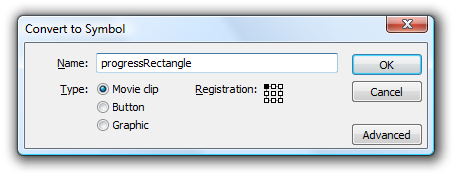
[ convert your rectangle into a movie clip called progressRectangle ]
Alright, now it is time to quickly recap what you did before we proceed to the next section. You created your base rectangle shape, and converted it into a movie clip.
This movie clip is more of container for more things than just your base, so you go dig inside this movie clip and convert your base rectangle into a movie clip one more time. After doing that, you added a new layer and drew a new rectangle directly above your base movie clip. This rectangle represented the progress portion of your progress bar, so you convert that into a movie clip as well.
In the end, you have a container movie clip called preloaderMC, and inside that, you have your preloaderBase and progressRectangle movie clips. Now, you are set to move on.
In the previous section you created the movie clip that houses your preloader and converted two rectangles into two more movie clips for your preloader's base and progress indicator. In this page, we'll wrap up the UI work and add some code that will make our progress indicator actually work.
Right now, you have two movie clips called progressRectangle and preloaderBase located on the Progress and Base layers respectively. What each of these rectangles do not have are instance names that you can use to refer them via code. Let's fix that now.
Select your progressRectangle movie clip and give it the instance name progress:
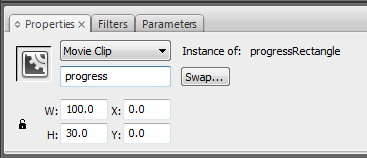
[ give your progressRectangle movie clip the instance name progress ]
Likewise, select your preloaderBase movie clip and give it the name name base:
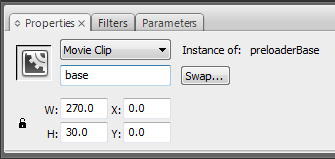
[ name your other movie clip, your preloaderBase, as base ]
With your instance names set, it's time to add some code. Revisit your timeline and add a new layer called Action right above the layer marked Progress:
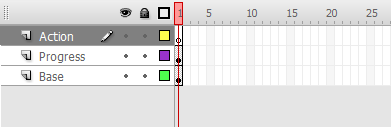
[ your new keyframe will be blank - which is OK ]
Right-click on the blank keyframe on your Action layer and, from the menu that appears, select the Actions menu item. Your Actions window will appear. Into this window, copy and paste the following code:
function SetProgress(value:Number)
{
  progress.width = value*base.width;
}
Strangely enough, that's all the code required to power your progress bar. To see what exactly you did, let's test it.
When you test your app, as you might have expected, nothing will happen. The reason is that you will need to call the SetProgress function first. To do that, let's get out of the preloaderMC movie clip you are currently in and return to our main scene.
You can go back by clicking on the Scene 1 tab in your navigation:
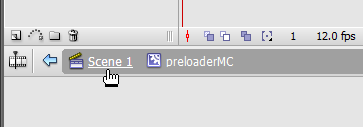
[ return to Scene 1 ]
Now that you are back in Scene 1, lets add some code to call our SetProgress function. First, you need to give your preloaderMC movie clip an instance name. Select it on your design surface - it should be the only thing you have actually, and give it the instance name preloader:
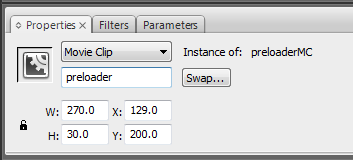
[ give your preloaderMC movie clip the instance name preloader ]
Once you have done that, it's time to add some code to test our preloader out. Right click on the keyframe see in Layer 1 and select Actions. Inside the Actions window, type in the following code:
preloader.SetProgress(.5);Run your application by pressing Ctrl + Enter. You should see something similar to the following:
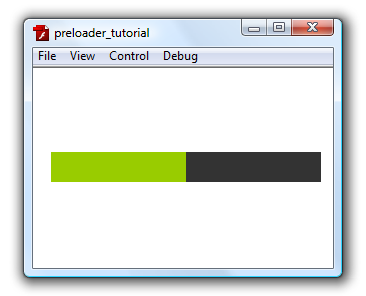
[ your progress bar is at the 50% mark ]
Your preloader displays with the progress indicator at the 50% mark. Now, change your code to set the progress to .2:
preloader.SetProgress(.2);When you have done that, test your app. Your preloader will now look like the following:
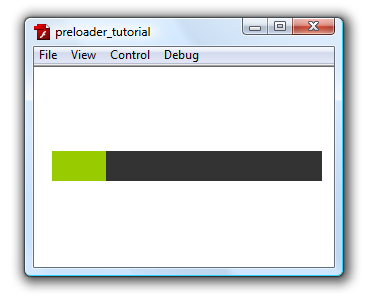
[ your progress bar is at the 20% mark ]
Do you see a pattern forming? You can pass in any value between 0 and 1, and your progress bar's width will adjust accordingly. In a few pages, you will see how crucial this little "feature" is. But, there is more that needs to done first before you are done.
In the previous section, we wrapped up work on the preloader and were able to test it out by passing in sample values between 0 and 1. Let's quickly look at why the preloader, more specifically the progress bar, worked in this page and start looking at how to use it in a real example.
If you recall, a few pages ago inside your preloaderMC movie clip, you added the following code:
function SetProgress(value:Number)
{
  progress.width = value*base.width;
}
In this code, what you are doing is setting the width of your progress bar to be a percentage of your preloader's base width. This means that your progress bar can be 0 pixels wide or, when your input value is 1 (signifying 100%), your progress bar's width is exactly that of your base.
This is why when you called the SetProgress method earlier, you were able to affect the width of your progress bar by simply passing in values between 0 and 1.
So now, you have your preloader movie clip created that allows your progress bar to alter its size depending on the argument you pass into your SetProgress method. While this is good, you still haven't created a preloader because you aren't using it to show progress as content is getting loaded. Let's fix that!
Before we move on, keep your current document containing your preloader open, for we will be coming back to it in a few minutes.
Anyway, to see your preloader in action, you will need to add some functionality that simulates loading content. Fortunately, the groundwork for much of this was done in another tutorial where you learned how to Load External Images into a Flash application. Instead of repeating what I've already covered again, let's reuse the source file from that application into what we are trying to do.
Download the source file of a small application sans the preloader from the following link:
Once you have downloaded the above source file, extract the contents of the file and open loadimage.fla in Flash CS3. Right now, you should see both your preloader application as well as loadimage.fla open in Flash CS3:

Make sure loadimage.fla is the currently active project, and test the application by pressing Ctrl + Enter or going to Control | Test Movie. You should see the following display:
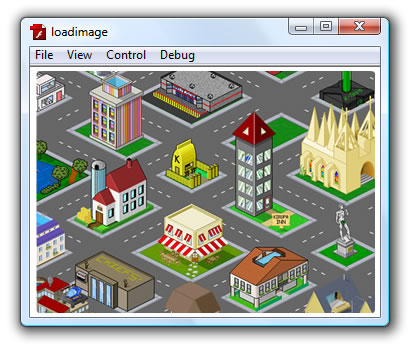
That image is located in the same directory as your SWF, and it gets loaded during runtime when you test your application. That is done via code that exists on the single blank keyframe on your action layer. Select that keyframe and press F9 or (Right Click | Actions).
You should see the following code:
var imageLoader:Loader;
function loadImage(url:String):void {
  // Set properties on my Loader object
  imageLoader = new Loader();
  imageLoader.load(new URLRequest(url));
  imageLoader.contentLoaderInfo.addEventListener(ProgressEvent.PROGRESS, imageLoading);
  imageLoader.contentLoaderInfo.addEventListener(Event.COMPLETE, imageLoaded);
}
loadImage("pixelHouses.jpg");
function imageLoaded(e:Event):void {
  // Load Image
  imageArea.addChild(imageLoader);
}
function imageLoading(e:ProgressEvent):void {
  // Use it to get current download progress
  // Hint: You could tie the values to a preloader :)
}
An explanation of everything you see in loadimage.fla and the code can be found in the Loading External Images tutorial I have referenced several times, and starting in the next section, we will extend our load image application to use the preloader we created.
In the previous section, you downloaded an existing Flash application that loads external content without using a preloader. A few pages before that, you learned how to create a preloader by implementing a progress bar. In this page, we put those together to create a Flash application that uses a preloader to inform users when external content is being loaded.
You should have both your imageload.fla application as well as your preloader application open currently in Flash. Switch into your preloader application. You should see your preloaderMC movie clip displayed on the design surface:
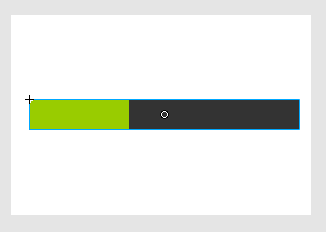
[ the only thing your preloader application will have is your preloaderMC movie clip ]
Copy this movie clip by right clicking on it and selecting Copy. Now, with this movie clip copied, switch back into your loadimage.fla application. Insert a new layer between your image and action layers, and give this new layer the name preloader:
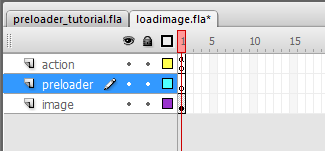
[ insert a new layer called preloader between your action and image layers ]
Your preloader layer should be selected. With the preloader selected, press Ctrl + V (or Edit | Paste) to paste your preloader movie clip onto this application. Your design surface will look like the following:
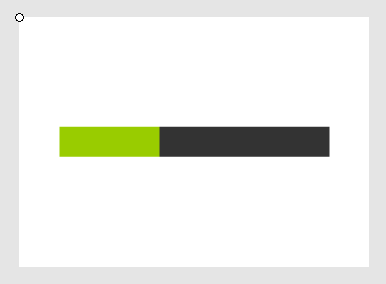
[ paste your preloaderMC movie clip you copied earlier into your preloader layer ]
While your preloader has now been added to this application, it won't work because we haven't actually hooked anything up. If you happen to test your application, the following is what you would see:
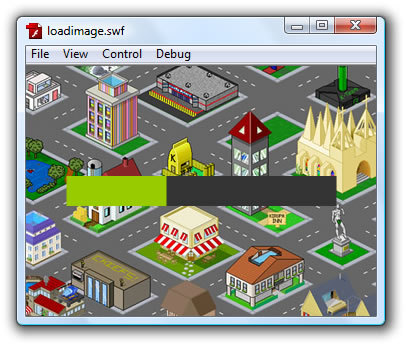
[ ...this can't be right! ]
Notice that your image is displayed in the image layer and your preloader is also displayed at the same time. As you can guess, this isn't the behavior we are looking for. What we want is the preloader to display while the image is downloading and then hide the preloader once the image has fully loaded.
This will require you modify the code we have already written. Launch the Actions window again by selecting the keyframe on your action layer in loadimage.fla. You should already have code that powers the image loading, so add the following highlighted lines in the appropriate areas:
var imageLoader:Loader;
function loadImage(url:String):void {
// Show Preloader
preloader.visible = true;
  // Set properties on my Loader object
  imageLoader = new Loader();
  imageLoader.load(new URLRequest(url));
  imageLoader.contentLoaderInfo.addEventListener(ProgressEvent.PROGRESS, imageLoading);
  imageLoader.contentLoaderInfo.addEventListener(Event.COMPLETE, imageLoaded);
}
loadImage("pixelHouses.jpg");
function imageLoaded(e:Event):void {
  // Load Image
  imageArea.addChild(imageLoader);
  // Hide Preloader
  preloader.visible = false;
}
function imageLoading(e:ProgressEvent):void {
  // Get current download progress
  var loaded:Number = e.bytesLoaded / e.bytesTotal;
  // Send progress info to "preloader" movie clip
  preloader.SetProgress(loaded);
}
If you find it too tedious to copy and paste just the lines that have been added, feel free to just copy everything and overwrite what you already have. The end result will be exactly the same.
Test your movie by pressing Ctrl + Enter. You should see your image appear, but you now won't see your preloader. That is good because we don't want the preloader to visible once the image has loaded, but that isn't really helpful because you can't say for sure whether the preloader actually worked or not. The fix is simple. With the preview Flash Player window still running, go to View | Simulate Download:
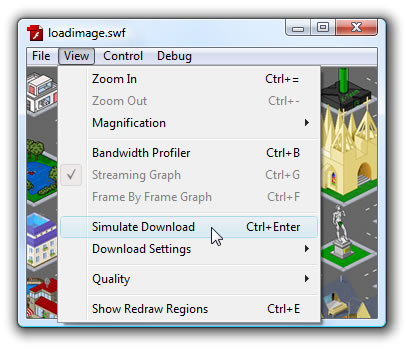
[ you can simulate your download and adjust the download settings as appropriate ]
Once you have selected the Simulate Download command, notice what you should be seeing. Instead of instantly displaying your image, the Flash Player will pretend that it is running on an internet connection and simulate whatever speed you have specified under Download Settings:
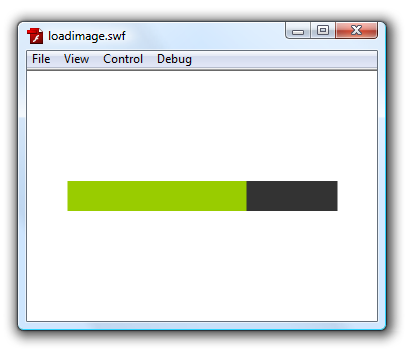
[ you are "downloading" the content! ]
You should now see your progress bar slowly filling up as more of your image is getting "downloaded". Once the progress bar fills up, the preloader disappears and your image makes its appearance.
To learn a bit more about the Simulate Download feature, check out my blog post on this topic.
Wohoo! You now have a working preloader. This is only a part of what this tutorial hopes to cover. In the next section, let's look in greater detail at what exactly the lines of code you added did to make everything just work.
In the previous section, you wrapped up the integration work where you used a preloader to load an image from an external location. In this page, let's look at the details of why it worked the way it did...starting with the code.
To best understand why your preloader worked, I am only going to focus on the code specific to just the preloader. The code for actually loading the images is explained in a separate tutorial and will not be discussed here.
function loadImage(url:String):void {
// Show Preloader
preloader.visible = true;
  // Set properties on my Loader object
  imageLoader = new Loader();
  imageLoader.load(new URLRequest(url));
  imageLoader.contentLoaderInfo.addEventListener(ProgressEvent.PROGRESS, imageLoading);
  imageLoader.contentLoaderInfo.addEventListener(Event.COMPLETE, imageLoaded);
}
In the above line, I am setting our preloader's visible property to true. If you recall, your preloader movie clip's instance name was preloader, and that instance got carried over when you copied and pasted it into your loadimage application.
The loadImage method is the first method that gets called when you run your application, so in other words, the first thing we do to our preloader when your application runs is make sure that our preloader is visible.
function imageLoaded(e:Event):void {
  // Load Image
  imageArea.addChild(imageLoader);
  // Hide Preloader
  preloader.visible = false;
}
The imageLoaded method gets called once your image has been loaded. This means that the download process has already been completed, so what you do is set your preloader's visible property to false because we no longer need to see it.
You looked at the code for what happens just before your image begins to get downloaded, and you saw the code for what happens after your image gets downloaded. What is missing is the code for what happens during the image download.
That is handled by the imageLoading method:
function imageLoading(e:ProgressEvent):void {
  // Get current download progress
  var loaded:Number = e.bytesLoaded / e.bytesTotal;
  // Send progress info to "preloader" movie clip
  preloader.SetProgress(loaded);
}
To be more specific, imageLoading is an event handler that gets called each time your progress event fires. That is why the argument to your imageLoading method is an object named e whose type is ProgressEvent. Progress Event fires each time more of your data is being downloaded, so you can imagine it being called many times for any particular download.
Your ProgressEvent object contains the properties for letting you know how much of your external content has actually been downloaded and the total size of the download. This data allows you to figure out the percentage of your file that is currently being loaded:
var loaded:Number = e.bytesLoaded / e.bytesTotal;As your download progresses, the value of your loaded variable approaches 1 because your bytesLoaded will approach the total size of your download represented by bytesTotal.
This brings us to the grand finale of this code:
// Send progress info to "preloader" movie clip
preloader.SetProgress(loaded);
In this line, you call your preloader movie clip's SetProgress method and pass it your loaded value. As you saw a few pages ago, as the values you pass into SetProgress vary from 0 to 1, your progress bar adjusts its width accordingly. It is this line that links the progress of your download with your actual progress bar.
This is a fairly long tutorial, so let's quickly touch upon the higher level goals of what happened. You spent the first part of this tutorial creating the preloader movie clip. The preloader movie clip contains your progress bar and some code for controlling that progress bar. What makes it really nice is that everything you need is contained inside that movie clip. Think of it is as a very simple component!
You copied that preloader movie clip and pasted it into an existing application that loads content from an external source. With just a few tweaks, you were able to integrate your preloader and have everything working. The tweaks involved displaying and hiding the preloader when appropriate and passing in the appropriate progress updates as your content was being downloaded.
Feel free to look at my source file to see the version I described in this tutorial:
Just a final word before we wrap up. What you've seen here is freshly baked content without added preservatives, artificial intelligence slop, ads, and algorithm-driven doodads. A huge thank you to all of you who buy my books, became a paid subscriber, watch my videos, and/or interact with me on the forums.
Your support keeps this site going! 😇


:: Copyright KIRUPA 2026 //--
