


This is an archived tutorial from the kirupa.com legacy collection. It covers software that may no longer be available, but it is kept online because the ideas still hold up.
One of the fun things about Flash is how simple it is to create some cool effects. Every now and then, you might run into an issue that seems simple but actually takes more effort than necessary. In this tutorial, I will go over one such situation involving animating dynamically loaded movie clips.
I will explain how to animate dynamic movie clips by explaining how the following animation works. For an example, hover your mouse over the following animation:
[ move your mouse around the above animation to see something cool ]
By the end of this tutorial, you will not only have created the above special effect, but also learned how to re-use movie clips using the attachMovie method and ensure that each movie clip's properties, variables, and event handlers do not interfere with each other. I will also provide various tricks on topics such as simulating onLoad for dynamically loaded movie clips. Both the designer and developer in you should be happy in the end!
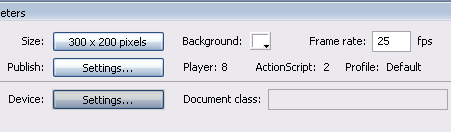
[ set your animation's width/height to 300 by 200 and your frame rate to 25 ]
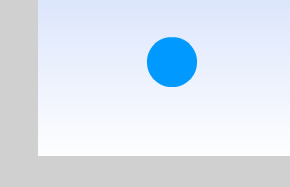
[ draw a blue, solid, filled circle ]
We have just begun, and in the next section, you will receiving the remaining steps towards completing your animation.
While we got to a good start from the previous section, there are still a few more steps that need to be completed before you have a fully working example.
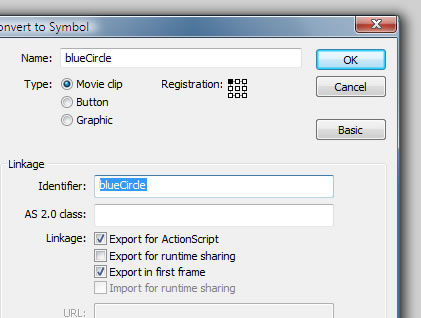
[ convert your circle into a movie clip with the identifier set to blueCircle ]
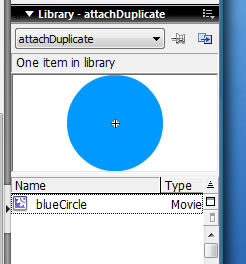
[ notice that your blueCircle movie clip is still in the Library ]
Now that you have a cool effect, let's go through the code and figure out how it all works. After all, we only finished one of the several goals I outlined in the first page.
In the previous section, you finished creating a working example of the animation you saw on the first page. Of course, re-creating what I wrote is only part of the learning experience. The bigger part is figuring out how all of the various pieces of our code fits together. We start that trip by taking a look at the code!
The following section provides a line-by-line explanation of what the code does. By the end, you should have a good understanding of not only how the code works but how all of the code works together to product the full animation.
var count:Number = 0;I am declaring a variable of type Number called count. As you will see later, this value keeps an accurate tally of the number of circles that are displayed on the screen.
function attachOnMove():Void {
  this.onMouseMove = function() {
  var xPos:Number = _root._xmouse;
  var yPos:Number = _root._ymouse;
  var scale:Number = 50+Math.random()*100;
  count++;
  //
  this.attachMovie("blueCircle", "blue"+count, 10000+count, {_x:xPos, _y:yPos, _alpha:10+Math.random()*40, _xscale:scale, _yscale:scale});
  var newMC:MovieClip = eval("blue"+count);
  newMC.onEnterFrame = function() {
  fadeOut(this);
  };
  };
}
attachOnMove();
The attachOnMove function is responsible for taking the blue circle from the library, displaying it on the stage, and applying some special effects to it. The next few sub-sections delve deeper into attachOnMove's code.
this.onMouseMove = function() {
  var xPos:Number = _root._xmouse;
  var yPos:Number = _root._ymouse;
  var scale:Number = 50+Math.random()*100;
  count++;
  //
  this.attachMovie("blueCircle", "blue"+count, this.getNextHighestDepth(), {_x:xPos, _y:yPos, _alpha:10+Math.random()*40, _xscale:scale, _yscale:scale});
  var newMC:MovieClip = eval("blue"+count);
  newMC.onEnterFrame = function() {
  fadeOut(this);
  };
};
The onMouseMove event handler executes any code contained within it every time the mouse cursor moves. This event handler is similar to onEnterFrame, except, unlike onEnterFrame, nothing is executed when the user is not actively interacting with the animation.
var xPos:Number = _root._xmouse;
var yPos:Number = _root._ymouse;
The xPos and yPos variables store the x and y positions of the mouse cursor. Because these lines are stored inside the function that is tied to onMouseMove, the xPos and yPos values automatically change as the mouse is moved around the animation surface.
In the previous section, we started to take a look at the code. There is more code that needs explaining, so let's continue from where we left off!
var scale:Number = 50+Math.random()*100;The scale value stores a number by which our circles will be scaled by. I am using Math.random() to generate a random number between 50 and 150. Given the range of numbers that could be generated, it means our circles might be smaller (down to 50%) or larger (up to 150%) than their default size.
count++;The count variable we declared earlier is incremented by one. Nothing tricky to look at with this particular line.
this.attachMovie("blueCircle", "blue"+count, 10000+count, {_x:xPos, _y:yPos, _alpha:10+Math.random()*40, _xscale:scale, _yscale:scale});This is the important line that takes the blueCircle movie clip from our library and places it on our stage. Let's look at it in greater detail. The attachMovie function takes the following four arguments:
You should have a basic idea of how attachMovie works. Let's see how it works in our code in the next section!
In the previous section, I provided you with a basic idea of how attachMovie works. Now, let's look at how it applies to our code.
this.attachMovie("blueCircle", "blue"+count, 10000+count, {_x:xPos, _y:yPos, _alpha:10+Math.random()*40, _xscale:scale, _yscale:scale});Like mentioned earlier, the movie clip we wish to attach to the stage is the blueCircle movie clip. Coincidentally, the Linkage ID value of our blueCircle movie clip is also blueCircle.
this.attachMovie("blueCircle", "blue"+count, 10000+count, {_x:xPos, _y:yPos, _alpha:10+Math.random()*40, _xscale:scale, _yscale:scale});The second argument specifies the new name of our attached movie clip. I'll be calling the new movie clip blue plus the value of count. The names you will see will be similar to blue0, blue1, blue2, etc.
this.attachMovie("blueCircle", "blue"+count, 10000+count, {_x:xPos, _y:yPos, _alpha:10+Math.random()*40, _xscale:scale, _yscale:scale});The third argument takes a number that specifies the depth of our attached movie clip on the stage. The most common value used here is the getNextHighestDepth() property associated with a movie clip or a target level such as _root.
In this case, I am creating my own custom depth by picking an arbitrarily large number combined with, again, our count value. I will explain the rationale behind this a bit later.
this.attachMovie("blueCircle", "blue"+count, 10000+count, {_x:xPos, _y:yPos, _alpha:10+Math.random()*40, _xscale:scale, _yscale:scale});The final argument is the most interesting one, because it allows you to set the initial properties of our movie clip. Notice that the properties are enclosed by the { and } curly braces. Also, the property and its value are assigned using a colon instead of an equals sign such as _x:xPos, _y:yPos, etc.
In the code for this example, I set the _x, _y, _alpha, _xscale, and _yscale properties to the variables I declared earlier. You are not limited to using variables for setting the properties. For the _alpha property, I am using an expression that picks a random alpha value between 10 and 50:
this.attachMovie("blueCircle", "blue"+count, 10000+count, {_x:xPos, _y:yPos, _alpha:10+Math.random()*40, _xscale:scale, _yscale:scale});In the end, our little blue circles taken from the library, placed at a point where our mouse cursor currently is as defined by the xPos and yPos variables, and the circles feature random scaling and alpha values thanks to Math.random().
The following screenshot gives you a snapshot of how the animation looks with each circle being a little bit more unique than the preceding circle:
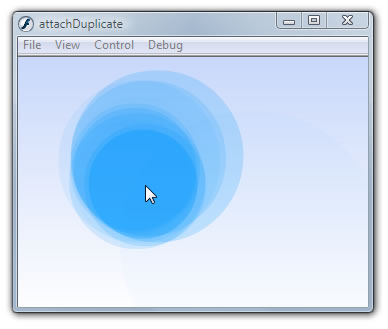
[ notice the random sizes/alphas of the circles generated ]
Let's leave attachMovie and continue on with the code explanation in the next section.
We are almost done with the code explanations. Let's pick up from where we left off from the previous section.
var newMC:MovieClip = this["blue"+count];I am declaring a new variable called newMC of type MovieClip. Notice that the name of the movie clip is the same as the value passed into the attachMovie function's new name argument. Notice that I am referring to the newly attached movie clip by using the this[...] function which informs Flash that the expression within this's brackets are referring to an actual object.
Note - eval()
Instead of using this[...] to have expressions refer to actual objects, you can also use the older eval function as in eval("blue"+count).
In our code, it seems like the return value for attachMovie is void - or nothing. In reality, the return value is the newly attached movie clip itself. So, you can get away with something like the following:
var newMC:MovieClip = this.attachMovie("blueCircle",....)For simplicity reasons, I broke the one statement over two lines. In this approach, notice that you don't need to worry about using this[...] either.
newMC.onEnterFrame = function() {
  fadeOut(this);
};
In the above lines, I am attaching an onEnterFrame event handler to the newly defined and initialized newMC movie clip. The onEnterFrame event handler loops whatever function is assigned to it at a brisk rate of 25 frames per second - which also happens to be your movie's frame rate! That's not a coincidence, for the rate at which onEnterFrame loops code is the same as the animation's frame rate in ActionScript 1.0/2.0.
Twenty-five times a second, the fadeOut function is called, and the argument passed into it is this, which in this case, refers to the newMC movie clip itself! It's time to take a look at the fadeOut function now.
function fadeOut(inputMC:MovieClip):Void {
  inputMC._xscale += 10;
  inputMC._yscale += 10;
  inputMC._alpha -= 1;
  if (inputMC._alpha<0) {
  inputMC.removeMovieClip();
  delete inputMC.onEnterFrame;
  }
}
The fadeOut function is called by the onEnterFrame event from our attachOnMove function. It takes for its argument a variable whose type is movie clip. This passed-in variable, inputMC, will reference the particular circle that is placed on your stage via the atttachMovie function you saw earlier.
There is more code that will be explained in the next section!
In this page we will continue the code explanation from the previous section. The end for these explanations is almost near though, so stay patient.
inputMC._xscale += 10;
inputMC._yscale += 10;
In the above lines, I am increasing inputMC’s x and y scaling. Because I want the scaling to be uniform, I am incrementing both the _xscale and _yscale properties by the same value, 10.
inputMC._alpha -= 1;Like the two lines above it, this time, I am decreasing our inputMC movie clip’s alpha property by 1. While decreasing by one might not seem like a lot, remember that this line and the above two lines are executed 25 times a second!
if (inputMC._alpha<0) {
  inputMC.removeMovieClip();
  delete inputMC.onEnterFrame;
}
This if statement becomes true if the alpha property of our movie clip drops below zero. In another way of phrasing this, the if statement is true when our input movie clip becomes invisible.
inputMC.removeMovieClip();In this line, I invoke the removeMovieClip() method to remove the inputMC movie clip from the stage. The reason I do this is that there is no need to waste memory storing a movie clip that is invisible and no longer useful.
delete inputMC.onEnterFrame;This line marks the final step towards ensuring our newly removed inputMC movie clip is not taking up system resources. I am deleting the onEnterFrame event handler that had so faithfully ensured that inputMC scaled proportionately while fading out at the same time.
Notice that I am using the delete keyword on inputMC.onEnterFrame. I am specifically deleting only this instance of the onEnterFrame event handler tethered to the inputMC movie clip. It is important to not arbitrarily delete the wrong onEnterFrame event handler.
Now that you have a good idea of what the code does, in the next section, I will provide an overview of how the various pieces of the program work together.
We wrapped up the main part of the tutorial in the previous section. In this, the previous section, we tie up some unfinished ends!
At this point, you re-created the mouse-trail like effect as well as learned about how each line of code works. In this section, let's go back and re-visit some of the important concepts beyond just the code that I hope this tutorial communicated.
Obviously, learning how to use attachMovie is a big part of this tutorial. Creating re-usable movie clip is both a great way to reduce file size, but it also makes maintenance and future updates much easier when all you have to do is change one movie clip instead of several individual movie clips.
Using attachMovie has its own set of issues that need to be addressed. One major issue is being able to assign unique values to the the newly attached movie clip's properties and variables. There is no easy way to use an onLoad event handler with a dynamically generated movie clip placed on stage via attachMovie, loadMovie, createEmptyMovieClip, etc. So, in this tutorial, I explained how to pass in the values for the properties of your movie clip object as part of the attachMovie function's argument itself. There are other, more indirect ways, of simulating onLoad, and the following code provides one way of using the onEnterFrame event handler and deleting it after it has gone through one iteration:
var newMC:MovieClip = this.attachMovie("blueCircle", "blue"+count, 10000+count);
newMC.onEnterFrame = function() {
  this._x = xPos;
  this._y = yPos;
  this._alpha = 10+Math.random()*40;
  this._xscale = this._yscale=scale;
  delete this.onEnterFrame;
};
The above method approach has its drawbacks also. For example, it is tricky to both assign your initial properties using onEnterFrame, deleting onEnterFrame, and then creating another onEnterFrame event handler to deal with the animation. Until, hopefully, future versions of Flash address this issue, you can read senocular's FAQ on this as well as take a look at some solutions at the always-useful http://proto.layer51.com/ site.
Finally, keeping each movie clip's properties and variables from interfering requires some planning. If a variable happened to accidentally be declared outside the scope of an individual movie clip, then you will find that this particular variable's data is shared across all movie clips. That might be useful in some cases, but when each movie clip is part of an animation with its own scale and alpha values, a global variable is not preferable.
Phew! With that, I hope this tutorial helped give you a better understanding of using attachMovie and dealing with some of the issues that you can encounter with it. I have provided the source file for my version of the example animation you saw on the first page.
Just a final word before we wrap up. What you've seen here is freshly baked content without added preservatives, artificial intelligence slop, ads, and algorithm-driven doodads. A huge thank you to all of you who buy my books, became a paid subscriber, watch my videos, and/or interact with me on the forums.
Your support keeps this site going! 😇


:: Copyright KIRUPA 2026 //--