 Creating
a Full Flash
Site
by
kirupa chinnathambi
Ah yes! The culmination of ones Flash
experience can be seen in a full-Flash site. Needless to say,
creating a fully "Flashnetized" site can be a frustrating and
tiresome process. While this tutorial will not help you
design the Flash site, this tutorial will help you to take
care of the technical and usability details such as linking between pages,
creating a good navigation,
and other common stumbling blocks one will encounter when creating
a Full-flash site.
Before you begin this tutorial, make sure you
are somewhat familiar with the following concepts:
- LoadMovie
- Layers
- Adding Actions
- Buttons
I am sure you are wondering how/what you will
be accomplishing in this tutorial. You will basically take a
Flash site I have created and modify it to make it work
properly when linked. For an example of the final Web site
you will have a hand in creating, click the link below and
explore:
You have just seen the animation above and
how all the links work. While it is easier for you to
understand seeing my animation, the real test is creating
your OWN animation and making everything work. Read on...
Structure of a Full Flash Site
A Full Flash site, in this tutorial, consists
of the following:
- Index Animation
The index animation is nothing but the pavement on which
your actual animation will be built on. The index
animation will contain nothing but the navigation menu and
an empty movie clip to load external SWF files into.
- Content Animations
The content animations are animations that contain the
content to be loaded into the index animation.
As you can understand, a full flash site is
comprised of several individual swf files. The index
animation is what loads first. Clicking on any of the
navigation links loads the content animations into a blank
movie clip stored on the index animation. If you are
familiar with loadMovie you will remember that you can load
animations into a movie clip or a level.
I am sure you are probably confused out of
your mind. Instead of learning from something abstract, like
my explanation, how about you get your hands dirty with what
I mentioned above? I have created a sample site with a lot
of key features missing so you can add them in yourself.
Without further delays, let's start creating
the sample site viewed above:
-
First, download the source file with the sample files in
it. Don't worry, you will add the buttons, links, and code
yourself with instructions found in the tutorial.
:: Download Zip File
-
Once you have downloaded and
unzipped the files, open the file called
clubkirupa.fla. After the file has been opened, you
will see a basic structure of a main animation.
-
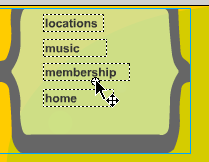
What good is a site without navigation? Let's add the
navigation menu. I have already an outline of a navigation
menu without any coding. Select the layer marked
"navigation". Then, press F11 or go to Window |
Library.
-
The library will appear. Drag the symbol named
"nav_background" and drop it onto the stage:

[ drag and drop the
nav_background symbol to the stage ]
-
Make sure the object is aligned perfectly on the top-left
edge of the edge. To easily set the position of the menu
on the top-left edge, select your movie clip, look in the
Properties panel below, and enter a 0 in both the X and Y
fields:

[ entering a zero in the X and
Y fields positions the menu perfectly ]
-
Now, we need to create a place where the external SWFs
would load. Remember, to use LoadMovie, we need a target
to load the movies. The target will be a movie clip.
Go to Insert | New Symbol. The Create New Symbol dialog
box will appear. Give the movie clip a unique name ,
select Movie Clip, and press OK. You will then see the
movie clip opened in the work area. Simply click the Scene
1 Tab:

[ click the
Scene 1 tab ]
-
You should now be back on your main timeline. Anyway,
while we created the movie clip symbol, we haven't added
it to anywhere on our animation. Click the "action"
layer. Press F11 or go to Window | Library.
Your Library dialog box will be appear. Select the movie
clip you just created and drag it on your main timeline.
Set the co-ordinates of the movie clip to 0, 0 - just like
you did in Step 5.
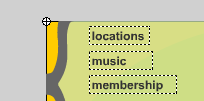
You should see the hollow circle of your movie clip on the
top-left corner of your timeline:

[ the hollow
circle on the corner is actually your movie clip ]
-
Select your movie clip and give it the instance name
contents. If you don't give the movie clip the
instance name contents, your movie simply will not work.
Now that you have the movie clip fixed, here comes the
tricky part (just kidding). Click the action layer and drag it
below the navigation layer:

[ drag the
action layer below the navigation layer ]
Well, you have the interface of the
animation completed. We still have to add the actions, and
then you'll have to learn the basics of creating your own
Flash site. Click the Next page link below to continue on to
the fun part on the next page.
|