 Create
Falling Snow
by
kirupa
What good is a holiday animation without some
snow? That is what I thought until I tried to create a snow
animation that looks reasonably realistic. Most tutorials
found throughout the net were either too complicated or not realistic enough. With that said, I decided to try
my hand at re-creating falling snow. Hopefully, this
tutorial will help you to add a cool snow effect to your
animations.
 |
Quick
Update |
|
This version
of snow is only for Flash MX. Updated
versions of this tutorial can be found for
the apppropriate Flash/AS version below:
|
|
The following animation is an example of what
caffeine and a thrilling re-run of Charlie Brown's Christmas Special can
do:
[ it's snowing....in the small
box on your screen ]
You will create something similar to the
above animation by following the
instructions in this tutorial.
Creating Snow:
-
Create a new movie in Flash
MX. Set the width and height to anything you want, and
make sure you set the frame rate to 25 for smooth
playback. You may
want to have a darker colored background for the white
snow to be visible.
-
Now, it is time to draw a particle of snow. Click the Oval
tool (the circle icon) from your toolbox. Select a white
color from the color palette. Ensure that the circle does
not have an outline. Draw your white colored circle
anywhere on your stage:

[ draw a
white circle without an outline ]
-
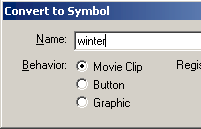
Once you have created your snow particle, select it with
your mouse pointer and press F8 (Insert | Convert to
Symbol). The Convert to Symbol dialog should appear.
Select Movie Clip and press OK.

[ convert
the snow particle into a movie clip ]
-
Select the movie clip (which you converted in Step iii).
Look down towards your Properties panel. Find the text
field that says <Instance Name>.
Click in that text field and type the word snow:

[ give the
movie clip the instance name snow ]
-
Now, let's add some code to create falling snow. Right
click on the movie clip and select Actions.
Copy and paste the following code into your Actions dialog
box:
-
We are still not done adding actions. Right click on the
first frame in your movie and select Actions. You will see
another Actions dialog box appear - this time for the first
frame.
Copy and paste the following code into the Actions dialog
box:
-
You are almost done with this tutorial. The remaining
sections involve customizing the animation and understanding
why the animation works the way it does.
Customizing the Animation
Since the crux of this animation involves
ActionScript, you will have to modify some code to customize the
animation:
-
Adjusting the Range: Width and Height
Right click on the movie clip and select Actions. Find the
commented line that says "specifies the size of the movie
stage". Change the values for
movieWidth
and movieHeight
from 300 x 200 to the width and height of your current
movie.
-
Adjusting number of Snowflakes Displayed
Right click on the frame you added actions to. Select
Actions from the menu that appears. Find the line that says
k<50 and
change the number 50 to represent the number of snow
particles you want displayed at any time.
The larger the number you use instead of 50, the slower the
animation will seem to users with slower computers. This
animation is fairly CPU intensive, so try to be kind and
virtuous by keeping in mind that not all users will be able
to see the animation in all its coolness when 300 snow
particles are displayed at the same time. It is the
Christmas season after all!
You are finished with this
tutorial. I highly recommend that you go to the
next page and find out how/why the
code works the way it does. Not only will you find what each
line of code does, you may get a better feel of ActionScript
programming so you can create cool effects on your own.
|