 Tutorials
Books
Videos
Forums
Tutorials
Books
Videos
Forums


This is an archived tutorial from the kirupa.com legacy collection. It covers software that may no longer be available, but it is kept online because the ideas still hold up.
Depending on how dirty you want to get your hands, Flash has various drawing tools available for you. If you want to get your hands really dirty, you can use the Pen and Pencil tools to precisely draw almost every pixel with great control. On the other extreme are the Shape tools.
The Shape tools allow you to draw simple circles, rectangles, and the awesomely named polystar-variety of shapes. In this tutorial, let’s briefly look at both how to draw shapes as well as make modifications to them.
The Shapes menu lives in your Tools panel which is by default docked to the left or right of your window depending on which version of Flash you are using. When you find it, click and hold it to display all of the tools available for you to use:
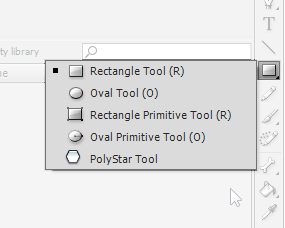
[ click on the Shapes menu to access all of the shapes you can draw ]
You have the Rectangle Tool, Oval Tool, Rectangle/Oval Primitive Tools, and the PolyStar Tool.
To draw a shape, click on the tool that is already displayed for you in the Tools panel. If you want to use a tool that is different than the one currently displayed, click and hold on the icon to display the Shapes menu itself.
When you select a different tool from the Shapes menu, you’ll notice that your newly selected tool becomes the new Shapes icon that gets displayed in the Tools menu:
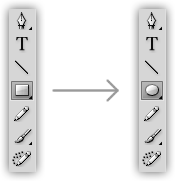
Anyhoo, make sure you have a shape tool selected. For now, it doesn’t matter which one you have selected, but I’m going to be using the Oval Tool.
Once you have your shape tool selected, move your mouse over the artboard and draw your shape. You draw by clicking down with your mouse and dragging the mouse until the size of the shape is approximately the size you are interested in:
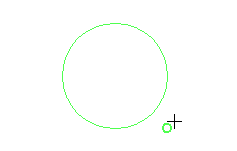
When you are happy with your shape’s size, release the mouse click to actually create your shape
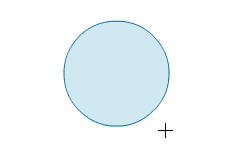
With your shape created, you can switch over to your to your selection tool and play with it like you would with anything else on the artboard.
If you want your shape to equally sized as you are drawing it, hold down the Shift key while dragging the mouse. If you want your shape’s size to grow from the center as opposed to the top-left corner, hold down the Alt key. If you want your shape to grow equally outward from the center, hold down both the Shift and Alt keys while drawing your shape.
That's all there is to actually creating a shape. It's just a simple click and draw operation as you can see. With that said, there are lot of powerful things you can do with the shape funcitonality, and the next few sections will powerfully cover them!
The oval tool can be used to draw more than just a perfect circle or something literally resembling an oval. For example, you can draw PacMan:
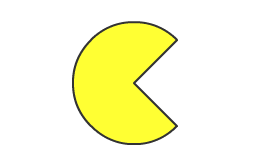
[ nom nom nom ]
When you have the Oval tool selected, you can set some initial properties that define what your final oval will look like. Those properties live in your Properties panel:
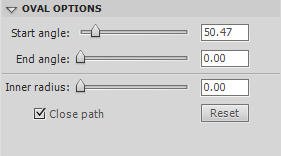
[ these properties have a large impact on what your oval shape looks like ]
The Start and End angle properties help define the angle at which your circle starts and ends. In other words, if you want to have a circle that looks like a portion has been sliced out like a piece of pizza…or the PacMan that you saw earlier, these properties will help you out:
If you recall from geometry, circles have 360 degrees. The 0 degree point starts on the right center, and you move counter-clockwise around the circle until you reach the beginning again. In the case of the Start and End angles, things are a bit different:
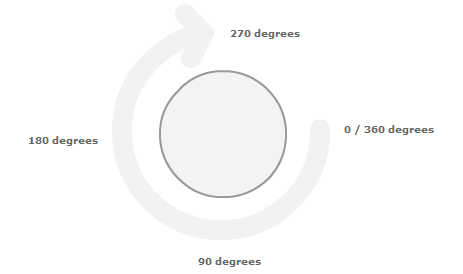
The 0 degree location is on the right-center as expected, but you move clockwise around your circle instead of counterclockwise. To create the PacMan wedge you saw earlier, the Start and End angles are actually 45 and 315 respectively with the bottom of the mouth at the 45 degree mark and the end/top of the mouth at the 315 degree position.
The inner radius property defines the size of a circular hole will appear at the center of your circle. For example, if I drew a circle with an inner radius of 10, here is what it would look like:
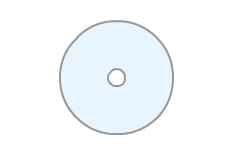
The larger the value for Inner Radius, the larger the size of the hole.
As part of drawing your rectangle, you can define how rounded you want your corners to be. To help change that, the rectangle tool has only one notable property for you to set:
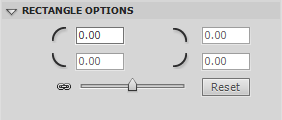
By default, rectangles you draw are square with sharp corners. To create rounded rectangles, you can enter a non-zero number in one of the boxes representing a corner:

[ a rounded rectangle! ]
You will notice that if you want each corner of your rectangle to have a different corner radius, you won’t be able to set a different value in each box. The last value you enter is propagated to all of the corners automatically. To fix that, you simply need to unlink the chain that ensures all values are equal:
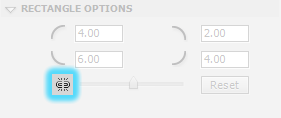
[ the chain icon defines whether all corners will have the same value for roundedness ]
You unlink the chain by clicking on it with your mouse cursor...just like you would in real life.
In the previous two sections, you set properties to define what your shape will look like when drawn. There are a handful of properties you can still set on a shape after it has been created.
Unlike holding a giant spoon, where any way of holding it is appropriate (ask your mom, she’ll agree), selecting a shape once it is drawn is a bit mysterious. By default, a typical (non-primitive) rectangle, oval, or polystar shape is made up of the body and the stroke.
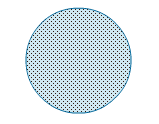
The body is usually the large part of your shape:
The stroke is the outside edge surrounding the body:
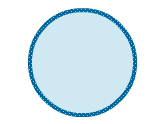
If you click inside your shape, you’ll only be selecting the body. If you click the edges, you’ll only be selecting the stroke.
To select your entire shape, double click on your shape (edge or body) or do a range selection where your selection box fully engulfs (like a fangorious monster) your shape:
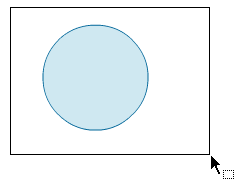
I know discussing selection may sound trivial, but Flash is one of the few tools that allows you to select subparts of a shape like this. Business as usual where selecting any part of the shape selects everything related to it simply won’t work. This is extra important if you are planning on changing your shape's properties, for the properties you can change depend on what parts of your shape have been selected.
When you select a shape, there are a few properties that are common to all of them. To view the properties, make sure your Properties panel is displayed and fully (stroke + body) select a shape:
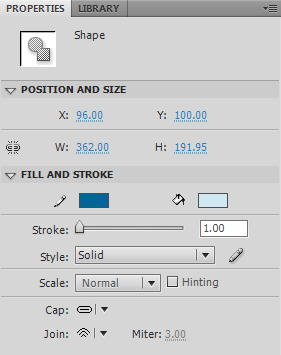
[ your shape's generic properties ]
You can adjust size, position, and other boring things better suited to editing on the artboard itself. What is important is being able to specify fill and stroke (outline) color of your shape and the size/style of your stroke. Much of this should be self-explanatory, so I won’t delve too deeply into this.
One cool property is being able to set your stroke style. The stroke style drop-down allows you to pick from a series of styles that affect what your stroke actually looks like:
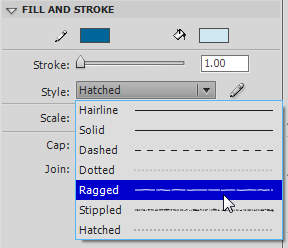
If you aren’t happy with the built-in styles, you can define your own by clicking the pencil icon found to the right of the drop-down.
Just a final word before we wrap up. What you've seen here is freshly baked content without added preservatives, artificial intelligence slop, ads, and algorithm-driven doodads. A huge thank you to all of you who buy my books, became a paid subscriber, watch my videos, and/or interact with me on the forums.
Your support keeps this site going! 😇


:: Copyright KIRUPA 2026 //--