 Tutorials
Books
Videos
Forums
Tutorials
Books
Videos
Forums


This is an archived tutorial from the kirupa.com legacy collection. It covers software that may no longer be available, but it is kept online because the ideas still hold up.
The Library in Flash acts as a repository where all of your custom graphics, buttons, movie clips, external content, etc. is stored. From the Design view, accessing elements from the Library is very easy. You just drag and drop what you want onto your stage. In many situations, though, you may be required to use code to display your library items on an as-needed basis. This tutorial covers just that scenario where Library content is displayed on your stage, and you'll learn how using Flash CS3's ActionScript 3 language.
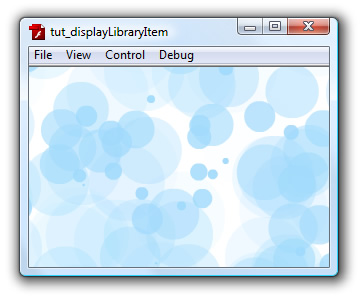
At the end of the tutorial, you will have created something that looks similar to the following image where the various circles were displayed on the stage using nothing but code:
If you are coming from an AS 2.0 or earlier background, one of the major changes in ActionScript (AS) 3 is that the attachMovie function is no longer supported. In the past, if you had Library content that you wanted to display on your stage, you would call the attachMovie function, pass in the Linkage name of your library item, add a few more pieces of data, and your content would be displayed on your screen. In AS3 there are some similarities to that approach, but there are some differences also.
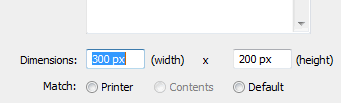
[ set your animation's width/height to 300 by 200 ]
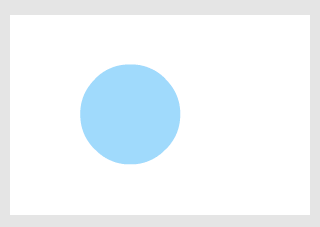
[ draw a blue, solid, filled circle ]
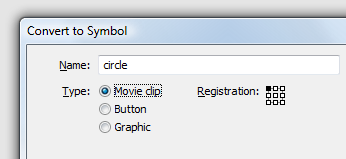
[ give your symbol the name circle and make sure it is also set to be a movie clip ]
Do not hit OK just yet. Let's make some more modifications.
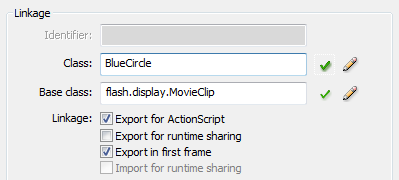
[ check 'Export for ActionScript and enter BlueCircle for your class ]
The Base class field will automatically be populated for you, but if it hasn't, make sure to enter flash.display.MovieClip as shown in the above image.
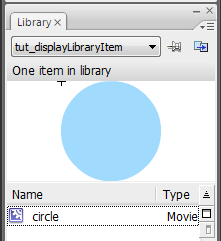
[ your circle in your Library ]
If you do not see your Library, press Ctrl + L to display it.
function Main() {
  this.addChild(new BlueCircle());
}
Main();
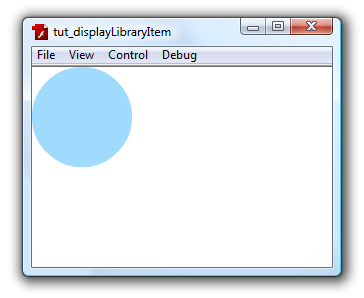
[ your circle displayed on the top-left corner ]
Technically, that is really all there is to taking content from your Library and displaying it on your stage. There are actually a lot more things that can be done, so in the following sections I will go through and not only provide some new tips but also explain why the code does what it does.
Right now, our circle is simply displayed in the top-left corner. It would be great if we would adjust properties such as the position of our circle. To do that, we need to back to our code. Right click on the frame you added your code to and select Actions to display the Actions window with the code you input earlier:
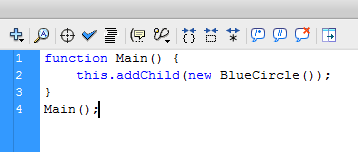
[ your code window ]
Our code right now does very little. We have our Main function that adds our new BlueCircle movie clip as a child element. Notice that our BlueCircle movie clip is followed by the two parenthesis ( and ). Those parenthesis indicate that our BlueCircle movie clip is actually being treated like a class. For now, don't worry if you are not familiar with classes.
Let's change our Main function's code to have a specific variable that takes care of all things related to our BlueCircle. Replace your current code with the following:
function Main() {
  var newCircle:BlueCircle = new BlueCircle();
  this.addChild(newCircle);
}
Main();
If you run your application again, nothing would have changed. Your blue circle would display in the top-left corner just like it did earlier. The main difference is that instead of simply passing in new BlueCircle() to our addChild function, you now have a variable called newCircle that stores a reference to your object of type BlueCircle.
This time, we now pass in newCircle to the addChild function. The end result is the same, for our addChild function gets a reference to a new BlueCircle object. The only difference is that instead of passing in the object directly like we did earlier, in the revised code you are passing in a variable referencing the object instead.
While the end result is the same, by having a separate variable referencing our BlueCircle object, you have a lot more flexibility in what you can actually do with this variable. Let's decide to place our circle at an x position of 50 and a y position of 75. The code for doing that would be:
newCircle.x = 50;
newCircle.y = 75;
When you add the above lines to your existing code, your modified code should look like the following:
function Main() {
  var newCircle:BlueCircle = new BlueCircle();
  newCircle.x = 50;
  newCircle.y = 75;
  this.addChild(newCircle);
}
Main();
Notice that I added the new lines before our this.addChild(newCircle) line. You do not have to do it that way. You could have placed those two lines after the addChild, and everything would have still worked.
If you preview your work now, you will notice that your circle is now located at 50, 75:
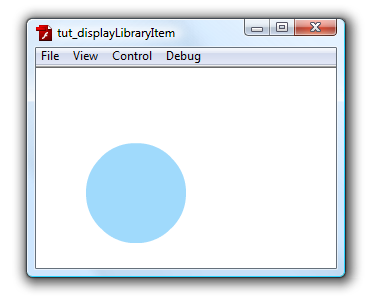
[ your circle now displayed at 50, 75 ]
Getting back to the two lines you added, notice that I am following our newCircle object with the x and y properties in order to set the circle's x and y positions. The reason you are able to use x and y is because our BlueCircle object is actually an extension of a MovieClip.
When you first converted your blue circle into a MovieClip, you may recall seeing the Base class field in the Linkage area of your Convert to Symbol window:
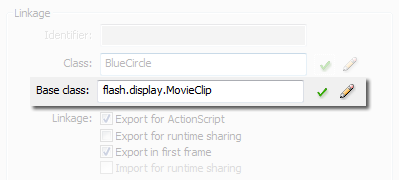
[ where you automatically accepted the Base class for MovieClip ]
The Base class text tells you the source from which your new symbol will be inheriting its functionality from. In our case, since we intended to have a MovieClip object, the BlueCircle class is derived from the MovieClip class.
To get to the punch line, this means our BlueCircle object can access all of the MovieClip class's Events, Methods, and Properties beyond just x and y. Replace your existing code with what you see below:
function Main() {
  for (var i:int = 0; i < 200; i++) {
  var newCircle:BlueCircle = new BlueCircle();
  var randomValue:Number = Math.random()*1;
  newCircle.x = -100+Math.random()*500;
  newCircle.y = -100+Math.random()*400;
  newCircle.scaleX = newCircle.scaleY = randomValue;
  newCircle.alpha = 1-randomValue;
  this.addChild(newCircle);
  }
}
Main();
In the above code, I just extend the earlier code by including a few more modifications. The main thing to notice is that I am creating a loop that pushes 200 BlueCircle circles to your stage. Because I am randomizing a lot of the BlueCircle object's properties, you get a random collection of circles drawn in various positions, sizes, and transparencies:
[ your final output ]
Taking content from your library and dynamically placing them on your stage is a very important and useful feature. In this tutorial, you just provided the basic syntax for displaying the content and making modifications to it. There is actually a lot more that wasn't covered in this tutorial.
Behind the scenes, a BlueCircle() class is being used and is automatically provided for you. You can also create your own BlueCircle class file (BlueCircle.as) and create a lot of custom functionality that this tutorial did not explore. Second, one of the nice features of attachMovie is that you can pass an arbitrary number of arguments to your newly generated movie clip (more info). Future tutorials will definitely touch upon these omissions and more.
Just a final word before we wrap up. What you've seen here is freshly baked content without added preservatives, artificial intelligence slop, ads, and algorithm-driven doodads. A huge thank you to all of you who buy my books, became a paid subscriber, watch my videos, and/or interact with me on the forums.
Your support keeps this site going! 😇


:: Copyright KIRUPA 2026 //--