 Tutorials
Books
Videos
Forums
Tutorials
Books
Videos
Forums


This is an archived tutorial from the kirupa.com legacy collection. It covers software that may no longer be available, but it is kept online because the ideas still hold up.
Hello boys and girls, today we are going to be building a dynamic member profile using multi-dimensional arrays and attachMovie. Why? Well it’s good practice for anyone new to ActionScript and makes the whole updating process very simple. Here is an example of what we will be creating:
[ all of the above data is located in variable form ]
The first thing we need to do is plan out all our data we will be using. This will be all the information we will be using in our movie. Below is an example of all the information we will be using for each member.
Name: Kirupa
Interests: Flashing (MX) complete strangers in 32-bit color.
Link To Profile: //www.kirupa.com/forum/member.php?u=1
Name: B.Rich
Interests: Basketball, Golf, Web Media.
Link To Profile: //www.kirupa.com/forum/member.php?u=4513
Name: Senocular
Interests: Fun stuff, like Flash
Link To Profile: //www.kirupa.com/forum/member.php?u=2867
Once we have planned out all the data we will be using we can begin creating the dynamic container which will store the information we will be using. Since the information we will be using is dynamic we will only have to create one container as a mock up which will be used for each group of information.
Let's Get Started:
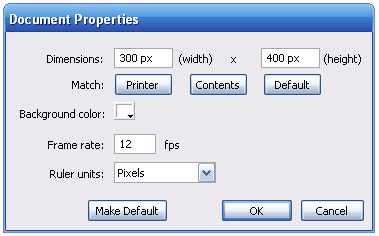
[ adjust your document properties ]
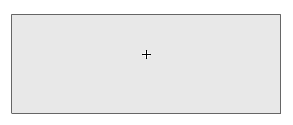
[ the rectangle you just drew ]
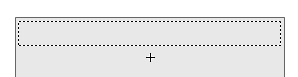
[ create a new text field and give it the instance name 'name' ]
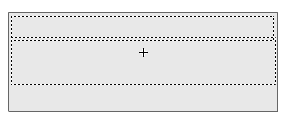
[ create the second text field and give it the instance name of 'interest' ]
on (press) {
  getURL(link, "_blank");
}
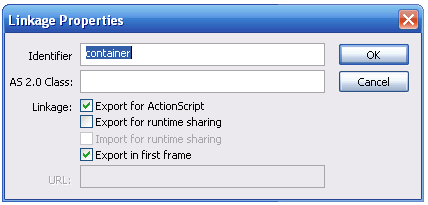
[ the linkage properties window ]
//Array with all our information
memberInfo = [["Kirupa", "Flashing (MX) complete strangers in 32-bit color.", "//www.kirupa.com/forum/member.php?u=1"], ["B.Rich", "Basketball, Golf, Web Media.", "//www.kirupa.com/forum/member.php?u=4513"], ["Senocular", "Fun stuff, like Flash", "//www.kirupa.com/forum/member.php?u=2867"]];
//Starting x & y values
var xPos = 150;
var yPos = 60;
//For loop to attach our container movieclip and pass the array information
for (i=0; i<memberInfo.length; i++) {
  //attach the container clip
  attachMovie("container", "new"+i, i, {_x:xPos, _y:yPos});
  //increase the y postion each time
  yPos += this["new"+i]._height+5;
  //add the information
  this["new"+i].name.text = memberInfo[i][0];
  this["new"+i].interest.text = memberInfo[i][1];
  this["new"+i].link = memberInfo[i][2];
}
That's it! You are done! You can now test out your movie and you should see 3 instances of your container movie with all of the information in the array. I will now briefly explain the ActionScript involved in creating this in the next section.
This is the continuation of our tutorial from the previous section. On this page I will explain the ActionScript behind our code:
memberInfo = [ [ "Kirupa", "Flashing (MX) complete strangers in 32-bit color.", "//www.kirupa.com/forum/member.php?u=1" ],[ "B.Rich", "Basketball, Golf, Web Media.", "//www.kirupa.com/forum/member.php?u=4513" ],[ "Senocular", "Fun stuff, like Flash", "//www.kirupa.com/forum/member.php?u=2867" ] ];This is our array that contains all of our data. Notice that there are three main array items represented by the green, blue, and orange colored sections. Each of those colored sections are arrays themselves. For example, the name 'Kirupa' is the first item in the sub-array, the description is the second item, and the third item is the URL for that data.
Notice that the rest of the arrays follow the similar format. For example, tracing memberInfo[2][0] will out the value 'Senocular'. Flash (and other languages) will interpret the call as the first item in the third sub-array. Remember, array data positions start numbering from 0. For more information about arrays, read Kirupa's tutorial here: http://www.kirupa.com/developer/actionscript/array.htm
var xPos = 150;
var yPos = 60;
xPos & yPos are the variables which hold our starting x & y coordinates for the very first container movie attached in the loop. You can adjust these values to any spot you would like the first container to be placed.
for (i=0;i<memberInfo.length;i++) {This is the for loop which makes our movie work. Variable i is set to 0 so it begins at the first element in our array. memberInfo is the name of our multidimensional array that holds all our our information. memberInfo.legth specifies the numerical value for the length of our array which is 3.
We use the length property so our loop will only run as many times as the number of items in our array, so if you add more items to the array you will not have to adjust the loop. i++ just tells the for loop to auto-increment the variable i each time the loop is accessed.
attachMovie("container", "new"+i, i, {_x:xPos, _y:yPos});This line of code brings the container movie clip out from hiding in our
library and to the forefront on the stage. Notice that the newly attached
movie's name is "new"+i. That ensures that each
movie's name is different and varies based on what the value of i during
the loop is.
For example, the first attached movie clip will be called new0 because the i in our for loop is initially zero. The next movie clip will be called new1, the next new2, and so on.
yPos += this["new"+i]._height+5;This line simply adds 5 pixels each time we attach a movie so the next movie is spaced out a little below the previous one.
Notice that I use the this call to allow for dynamic variables. Remember,
our attached movie clips are called "new" + i.
If we want to make any modifications to that movie clip, we can either make a
call to new0, new1,..., newN explicitly by writing each line out, OR we can let
Flash sort it out by using this["new"+i]
instead.
When you are cycling through your for loop,
this["new"+i] is equivalent to new0, new1, new2, etc. depending on what
your value of i is. Also, in case you are wondering, you can also use the
eval command instead of this. They are both valid, but this is
more modern.
this["new"+i].name.text = memberInfo[i][0];This adds the first item in our array which is the Name to our textbox called "name".
this["new"+i].interest.text = memberInfo[i][1];This line of code will add our second item in our array which would be the interest text to our textbox called "interest".
this["new"+i].link = memberInfo[i][2];This last line of code will define the variable link which we placed in our button so it points to the URL we specified in the last item of our array. Speaking of our button, let's look at the code for that next.
on (press) {
  getURL(link, "_blank");
}
This is pretty straightforward. It's a simple getURL statement, with the URL being taken from the link variable you specified earlier. The "_blank" is the property that tells Flash to open a new window for your link.
I have provided the FLA for what you did above:
If you have any questions, feel free to post on the kirupaForums: //www.kirupa.com/forum/
 |
B.Rich RoundedVision |
 |
Just a final word before we wrap up. What you've seen here is freshly baked content without added preservatives, artificial intelligence, ads, and algorithm-driven doodads. A huge thank you to all of you who buy kirupa's books, became a paid subscriber, watch the videos, and/or interact on the forums.
Your support keeps this site going! 😇

:: Copyright KIRUPA 2026 //--
