Displaying a Preloader for External Content
- Pg. 1
by
kirupa | 5 October 2010
Have questions? Discuss this Flash / ActionScript
tutorial with others on the forums.
There are various ways to structure your Flash
application. One way that I like is to keep the main
application download small, but load all additional content
on-demand as the application requires it. This approach is
nice because it frees your users from the burden of having
to download your entire application initially even if only a
small subsection will actually be used.
In this particular tutorial, I will show you how to
create a small application that loads an external image and
displays a preloader while the image is being downloaded.
The following is an example of what you will create:
[ click the green Refresh icon to see the
pre-loader in action again ]
The basic structure of the application is taken from the
Loading an External Image tutorial. What you will do is
extend the application from that tutorial by adding a
preloader. Let's get started!
Because the focus of this tutorial is to add a preloader, I
am going to provide you with a small sample application that
already has the code for loading an image provided for you.
Download the following Flash CS5 source file and extract its contents to a
location on disk:
Don't worry. You will still have to make the
modifications to support displaying a preloader yourself. I
am just saving you some time, but if you want to learn how
to load an external image, do check out the
Loading an External Image tutorial tutorial I posted
earlier.
Once you have extracted the files, open both
loadingimage_tutorial.fla and
MainDocument.as in Flash CS5:

[ both your FLA and AS file should be open ]
Go ahead and switch into the
loadingimage_tutorial file. This file is pretty
empty. All it contains is two layers, and the loadingArea
layer contains an empty movie clip called loadArea:
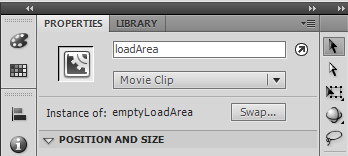
[ your empty movie clip is called loadArea ]
This movie clip is where your image will be loaded into
once it has fully downloaded. That's all there is to this
file.
The loadingimage_tutorial file has its
document class associated with MainDocument, so let's
jump on over to that ActionScript file. Once you have that
file displayed, you will see the following code:
- import
flash.display.MovieClip;
- import
flash.events.Event;
- import
flash.events.ProgressEvent;
- import
flash.display.Loader;
- import
flash.net.URLRequest;
-
- public
class
MainDocument
extends
MovieClip
- {
- private
var
imageLoader:Loader;
-
- public
function
MainDocument()
- {
- LoadImage("stuff.jpg");
- }
-
- public
function
LoadImage(url:String):void
- {
- myPreloader.visible
=
true;
-
- // Set properties on
my Loader object
- imageLoader
=
new
Loader();
- imageLoader.load(new
URLRequest(url));
- imageLoader.contentLoaderInfo.addEventListener(ProgressEvent.PROGRESS,
ImageLoading);
- imageLoader.contentLoaderInfo.addEventListener(Event.COMPLETE,
ImageLoaded);
- }
-
- private
function
ImageLoaded(e:Event):void
- {
- myPreloader.visible
=
false;
-
- // Load Image
- loadArea.addChild(imageLoader);
- }
-
- private
function
ImageLoading(e:ProgressEvent):void
- {
- // Use it to get
current download progress
- // Hint: You could tie
the values to a preloader :)
- }
-
- }
This code is lifted almost in its entirety from the
Loading an External Image tutorial, so I will not
describe it in any great detail here. The only thing to note
is the line where I specify where to display our downloaded
image:
- loadArea.addChild(imageLoader);
I am loading our image into the empty loadArea movie
clip, which as you saw earlier, lives in our FLA file. Ok,
this wraps up what you have to work with.
In the
next page, let's go ahead and add our preloader
and make everything work.
Onwards to the
next page!
|


