 Tutorials
Books
Videos
Forums
Tutorials
Books
Videos
Forums


This is an archived tutorial from the kirupa.com legacy collection. It covers software that may no longer be available, but it is kept online because the ideas still hold up.
You have probably seen Google Maps running in your browser, and it was probably displayed using a combination of HTML and JavaScript (AJAX) to do its thing. While HTML and JavaScript are used by default, the actual data is flexible enough to be displayed in a whole host of different technologies...such as Flash!
At the end of the tutorial, you will have learned how to incorporate the Google Maps API to display the direction between two points using nothing but ActionScript:
With the map, you have the ability to pan around. More traditional navigation methods such as zooming in and such hasn't been implemented in this example, but that is OK for this introductory tutorial.
Creating an app like this seems complicated, but it is actually fairly simple. You just need to get an API key and download the Google Maps API to the correct location on your computer.
To sign up for a Google Maps API Key, click here and follow the instructions on Google's site. If you don't feel like using your own key, for testing purposes, you can use the one that I have created:
Be sure to copy the entire string from the above text field, and do remember to get your own key before creating a production application, for the above key will only work when you are testing from inside Flash via Ctrl + Enter. The key is tied to the domain this app will be displayed on, so my key will certainly not work, so click here.
Next up, you need to download the Google Maps API for Flash. Once you have downloaded this file, extract its contents to a location you can easily browse through and access. There will be two folders - docs and lib. Look inside your lib directory, and find the map_1_9 Flash Component file:
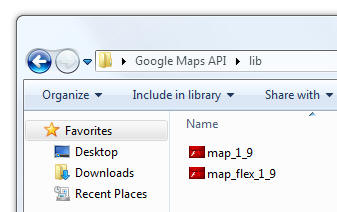
[ the extracted files on my disk ]
Copy this file. Now that you've copied the map_1_9 file, where do you go to paste it? The place you go to paste depends on the version of Flash you are using. For Flash CS3, paste your copied file into the following location: C:\Program Files (x86)\Adobe\Adobe Flash CS3\language\Configuration\Components
For Flash CS4, paste your copied file into this location: C:\Program Files (x86)\Adobe\Adobe Flash CS4\Common\Configuration\Components\
I created a folder called Google Maps API and pasted my component file in there. You don't have to do that, but it does help keep your components organized. Flash will not care either way.
All that is left now is to launch Flash. Note that if you had Flash running while pasting the component into its Program Files directory, you may need to restart Flash for this to work. Anyway, create a new ActionScript 3.0 based Flash application from File | New. Once your new application has been created, go to Window | Components. The floating Components panel will appear with a Google Maps API node:
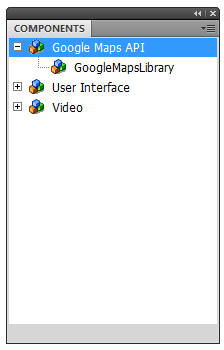
[ the GoogleMapsLibrary Component ]
This is probably pretty anticlimatic, for all I really wanted to show you was that the Google Maps API is recognized by your application. Let's do some slightly more interesting things in the next section!
In the previous section, you learned a bit on how to get components into a location Flash can recognize and to have them appear in your Components panel. In this page, let's wrap things up by showing you how to actually use the API to create a very simple application.
To make your map come alive, you need some code. Select a keyframe, go to Actions (via right-click or F9), and copy/paste the following code into your Actions window:
import com.google.maps.LatLng;
import com.google.maps.Map;
import com.google.maps.MapEvent;
import com.google.maps.MapType;
import com.google.maps.InfoWindowOptions;
import com.google.maps.LatLngBounds;
import com.google.maps.MapMoveEvent;
import com.google.maps.overlays.Marker;
import com.google.maps.overlays.MarkerOptions;
import com.google.maps.interfaces.IPolyline;
import com.google.maps.services.*;
var dir:Directions;
var polyline:IPolyline;
var map:Map
function setupMap() {
  map = new Map();
  map.key="Your Key Here";
  map.setSize(new Point(400,400));
  map.x=0;
  map.y=0;
  map.addEventListener(MapEvent.MAP_READY, onMapReady);
  this.addChild(map);
}
setupMap();
function onMapReady(event:Event):void {
  dir = new Directions();
  dir.addEventListener(DirectionsEvent.DIRECTIONS_SUCCESS,onDirectionsLoaded);
  dir.load("645 Carlton Road, Markham, ON to Fawnbrook Circle, Markham, ON");
}
function onDirectionsLoaded(event:DirectionsEvent):void {
  var returnedDirection:Directions=event.directions;
  var startLatLng:LatLng=returnedDirection.getRoute(0).getStep(0).latLng;
  var endLatLng:LatLng=returnedDirection.getRoute(returnedDirection.numRoutes-1).endLatLng;
  polyline=returnedDirection.createPolyline();
  // Remove everything from map and add back the markers and polyline
  map.clearOverlays();
  map.addOverlay(polyline);
  map.addOverlay(new Marker(startLatLng));
  map.addOverlay(new Marker(endLatLng));
  map.setCenter(returnedDirection.bounds.getCenter(), map.getBoundsZoomLevel(returnedDirection.bounds));
}
After you have pasted the above code, you have one more thing to do before you can test your app. Do you see the place in the code where I have said "Your Key Here"? Replace that string with either your API key or the sample one I provided:
Once you have replaced the API key text with the actual key itself, press Ctrl + Enter to see your app work:
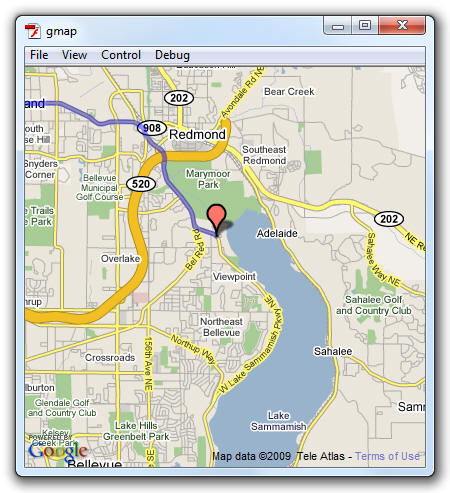
All right. Now that you have a working app, let's quickly look at the code to see how this was all set up. In this article I will just describe the basics of how to have a map up and running with directions displayed.
Like all APIs, the Google Maps API is an abstraction - it provides a nice interface that hides the complexities that lie beneath. If you had to figure out a way to communicate with the Google Maps API from scratch, you may have to do a lot of tricky, complicated work. Thanks to this API, the tricky and complicated work has already been done for you. All you have to do is just code against the nice interface.
Let's look at the code that you have to write to talk to this API starting at the very top:
import com.google.maps.LatLng;
import com.google.maps.Map;
import com.google.maps.MapEvent;
import com.google.maps.MapType;
import com.google.maps.InfoWindowOptions;
import com.google.maps.LatLngBounds;
import com.google.maps.MapMoveEvent;
import com.google.maps.overlays.Marker;
import com.google.maps.overlays.MarkerOptions;
import com.google.maps.interfaces.IPolyline;
import com.google.maps.services.*;
These are import statements that point your code to the location where the various classes and types you are using live. Because a lot of the code you are using requires the Google Maps API, something which Flash doesn't know anything about by default, you have to explicitly point the compiler to the API via these import statements.
var dir:Directions;
var polyline:IPolyline;
var map:Map
There are three variables that I want globally accessible, so I am just declaring them. These variables will be initialized in later methods that I describe.
function setupMap() {
  map = new Map();
  map.key="Your Key Here";
  map.setSize(new Point(400,400));
  map.x=0;
  map.y=0;
  map.addEventListener(MapEvent.MAP_READY, onMapReady);
  this.addChild(map);
}
setupMap();
The above code defines the setupMap method along with the method call that actually calls your setupMap method. The setupMap method does a few things. It initializes your map variable from earlier, sets your map's API key, specifies position/size, and sets up the event handler. The final thing you do is actually add your map to your application's visual tree. That is accomplished via the addChild method.
The format for binding your event to an event handler is consistent with everything you've done in the past. What may be new to you is the actual event itself. The Google Maps API declares its own custom event called MAP_READY that lives in the MapEvent class, and as I will show next, you will see the onMapReady event handler get called when the MAP_READY event gets called.
function onMapReady(event:Event):void {
  dir = new Directions();
  dir.addEventListener(DirectionsEvent.DIRECTIONS_SUCCESS,onDirectionsLoaded);
  dir.load("645 Carlton Road, Markham, ON to Fawnbrook Circle, Markham, ON");
}
The onMapReady method is, as I showed a few seconds ago, is the event handler for the the MAP_READY event. When your map is ready, this event handler will get called, and this event handler is responsible for setting off the events that cause things to be drawn on your recently-made ready map.
I initialize the dir variable to a new Directions object, add another event handler to let me know when my direction is ready, and actually specify the addresses I want to find directions to. In other words, when the directions I specify as arguments to my dir object's load method get sent to the server and successfully returned, the onDirLoad gets called. Let's look at this onDirLoad method in greater detail next.
function onDirectionsLoaded(event:DirectionsEvent):void {
  var returnedDirection:Directions=event.directions;
  var startLatLng:LatLng=returnedDirection.getRoute(0).getStep(0).latLng;
  var endLatLng:LatLng=returnedDirection.getRoute(returnedDirection.numRoutes-1).endLatLng;
  polyline=returnedDirection.createPolyline();
  // Remove everything from map and add back the markers and polyline
  map.clearOverlays();
  map.addOverlay(polyline);
  map.addOverlay(new Marker(startLatLng));
  map.addOverlay(new Marker(endLatLng));
  map.setCenter(returnedDirection.bounds.getCenter(), map.getBoundsZoomLevel(returnedDirection.bounds));
}
The final method we will look at is the onDirectionsLoaded method that gets called when the server returns the direction data for the addresses you specified earlier.
This code is specific to the Google Maps API, so I am not going to be describing all of this in greater detail. What this code does is pretty straightforward. What you first do is get the latitudinal and longitudinal coordinates of your start and end point. This is responsible for setting your starting and ending points.
Once you have these points, you need to generate the path between them. Unfortunately, this isn't like drawing a straight or curved line between two points :P
The path that gets generated is actually a series of lines that snakes through various roads and intersections to get you between two points. The createPolyLine method found in your Directions object gets you exactly that - a series of lines that, when put together, create the lines between the two points.
The final step once all of the data has been calculated is to actually display them on your map. That is handled elegantly by the following five lines:
// Remove everything from map and add back the markers and polyline
map.clearOverlays();
map.addOverlay(polyline);
map.addOverlay(new Marker(startLatLng));
map.addOverlay(new Marker(endLatLng));
map.setCenter(returnedDirection.bounds.getCenter(), map.getBoundsZoomLevel(returnedDirection.bounds));
Let's run through this code quickly. First, clear anything on your map that you may not want to see. After that, add the overlays for your directions, starting point, and ending point. You have one more thing remaining before you can call it a day.
Your map's initial size is determined by two things. It is determined by your map's center point and the boundaries of the points that make up your starting point, ending point, and the path between them. Your map object's setCenter object takes those three inputs into account, does some magic, and sets up your map's center and zoom positions for you.
I hope this tutorial helped give you a leg up on using the Google Maps API to create a simple application. There is a lot more you can do, and this tutorial just scratched the surface of what is possible.
If you have any questions, please feel free to post on the forums, and I or others will help you out.
Just a final word before we wrap up. What you've seen here is freshly baked content without added preservatives, artificial intelligence, ads, and algorithm-driven doodads. A huge thank you to all of you who buy kirupa's books, became a paid subscriber, watch the videos, and/or interact on the forums.
Your support keeps this site going! 😇

:: Copyright KIRUPA 2026 //--