|
by
kirupa | 8 December 2009
Every year during Christmas time, unsurprisingly, the
falling snow tutorial is one of the most popular tutorials
on the site. In case you don't know what exactly it is, click on the Let It
Snow banner in the below movie:
Once you have clicked on the Let It Snow banner, you'll
see a fair number of snow-like circles oscillating as
they fall to the ground....just like real snow!
This effect is something that has been covered on the
site extensively over the years, but this one is newer and
shinier. It is newer and shinier because, in this tutorial,
you will learn how to implement the snow effect using
ActionScript 3 in Flash CS4 instead of something older.
So what are you waiting for? Let's get started!
Let's start at the very beginning and work our way up:
- First, create a new animation in Flash CS4 whose project
type is Flash File
(ActionScript 3.0). Once your project has been
created, from the Properties panel,
click the button next to the Size text called Edit. The
Document Properties dialog will appear.
- From the Document Properties dialog, set the
animation's width and height to 450 pixels by 300 pixels
respectively:
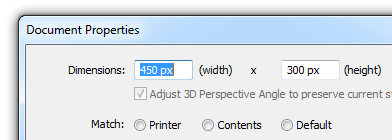
[ set your
animation's width/height to 450 by 400 ]
- From this same dialog, set the frame rate
to 30 and the background color to black:
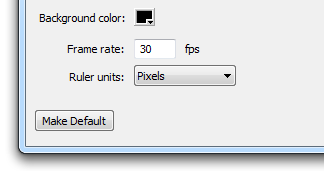
[ since you are already here, set the frame rate to 30 ]
The animation size, background
color, and frame rate are the only things that you will need
to change from the Document Properties dialog. Once you have
made these changes, go ahead and click OK to commit the
changes and to close the dialog.
Your stage will now
look as follows:
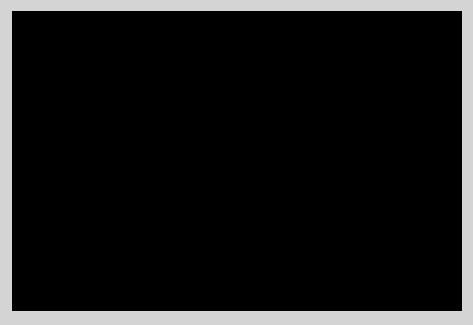
[ wow, this is a work of art ]
With your stage setup, let's move on to the
bigger piece that is creating the SnowFlake movie clip.
Each circle that you see falling down is a movie clip with a
class file associated with it. If the preceding sentence did
not make a lot of sense to you, I strongly suggest you read
my earlier
Classes and Movie Clips article before continuing on.
What we are going to do now is draw a circle, make it
into a movie clip, and edit the movie clip's properties to
require a class file be used for defining its functionality.
Let's get started:
- Using the Circle tool, draw a small, white circle
anywhere on your stage:
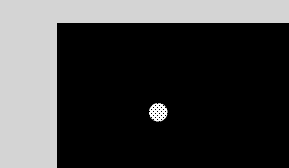
[ this circle will be your snowflake ]
- Once you have drawn the circle, select it
(if you somehow deselected it), and press F8 (Modify |
Convert to Symbol) to launch the Convert to Symbol
dialog. Once this dialog appears, make sure Type is set
to Movie Clip, and in the Name field, enter
Snowflake:
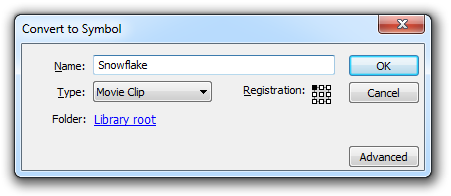
[ conver the circle into a movie clip symbol ]
- From this same dialog, now hit the
Advanced button to display more customizations you can
make to the movie clip you will eventually be creating.
There should be an area marked Linkage that contains two
checkboxes. Click on the first checkbox that says Export
for ActionScript:
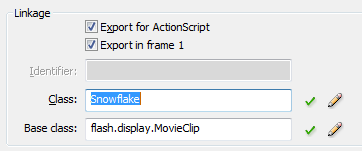
[ we want to have a class file assocated with this circle ]
Once you have checked that box,
a few more fields will be autocompleted for you. Notice that
the Class name is listed as Snowflake. That will come in
handy in a little bit.
- Press OK to create your Snowflake movie
clip and to close this dialog. You may see a warning
dialog stating that the class file cannot be found, but
don't worry about that. Click OK to acknowledge and
close the dialog.
If you look in your Library
panel, you will see your Snowflake movie clip displayed:
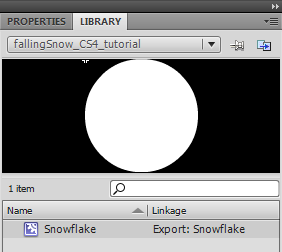
[ your library will now display your movie clip ]
- You are almost done with this part of the
tutorial. Go to File | Save and save this your Flash
document (FLA) into a directory. Saving the file is
important for you will revisit the location this FLA
file is saved in shortly.
Ok, this seems like a good place to take a small break.
In the
next page, we'll create the class file that links the
movie clip you created with the code that will power it.
Onwards to the
next page!
|


