|
by
kirupa | 6 June 2010
In Flash, you've always had the ability to load content
that was stored on a server. For a class of applications,
having the ability to load content that lives on disk is
quite useful. The pleas were heard and acknowledged, and
Adobe recently added support to allow users to load local
content into your Flash application.
Since seeing is believing, in the following example,
click on the Load button and browse to an image file that
you want this application to display:
[ click on the Load button and select an
image file ]
When you click on the Load button, notice that your
operating system's Open File Dialog will appear allowing you
to select a file:
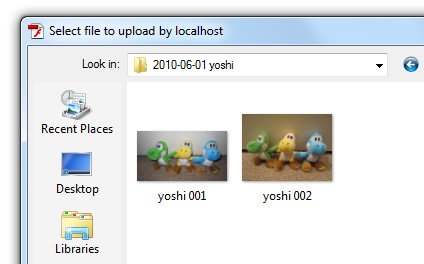
[ files I am currently browsing through ]
Once you have selected an image file and clicked on the
Open button, your selected image will be displayed in your
Flash application:

[ yes, I
realize this image wasn't shown in the thumbnails in the
earlier screenshot ]
In this tutorial, you will learn how to use the
FileReference class to display a dialog, select a file, and
process the file for use. While my code and example will
seem to favor only image file types, the approach used will
be generic enough for you to very easily extend to other
more file types.
This tutorial is more of a deconstruction rather than
introducing building blocks in a step-by-step way for you to
arrange, so feel free to
download the source file for the example shown above and
whose code will be described in this and the next page.
The approach to take when wanting to load a local file is as
follows:
- Display the native Windows/OS X dialog for selecting
a file.
- If a file is selected, attempt to load the file.
- Once the file has been loaded, do other things to
the file such as displaying its contents
The code you are about to see is simply an
ActionScript-ized form of the three steps you see above.
Without further ado, the code is:
- import
flash.net.FileReference;
- import
flash.events.Event;
- import
flash.net.FileFilter;
-
- var
file:FileReference;
- var
fileLoader:Loader;
-
- function
start()
- {
- loadImageBtn.addEventListener(MouseEvent.CLICK,
showDialog);
- }
- start();
-
- function
showDialog(event:MouseEvent):void
- {
- file
=
new FileReference();
-
- var
imageFileTypes:FileFilter
=
new FileFilter("Images
(*.jpg, *.png)",
"*.jpg;*.png");
-
- file.browse([imageFileTypes]);
- file.addEventListener(Event.SELECT,
selectFile);
- }
-
- function
selectFile(e:Event):void
- {
- file.addEventListener(Event.COMPLETE,
loadFile);
- file.load();
- }
-
- function
loadFile(e:Event):void
- {
- fileLoader
=
new Loader();
-
- fileLoader.contentLoaderInfo.addEventListener(Event.COMPLETE,
displayImage);
- fileLoader.loadBytes(file.data);
- }
-
- function
displayImage(e:Event):void
- {
- addChild(fileLoader);
- }
The code seems like a lot, but as you will see shortly,
it is actually quite straightforward. Let's look at each
segment of code in greater detail.
First, in our quest to load local files is
to display the dialog that will allow your users to select a
file itself. The code for doing that is contained in the
following lines of code:
- var
file:FileReference;
- var
fileLoader:Loader;
-
- function
start()
- {
- loadImageBtn.addEventListener(MouseEvent.CLICK,
showDialog);
- }
- start();
-
- function
showDialog(event:MouseEvent):void
- {
- file
=
new FileReference();
-
- var
imageFileTypes:FileFilter
=
new FileFilter("Images
(*.jpg, *.png)",
"*.jpg;*.png");
-
- file.browse([imageFileTypes]);
- file.addEventListener(Event.SELECT,
selectFile);
- }
Let's look at the two variables that are declared at the
top first:
- var
file:FileReference;
- var
fileLoader:Loader;
These two variables, file and fileLoader, are of tpe
FileReference and Loader respectively. How these variables
are used will make more sense when they are initialized in
the code, so we'll revisit each individually when the time
is right.
- function
showDialog(event:MouseEvent):void
- {
- file
=
new FileReference();
-
- var
imageFileTypes:FileFilter
=
new FileFilter("Images
(*.jpg, *.png)",
"*.jpg;*.png");
-
- file.browse([imageFileTypes]);
- file.addEventListener(Event.SELECT,
selectFile);
- }
The showDialog function is invoked in this example when
the loadImageBtn is clicked. As its name implies, this
function is in charge of actually showing the dialog.
Notice that the first thing we do is initialize the file
variable that was declared earlier by calling the
FileReference constructor:
- file
= new
FileReference();
As you will see, the FileReference class contains
everything (classes, properties, events) you would need to
handle opening a file.
The next two lines help our showDialog function live up
its name by actually displaying the the dialog:
- var
imageFileTypes:FileFilter
= new
FileFilter("Images
(*.jpg, *.png)",
"*.jpg;*.png");
-
- file.browse([imageFileTypes]);
The FileFilter object imageFileTypes allows you to
constrain which file types you will allow your users to
select via the dialog:
- var
imageFileTypes:FileFilter
= new
FileFilter("Images
(*.jpg, *.png)",
"*.jpg;*.png");
I specify the filtering constraint in the constructor of
the FileFilter class itself, and the format for filtering
basically involves a description of the file format followed
by a semi-colon delimited list of actual file formats. You
must follow this general format in order to have Flash
properly communicate what you want to the dialog:
[ your
FileFilter information is passed along to the dialog ]
To actually display the dialog, you call our
file object's
browse function:
- file.browse([imageFileTypes]);
The browse function takes our earlier FileFilter object
as its argument. The important thing to note is that it
takes the FileFilter arguments in the form of an array.
Because I only have one FileFilter object, only one
FileFilter object is specified in the array:
- file.browse([imageFileTypes]);
If you wanted to constrain by several file types, you
would append the array with more FileFilter objects as
needed.
The last thing we do is setup an event listener to let
your application know that a file has been selected via this
dialog:
- file.addEventListener(Event.SELECT,
selectFile);
I add this event listener to our file object itself, and
that is because it is also the file object that calls the
browse function that launches the dialog. The event I am
listening for is the SELECT event. When a SELECT event is
fired, the selectFile event handler function will get
called. Let's go ahead and look at that on the
next page!
Onwards to the
next page!
|


