 Tutorials
Books
Videos
Forums
Tutorials
Books
Videos
Forums


This is an archived tutorial from the kirupa.com legacy collection. It covers software that may no longer be available, but it is kept online because the ideas still hold up.
I am a huge fan of circles, and I am an even bigger fan of making things move. In this tutorial, I will combine them both into one example that I call the Colorful Explosion. Mouse over on the Mouse Over button in the following movie to see why I call it that:
[ click on the Click Me text and move your mouse around ]
The colorful explosion is nothing more than dynamically generated circles adopting a random color, zooming in, and fading out. In this and the next couple of pages, you will learn how to create this effect on your own using Flash CS4 (or Flash CS3) using ActionScript 3.
First, you will need to create a movie clip. For this tutorial, simply create a solid blue circle movie clip and, in the Library, give it the class name ColorfulCircle. If you don't know how to do that, feel free to read the detailed instructions below. Otherwise, jump on over to the next section!
The following instructions explain how to setup your movie and create the blue circle movie clip:
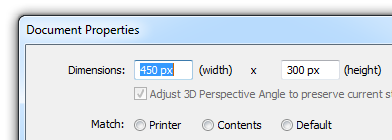
[ set your animation's width/height to 300 by 200 ]
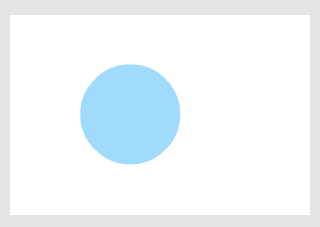
[ draw a blue, solid, filled circle ]
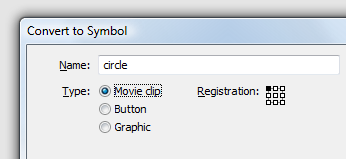
[ give your symbol the name circle and make sure it is also set to be a movie clip ]
Do not hit OK just yet. Let's make some more modifications.
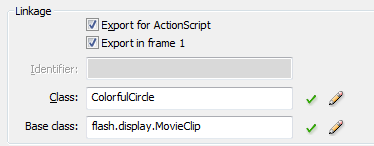
[ check 'Export for ActionScript and enter BlueCircle for your class ]
The Base class field will automatically be populated for you, but if it hasn't, make sure to enter flash.display.MovieClip as shown in the above image.
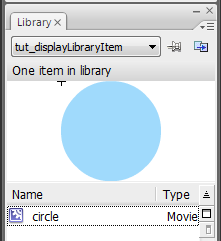
[ your circle in your Library ]
If you do not see your Library, press Ctrl + L to display it.
At this point, you should see a blank stage with your Library displaying the circle movie clip with the class name ColorfulCircle. Right now, nothing is really being done. Let's fix that...in the next section!
In the previous section, you got a quick intro to what you will be creating and learned how to create a ColorfulCircle class instance through the movie clip. In this page, let's add some code and start to see how everything works.
Currently, you should see just one circle on your stage:
[ the circle is quite lonely right now ]
When you preview or test your application, nothing will be happening. The reason is that there is no code in place to actually make your circle move. To fix this, you will need to add some code to your ColorfulCircle class - a class that doesn't technically exist for you right now. This means that you will need to create the class file and add some code.
This is pretty straightforward. From Flash, go to File | New to display the New Document window. From this window, select ActionScript file and press the OK button:
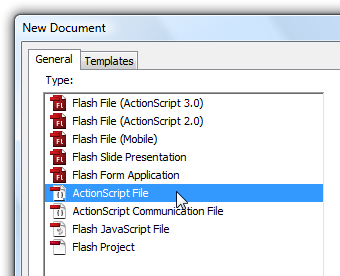
[ select the ActionScript file type from New Document ]
Once you have clicked OK, the New Document window will disappear, and your Flash drawing area will now be replaced by what is essentially a large code editor. In this code area, copy and paste the following code:
package {
  import flash.display.*;
  import flash.events.*;
  import flash.geom.*;
  public class ColorfulCircle extends MovieClip {
  var radians:Number;
  var speed:Number;
  var radius:Number;
  var originalX:Number;
  var originalY:Number;
  static var colorArray:Array = new Array(0xFFFF33, 0xFFFFFF, 0x79DCF4, 0xFF3333, 0xFFCC33, 0x99CC33);
  public function ColorfulCircle() {
  originalX = this.x;
  originalY = this.y;
  setProperties();
  this.addEventListener(Event.ENTER_FRAME, flyCircleIn);
  }
  function setProperties()
  {
  speed = Math.ceil(5*Math.random());
  radius = 20*Math.random();
  radians = 0;
  trace(speed);
  this.scaleX = 0;
  this.scaleY = 0;
  var randomColorID:Number = Math.floor(Math.random()*colorArray.length);
  var myColor:ColorTransform = this.transform.colorTransform;
  myColor.color = colorArray[randomColorID];
  this.transform.colorTransform = myColor;
  this.alpha = 1;
  }
  function flyCircleIn(e:Event) {
  radians += Math.abs(speed/10);
  this.x += Math.round(radius*Math.cos(radians));
  this.y += Math.round(radius*Math.sin(radians));
  this.scaleX += Math.abs(speed/10);
  this.scaleY += Math.abs(speed/10);
  this.alpha -= Math.abs(speed/100);
  if (this.alpha < 0)
  {
  resetCircle();
  }
  }
  function resetCircle()
  {
  this.x = originalX;
  this.y = originalY;
  setProperties();
  }
  }
}
After you have pasted the above code, before we proceed any further, let's save this file. Go to File | Save, navigate to the folder where your current Flash project is, change the current default filename to ColorfulCircle.as, and hit the Save button. A ColorfulCircle.as file will now be created in the same location as your colorfulExplosion.fla:
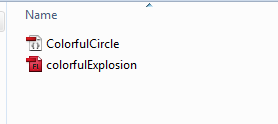
[ save your ColorfulCircle.as file in the same location as your dynamicMouseTrail.fla ]
Great. We just created our ColorfulCircle.as file. Now, jump back to your Flash file that currently just has one circle and test it by pressing Ctrl + Enter. Notice that the solitary circle that did nothing earlier is now animating and doing what you expected.
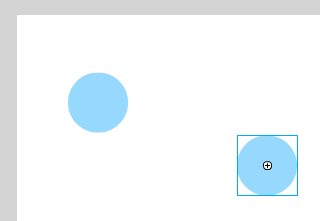
Currently, you only have one circle that is being animated. You probably want a few more circles to make your effect look really cool. Go back to your artboard, select the one circle that is currently visible, copy it by pressing Ctrl + C, and paste the circle by pressing Ctrl + V:
[ copy and paste the circle on your stage ]
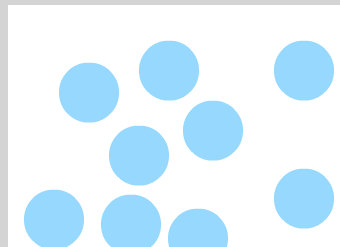
After you have done this, two circles will now be on your artboard. Keep repeating this process until you have at least 10 circles on your artboard. You may need to move your circle around the stage a bit after each paste to prevent the circles from just being pasted on top of each other:
[ repeat the copy and paste step a few more times to create more circles ]
Once you have enough circles, test your application again. This time you will have a more continuous stream of circles zooming in and fading out - which is exactly what we want.
Now that you have a working application, you aren't done yet. In fact, this was just the easy part of this tutorial. In the next couple of pages, we will delve into the workings of the colorful explosion and learn exactly how everything works.
In the previous section, you wrapped everything up and now have a fully working application. In this and subsequent pages, let's look at the code and why everything works the way it does.
While the previous section seemed to have a lot of code, overall, the effect is fairly simple. At a very high level, the code works as follows.
Each of your circle movie clips are associated with the ColorfulCircle class file, and all that code that is contained inside the ColorfulCircle class file gets excecuted each time for each circle. To learn more about the association between movie clips and classes, my earlier Classes and Movie Clips tutorial should provide you with more information.
Digging a bit deeper into each circle, the code does a few things on the circle:
In the next section, let's go through each line of code and see how it fits in with the approimately four things our code does.
Let's start at the very top:
package {
  import flash.display.*;
  import flash.events.*;
  import flash.geom.*;
  .
  .
  .
  .
}
The very top is generic boilerplate code containing the package declaration and any import statements that you need. In ActionScript 3, a lot of the classes that you use are stored in different libraries. The import statements help the Flash compiler know which library the classes you are using are coming from.
public class ColorfulCircle extends MovieClip {Here, I formally declare our ColorfulCircle class. Notice that this class extends the base MovieClip class. This is done because our class isn't self-containing. We are not reimplementing everything needed to have our circle movie clip visual on the artboard associated with the class file itself. Instead, we are extending the existing MovieClip class and only adding our code on the top.
var radians:Number;
var speed:Number;
var radius:Number;
var originalX:Number;
var originalY:Number;
In these lines, I am declaring some variables that I will be using in the rest of the code. Notice that I have strongly typed these variables as something that is a Number indicating that only numerical data will be stored here.
static var colorArray:Array = new Array(0xFFFF33, 0xFFFFFF, 0x79DCF4, 0xFF3333, 0xFFCC33, 0x99CC33);In this line, I am storing an array of color values. You can learn more about this in the Random Colors in AS3 tutorial where I describe in greater detail this and some related code you will see shortly.
public function ColorfulCircle() {
  originalX = this.x;
  originalY = this.y;
  setProperties();
  this.addEventListener(Event.ENTER_FRAME, flyCircleIn);
}
This block of code defines the constructor for the ColorfulCircle class. You can think of the constructor as an entry way to your code. Each time a ColorfulCircle movie clip is created, this code is called automatically once...and only once! This means that any code you want executed automatically when your circle makes an appearance needs to live here.
originalX = this.x;
originalY = this.y;
What I do first in the constructor is get our circle's current X and Y position and store it in the originalX and originalY variables. Next up is the code that calls our setProperties function:
setProperties();I will describe this function in greater detail later, but it is just a simple function call. The next line is a little bit more interesting:
this.addEventListener(Event.ENTER_FRAME, flyCircleIn);Here I set up the event listener that associates an event with an event handler. The event I am listening for is ENTER_FRAME, and the event handler that gets called at each frame tick is flyCircleIn. We'll look at the flyCircleIn method later.
This line wraps up the code found in our constructor. Like I mentioned earlier, the constructor is the gateway to the class. As such, it contains some pretty heavy-hitting code that calls other functions that are essential to what your class does. We'll look at some of those classes first - starting with the setProperties function.
function setProperties()
{
  speed = Math.ceil(5*Math.random());
  radius = 20*Math.random();
  radians = 0;
  trace(speed);
  this.scaleX = 0;
  this.scaleY = 0;
  var randomColorID:Number = Math.floor(Math.random()*colorArray.length);
  var myColor:ColorTransform = this.transform.colorTransform;
  myColor.color = colorArray[randomColorID];
  this.transform.colorTransform = myColor;
  this.alpha = 1;
}
The setProperties function, as its name implies, sets the properties that your circle will posses. The first couple of lines simply set some properties for our circle's zoom speed, its radius, current radians value, and initial size:
speed = Math.ceil(5*Math.random());
radius = 20*Math.random();
radians = 0;
trace(speed);
this.scaleX = 0;
this.scaleY = 0;
The speed and radius values use Math.random() to generate a random number each time this function is called, and these values determine how quickly your circles zoom in at you and how wide the circle's arc will be.
The next series of lines are related to picking a random color:
var randomColorID:Number = Math.floor(Math.random()*colorArray.length);
var myColor:ColorTransform = this.transform.colorTransform;
myColor.color = colorArray[randomColorID];
this.transform.colorTransform = myColor;
Just like before, I am not going to describe the code for generating a random color because the Random Colors in AS3 tutorial covers this topic in much greater detail.
The last line in setProperties is:
this.alpha = 1;The alpha property determines the opacity of your circle, and setting it to 1 is the same as making it fully visible.
We are almost done. There is a few more sections of code that need to be covered, and we'll do that in the next section!
In the previous section, we began to look at the code that causes your circles to have the effect that they do. In this page, let's pick up where we left off.
function flyCircleIn(e:Event) {
  radians += Math.abs(speed/10);
  this.x += Math.round(radius*Math.cos(radians));
  this.y += Math.round(radius*Math.sin(radians));
  this.scaleX += Math.abs(speed/10);
  this.scaleY += Math.abs(speed/10);
  this.alpha -= Math.abs(speed/100);
  if (this.alpha < 0)
  {
  resetCircle();
  }
}
The flyCircleIn function is responsible for creating the movement that you see. If you recall, in the constructor, you associated the Event.ENTER_FRAME event with this flyCircleIn event handling function. This means that each time your frame ticks this function gets called.
First, we increment our radians value by taking our speed value and dividing it by 10:
radians += Math.abs(speed/10);The radians value, like you saw earlier when I reset its value to zero, determines where in the circular path your circle currently is in. You'll see it used in the Circular Motion code found in the next two lines:
this.x += Math.round(radius*Math.cos(radians));
this.y += Math.round(radius*Math.sin(radians));
The circular movement is calculated by using the Cosine and Sine functions. Notice that I am passing our radians value as an argument to the Math.cos and Math.sin functions, and I am multiplying our Cosine and Sine functions by the radius value.
Now that we have the circular movement out of the way, let's now look at the lines of code that animate the circle's size and transparency:
this.scaleX += Math.abs(speed/10);
this.scaleY += Math.abs(speed/10);
this.alpha -= Math.abs(speed/100);
These lines are very straightforward as well, and they too involve the speed variable to determine how quickly the resizing or fading out will occur.
When the circle fully fades out, we want to put an end to the animation in its current state and reset everything to a new set of properties:
if (this.alpha < 0)
{
  resetCircle();
}
We accomplish that by checking when the circle becomes fully transparent and calling the resetCircle function when that happens. Speaking of which, let's look at the resetCircle function next.
function resetCircle()
{
  this.x = originalX;
  this.y = originalY;
  setProperties();
}
The resetCircle function is called when our circles become fully invisible. There are really only two things this function does. First, it resets our circle'ss position to what it was before it began its journey. Second, it calls our setProperties function again where initial values are set (or reset) for the next round of zooming, fading out, and color changing.
The preceding sections covered a lot of code, so let's use this moment to quickly recap what our code is doing. Each of our circles is like an independent life form with its own instance of ColorfulCircle powering it. First, the constructor gets called where the initial values of our circle are stored in various variables and our enter frame event is associated with our event handler.
At each tick of the frame, 24 per second if you keep the default Flash CS4 value for frame rate, your circle gradually becomes larger, moves in a circular path, and becomes a bit less visible. Once your circle becomes fully invisible, we reset the circle back to a good starting point by calling the same function you called earlier for setting the initial properties.
Even though we are calling the same function for setting the properties, the properties that get set will probably not be the same. There is a certain level of randomness that is introduced where the speed, radius, and color variables are set with the help of a Math.random call. This is nice because it keeps your animation a bit more unique and lively as each circle gets reset to a different variant of itself.
If you are interested in seeing my version of the code, please feel free to download the source files below. The colorfulExplosion.fla is what this tutorial used, and the flyingCircles.fla represents the example animation from the original page:
Just a final word before we wrap up. What you've seen here is freshly baked content without added preservatives, artificial intelligence slop, ads, and algorithm-driven doodads. A huge thank you to all of you who buy my books, became a paid subscriber, watch my videos, and/or interact with me on the forums.
Your support keeps this site going! 😇


:: Copyright KIRUPA 2026 //--
