 Tutorials
Books
Videos
Forums
Tutorials
Books
Videos
Forums


This is an archived tutorial from the kirupa.com legacy collection. It covers software that may no longer be available, but it is kept online because the ideas still hold up.
A really nice effect I saw recently on the forums is the ability to pan an image based on your mouse movement. The following animation is an example of what I am referring to:
[ move your mouse around the above animation to scroll the image ]
In the above example, notice that as you move your mouse cursor around the screen, the image scrolls based on the direction of your mouse movement. The scrolling, though, stops once you have reached the image's boundary.
In this tutorial you will learn how to re-create the above animation followed by an explanation of how the code, created by kF all-star Krilnon, works.
Let's Get Started:
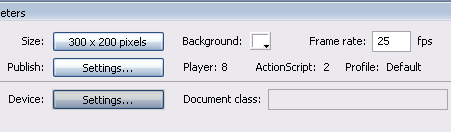
[ set your animation's width/height to 300 by 200 and your frame rate to 25 ]
The background image used in the above animation and provided as a download link in Step ii is part of KoL's Strange World series. You can visit his website and checkout his other cool wallpapers by clicking here.
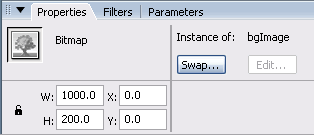
[ set your image's x and y position at 0,0 ]
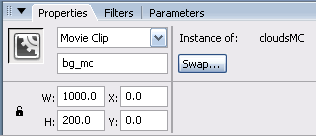
[ set your image's x and y position at 0,0 ]
[ copy and paste the above code into the first frame of your animation ]
Now that you have a working animation, I am sure you are curious to know how it works. In the next few pages I will explain what each line of code accomplishes so that you will know how to create a better, cooler effect for your self/clients!
In the previous section, you created the image panning effect. In this and the next few pages you will learn how the code works to cause the image pan effect to work the way it does.
this.onMouseMove = function() {
  constrainedMove(bg_mc, 4, 1);
};
The above section of code registers an onMouseMove event handler. Whenever the mouse moves, any code contained within the this.onMouseMove function will be executed.
The code that is executed is the function call constrainedMove(bg_mc, 4, 1); You will learn more about what constrainedMove does really soon!
function constrainedMove(target:MovieClip, speed:Number, dir:Number) {In the above line of code, you are declaring a new function called constrainedMove. It takes in three arguments - target, speed, and dir. Notice that I define their types as MovieClip, Number, and Number. While declaring the types is optional in Flash (for now), it is a good practice to get into.
var mousePercent:Number = _xmouse/Stage.width;The mousePercent variable stores a fraction of your mouse's X position with regards to your total stage width. This number varies \ between 0 and 1, and as you will see later, it helps dampen or speed up how fast your image scrolls to its boundary.
var mSpeed:Number;
if (dir == 1) {
  mSpeed = 1-mousePercent;
} else {
  mSpeed = mousePercent;
}
The mSpeed variable either stores the value stored by your mousePercent variable or it reverses the value in your mousePercent variable. Depending on what value you pass in for the dir variable, your mousePercent value will be either mousePercent or 1 - mousePercent.
What this essentially does it reverses the movement of the image scroll based on your mouse movement. For example, when the dir value is 1, your image pans in the same direction as your mouse movement. If the dir value is anything besides 1, then the mouse movement and the image panning work in opposite directions.
The exciting stuff in the code takes place in the next section. Let's go there now!
In the previous section, I started to explain the code behind the image pan. In this page, I will wrap up the code explanation. Let's pick up from where we left off:
target.destX = Math.round(-((target._width-Stage.width)*mSpeed));The destX variable stores the X position of our image. This line of code is designed to ensure that no matter where the mouse is, as determined by the mousePercent variable stored in mSpeed, that your image will not go beyond either the left-most or right-most boundaries.
One way you can think about this is that, mSpeed is either (1 - mousePercent) or mousePercent. Either way, mousePercent is _xmouse/Stage.width. When you expand this out, for example when dir = 1, your destX variable can be simplified as:
-(_xmouse * (target._width - Stage.width) / Stage.width)
As your mouse position moves, your value for destX changes. What this does, as you will see shortly, is that it sets the final destination for where your image needs to scroll. When you are panning, you would have noticed the image movement is not immediately responsive to your mouse movement. There is a gradual acceleration and deceleration as the image moves to its destination. The destination is what the above destX value finds for you.
Note - target.destX
The variable target is the instance name of the Movie Clip you pass in to the constrainedMove function. The variable destX is stored in the target movie clip, because otherwise, if it were stored without a parent, it would only have one value throughout the life of the animation.
While that is OK for only one moving image, but what if you have multiple images that you wish to pan. Each one of those images would need their own destX value, or else you won't be able to individually control either the direction or the speed of each image. That greatly reduces the flexibility we can have with the code.
if (target._x == target.destX) {
  delete target.onEnterFrame;
} else {
  target._x += Math.ceil((target.destX-target._x)*(speed/100));
}
The above lines of code are fairly straightforward after learning about what the destX variable does. If your image position, target._x, is less than or greater than your destX variable, then you need to move in the appropriate direction to make sure that the difference between where you are and where you should be as specified by the destX variable is reduced to zero.
In other words, your goal is to have both your current position and the position stored by destX to be the same so that you end the enterFrame by reaching target._x == target.destX.
Well, I hope this tutorial helps you to create a really cool image panning effect. I have provided the source files I used to create the animation you see on the home page. Click on the download graphic below to get it.
If you have any questions, feel free to post them on the forums.
Cheers!
 |
Krilnonreclipse.net |
 |
kirupakirupa.MIT |
Just a final word before we wrap up. What you've seen here is freshly baked content without added preservatives, artificial intelligence, ads, and algorithm-driven doodads. A huge thank you to all of you who buy kirupa's books, became a paid subscriber, watch the videos, and/or interact on the forums.
Your support keeps this site going! 😇

:: Copyright KIRUPA 2026 //--