 Tutorials
Books
Videos
Forums
Tutorials
Books
Videos
Forums


This is an archived tutorial from the kirupa.com legacy collection. It covers software that may no longer be available, but it is kept online because the ideas still hold up.
Video and the net are not the best of friends for the majority of net surfers. For the most part, due to large file sizes, you may be steered to other non-video formats such as - well, Flash! Of course, with the growing popularity of broadband content, you may find situations where a video clip is very useful. You can also use videos within Flash!
Flash MX 2004 includes basic video features that can aid you in not only importing video files for display in Flash, but you can also perform some simple editing tasks also. This tutorial will help you to learn more about Flash and video.
The following is an example of video in Flash:
[ video in Flash - it's about 125k, so it may run choppy the first time ]
The following steps will explain how to import and display a video file in Flash MX 2004:
Create a new Flash file by launching Flash MX 2004 and by going to File | New.
Once you have a new Flash file created, go to File | Import | Import to Stage. You will see the Import dialog box appear.
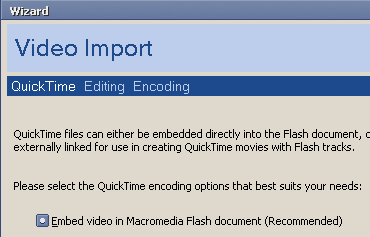
Browse to the location of a movie file. After finding a movie file, select it and press the Open button. The Video Import Wizard should appear:
[ the video import wizard for a QuickTime movie ]
The Video Import Wizard will vary depending
on your movie's format, so if you selected a non-QuickTime
movie format, you may see something different than what is
displayed in the above screenshot.
Regardless of which movie format you have, press the Next
button though.
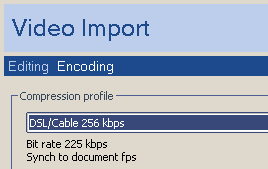
You will receive more options. Select the option for "Import the entire video." Press Next again. You should see the following screen:
[ the encoding options ]
You can adjust your Compression profile from this screen. Here you will be able to fine-tune your movie for various connection settings. Select the option for DSL/Cable 256k, and press the Finish button.
After a few seconds of processing, your video file should be displayed in your Flash stage! You can move the timeline slider around and preview your movie.
You are done importing a movie into Flash! If you publish your movie and preview the movie in your browser, you should see your movie in Flash.
 |
Tip |
|
In Flash MX 2004,
you can import and use the following video file
formats:
|
|
There are more options and settings that we skipped in this portion of the tutorial, but in the next section we will revisit those skipped settings and learn about editing your video.
In the previous section, you learned how to incorporate a video file in Flash MX 2004. You may have noticed that we skipped over a lot of settings and customizations that deal with video editing. The following sections will try to go back and re-explain some of the video editing features of Flash that we did not cover.
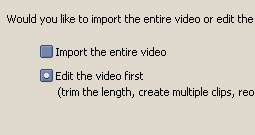
Flash MX 2004 includes simple movie editing features that allow you to perform some basic tasks. Go back to Importing your movie from the previous section, and stop when you get to the screen where you are presented with the two options to either "Import the entire video" or to "Edit the video first." From this screen, select the option for "Edit the video first" and press Next:
[ the option for editing the video ]
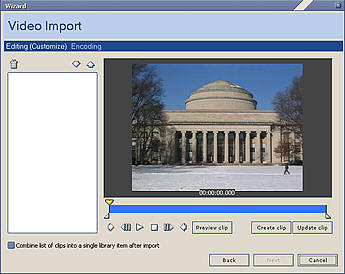
After you selected "Edit the video first" and pressed Next, you should see something similar to the following scaled-down image:
[ the video editing screen ]
If you are interested in cropping your movie, you will do so in this screen using the small triangles located on the bottom left and bottom right corners of the timeline:

[ the circled "in" and "out" triangles are used to crop the movie ]
To crop the movie, click and drag the in (left) or out (out) triangular sliders. The blue area seen in your timeline represents the portion of your movie that will be played when your movie is exported to your main Flash timeline. By clicking and dragging, you can adjust which portions of your movie are displayed such as what you see in my above screenshot.
You can press the Preview Clip button to preview only the portion of your movie that is between the in our out sliders. Once you have finished picking the portion of the movie you want to see, press Create Clip and give the clip a name. You are free to create more in and out points and create additional clips. You can also rearrange the clips in the left side of your wizard by using the pictured move up and move down arrows:
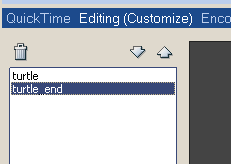
[ create, rename, and move up or move down additional clips ]
Press Next once you are done. You can press the Finish button, and you will see the portion of your cropped movie in Flash, but don't press Finish if you are planning on learning how to adjust the compression settings.
To adjust the compression settings for your movie, go back to your Import Video Wizard and follow the directions by clicking Next until you reach the Encoding screen. While you specified a bandwidth setting from the drop-down menu in the previous section (DSL/Cable 256k), you will press the Edit button to the right of the Compression Profile drop-down menu.
You should see something similar to the cropped version of the following image:
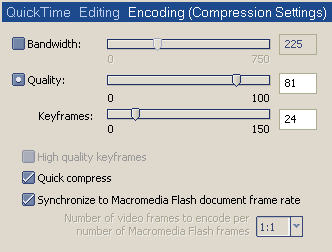
[ the compression settings ]
The Bandwidth Setting allows you to adjust your compression techniques based only on the bandwidth. Setting a higher value signifies a user with a faster connection, therefore the quality will be a lot better than setting the bandwidth slider at 56. While you are sliding the slider, you can see the effects of the compression on the video on the right.
The Quality/Keyframes setting takes a different approach towards optimizing your movie compared to the above Bandwidth method. This method gives you a greater say in adjusting the quality of your movie. Setting a higher quality, similar to the quality setting for a JPEG image, will cause your movie's size to be larger.
Increasing the number of keyframes will also increase the size of your movie. By having more frames, the transition between one frame and another is more smooth. You won't have a lot of choppiness with extra frames. If you drag the slider to the right, you increase the number of keyframes. If you drag the slider to the left, you decrease the number of keyframes - thus making the movie a bit choppier.
In summary, any setting that increases quality or increases the number of frames, will have a negative impact on users with low-speed connections.
Hope fully this tutorial helps you to better understand how to use videos in Flash MX 2004. You may find that varying video formats work differently in the Import Wizard, so you may find some very minor variations in the above tutorial depending on the video format you are using.
Thanks to the awesome super moderator senocular (that rhymes!) for providing the video for the example animation you saw in the previous section.
 |
Just a final word before we wrap up. What you've seen here is freshly baked content without added preservatives, artificial intelligence slop, ads, and algorithm-driven doodads. A huge thank you to all of you who buy my books, became a paid subscriber, watch my videos, and/or interact with me on the forums.
Your support keeps this site going! 😇


:: Copyright KIRUPA 2026 //--