 Changing
Stacking Order
(swapDepth)
Changing
Stacking Order
(swapDepth)
by
kirupaA common
misconception is that the vertical "stacking" order of
objects in Flash is determined by which layer the object is
in. The objects in the bottom layer will always be below an
object near a higher layer. If you are one of those who
believes in that myth, your whole perception of what is real
and what is imaginary is going to change. It is possible to
adjust the stacking order of objects in Flash.
"We hold these truths
to be self evident that the stacking order of objects can
be changed by following Kirupa's tutorial".
If you are not big on classic
American historical quotes, the following example might
help:
| |
|
|
|
[ click and drag any of
the windows; notice how the selected window goes on top
] |
While I could tell you to
create the interface from scratch like some of those "other"
sites, I am going to be kind enough to provide an incomplete
FLA for you to download.
Here is
how to change the stacking order:
-
Make sure you open the file
swapwindow.fla that you downloaded from the
previous link. The file only contains the actions for
causing the window to be dragged; you will add the
swapDepth function yourself.
-
You should see three colored windows once you open the
animation. The windows are nothing spectacular; the
windows are in a button stored inside a movie clip. I will
explain how to the window was created near the end of the
tutorial.
-
Right click on the green window movie clip and
select "Edit In Place". You are now at the window's button
state. Right click on the green window and select Actions.
Copy and paste the following code below the other actions
found in the Object Actions window.
[ copy and paste the above
code in the Object Actions window ]
-
You will not need to add the actions to the other windows.
The code is very similar, and forcing you to add the
similar code is quite redundant. Preview the animation and
see that when the green window is dragged or clicked, it
gets focus (it goes above all other windows).
Partial
Source
Because you
downloaded the interface and partial source, I will explain
briefly how the interface was created.
- I
first created the window by drawing two rectangles and
adding a border.
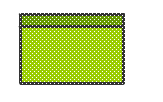
[ the window drawn in Flash ]
- I
then selected the entire window and pressed F8 (Insert |
Convert to Symbol). From the Symbol Properties dialog box,
I selected Button and pressed OK. The window is now a
button.
-
Select the window (which is now a button). Press F8 again.
From the Symbol Properties dialog box, select Movie Clip.
Press OK to close the Symbol Properties dialog box.
That is all there is to
creating the window movie clip. Why did I convert the symbol
to a button then a movie clip? As you now, the window
changed its vertical order when you clicked on the object.
Only buttons support mouse actions. The swapDepth function,
just like all Flash functions, works only when targeted to a
movie clip.
Therefore, I needed to place
the button (to support mouse actions) inside a movie clip
(to support Flash 5 Actions). That is why when you added the
Actions, you first had to right click on the green window
and select Edit In Place. You entered inside the movie clip
instance to see the button form of the green window.
The final step is to give the
movie clip a name. I gave each window a name depending on
its color. For example, the green window is coincidentally
called green! Remember that instance names can only
be given to movie clips, that is why you have to go to the
main timeline and then select the movie clip instance of the
green window to give it an instance name.
How Does the
Code Work?
The following section will basically
deconstruct how the code causes the stacking order of the
windows to be modified.
on (press, release, dragOver,
dragOut) {
_root.x +=2;
_root.green.swapDepths(_root.x);
}
The first line is the On
handler for the button. The code following this statement
will be enabled and executed when the mouse either presses,
releases, drags over, or drags out over the window. You can
access these options by going to Basic Actions | On Mouse
Event from the Object Actions window.
on (press, release, dragOver,
dragOut) {
_root.x +=2;
_root.green.swapDepths(_root.x);
}
This is a counter for the
variable x. The variable x is stored on the main timeline,
_root. Why? The value of x will constantly be updated as you
click on each panel. The +=2 is an incremental operator that
increases the value of x by 2.
If x were simply declared as x +=2, the
value of x is localized only to this movie clip. If I want
another panel to increase its stacking order in relation to
this panel, I can blindly increase the stacking position of
that panel, or, I can increase a variable stored on the main
timeline by a certain value so all movie clips are in sync.
on (press, release, dragOver,
dragOut) {
_root.x +=2;
_root.green.swapDepths(_root.x);
}
The line in blue is the most
important line contained in this block of code. It includes
the swapDepth function that enables a movie clip to change
its stacking order. Because I am referring to a movie clip
stored on the main timeline, I need to tell Flash to retrace
my steps to reach the movie clip.
_root tells Flash to
start at the main timeline to find the movie clip. The word
green is the instance name of the movie clip.
Basically, I am telling Flash to go to the very beginning
and target the movie clip green. The swapDepths (_root.x); line
tells Flash to adjust the stacking order of the movie to
whatever variable x currently is.
The higher the stacking
number, the higher up the window movie clip will be placed.
The stacking order is relational to other objects in a
surrounding area.
Downloads
Never to leave you surprised or confused,
I have provided the final source file for this tutorial. If
you still have questions, you can post them in the forum by
clicking the Message Board link below.
Conclusion
While this effect is cool and such, what
practical uses are there for this feature? Plenty! Many
sites have content that loads up in tiny modular windows.
You can modify the stacking order and display the content
that has currently be clicked on.
A great example of this feature can be found on the
following site:
Just a final word before we wrap up. If you have a question and/or want to be part of a friendly, collaborative community of over 220k other developers like yourself, post on the forums for a quick response!

|


