 Tutorials
Books
Videos
Forums
Tutorials
Books
Videos
Forums


This is an archived tutorial from the kirupa.com legacy collection. It covers software that may no longer be available, but it is kept online because the ideas still hold up.
It is fairly straightforward to animate in Flash using the timeline. With a little knowledge of programming, you can even animate movie clips that exist on your stage. What is more tricky, though, is animating movie clips that neither use the timeline nor exist on the stage. These movie clips exist solely in your Library, and this tutorial will cover how to use code to animate them.
For example, click around the following blue rectangle to see circles fade in and fade out at the location of your click:
The circles are added to the stage and animated only when your mouse is clicked, and in this tutorial, you will learn how to animate content drawn and stored in your library.
First, you will need to create a movie clip that will be loaded dynamically. For this article, simply create a solid blue circle movie clip and, in the Library, give it the class name BlueCircle. If you are not sure how to do that, the following instructions will help you out.
If you already know how to do create a circle stored in the Library with the class name BlueCircle, skip on over to the next section where you'll see the code.
The following instructions explain how to setup your movie and specify the blue circle that will be loaded dynamically.
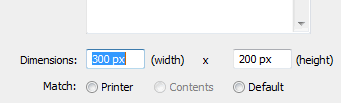
[ set your animation's width/height to 300 by 200 ]
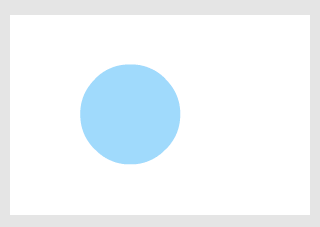
[ draw a blue, solid, filled circle ]
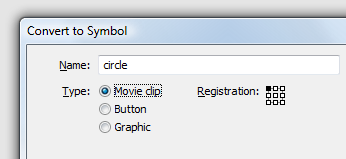
[ give your symbol the name circle and make sure it is also set to be a movie clip ]
Do not hit OK just yet. Let's make some more modifications.
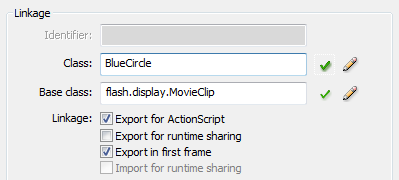
[ check 'Export for ActionScript and enter BlueCircle for your class ]
The Base class field will automatically be populated for you, but if it hasn't, make sure to enter flash.display.MovieClip as shown in the above image.
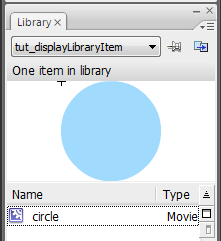
[ your circle in your Library ]
If you do not see your Library, press Ctrl + L to display it.
Ok, you should see a blank stage with your library displaying the circle movie clip with the class name BlueCircle. Right now, nothing is really being done. We'll change that in the next section when you add the code.
In the previous section you created the movie clip that we will load dynamically and animate. In this page, you will see the code that will allow you to do both of those tasks.
Right click on a keyframe in your timeline and select Actions. Copy and paste the following code into the window that appears:
function Main() {
  // Adding mouse event to our stage!
  stage.addEventListener(MouseEvent.CLICK, AddCircle);
}
Main();
function AddCircle(e:MouseEvent):void {
  // Adding a circle to the stage
  var newCircle:BlueCircle = new BlueCircle();
  this.addChild(newCircle);
  // Setting the circle's X and Y position
  newCircle.x = mouseX;
  newCircle.y = mouseY;
  // Setting the circle's scale and alpha
  newCircle.scaleX = 0;
  newCircle.scaleY = 0;
  newCircle.alpha = 0;
  // Adding ENTER_FRAME event listener
  newCircle.addEventListener(Event.ENTER_FRAME, ZoomCircle);
}
function ZoomCircle(e:Event):void {
  // Getting the clicked circle
  var circleMC:MovieClip = MovieClip(e.target);
  // Incrementing the scale
  circleMC.scaleX += .05;
  circleMC.scaleY += .05;
  // Fading circle out after it reaches a certain size
  if (circleMC.scaleX < 2) {
  circleMC.alpha += .03;
  } else {
  circleMC.alpha -= .03;
  // Stopping enter frame event after circle becomes (almost) invisible
  if (circleMC.alpha < .1) {
  circleMC.removeEventListener(Event.ENTER_FRAME, ZoomCircle);
  }
  }
}
Run your animation by pressing Ctrl + Enter. If you click anywhere in your movie, you will see circles appear that fade in and out just like in the animation on the first page.
Now that you have a working animation, let's look at the code in greater detail so that you have a better idea on how to animate dynamic movie clips.
Let's start with our Main function:
function Main() {
  // Adding mouse event to our stage!
  stage.addEventListener(MouseEvent.CLICK, AddCircle);
}
Main();
The Main function is what is called when your animation first runs. The most important (and only!) line of code in this function is where I add an event listener that listens for mouse clicks:
stage.addEventListener(MouseEvent.CLICK, AddCircle);To listen for events, you first need to assign a target to act as a listener. In this case, we are assigning our movie's stage as the listener. To be an effective listener, you also need to know what to listen for, and in the above code, we listen for MouseEvent.CLICK events.
Once you find out what you are listening to, you probably want to do something. The easiest way would be to create a function that contains the code that "does something", and in our case, we call the AddCircle function to deal with the event you overheard.
To recap, we tell our stage to listen for mouse click events, and if it overhears a click (MouseEvent.CLICK) event, call the AddCircle function.
We ended our discussion of the event listener by saying it calls the AddCircle function. Let's take a look at the AddCircle function definition first:
function AddCircle(e:MouseEvent):void {
  .
  .
  .
  .
}
Unlike other function calls, a function called by an event handler has to fit certain specific characteristics. First, it must take one (and only one!) argument of a type based on Event. Second, it cannot return any value, so its return type must be void.
Our AddCircle function meets both of those criteria. It takes one argument of type MouseEvent, and MouseEvent is based on the Event class. The function also returns nothing, so its return type is set to void.
Now, let's look at the entire AddCircle function.
function AddCircle(e:MouseEvent):void {
  // Adding a circle to the stage
  var newCircle:BlueCircle = new BlueCircle();
  this.addChild(newCircle);
  // Setting the circle's X and Y position
  newCircle.x = mouseX;
  newCircle.y = mouseY;
  // Setting the circle's scale and alpha
  newCircle.scaleX = 0;
  newCircle.scaleY = 0;
  newCircle.alpha = 0;
  // Adding ENTER_FRAME event listener
  newCircle.addEventListener(Event.ENTER_FRAME, ZoomCircle);
}
The first part deals with adding our BlueCircle and displaying it on our stage. All of that is covered extensively in the Displaying Library Content in AS3.0 tutorial, so I will not be explaining them in this tutorial. Just note that our new circle is referenced by newCircle, and also note that the initial x-scale (scaleX), y-scale (scaleY), and alpha values are set to 0.
The line that is more interesting for this tutorial is where you attach an ENTER_FRAME event listener to the newCircle movie clip:
// Adding ENTER_FRAME event listener
newCircle.addEventListener(Event.ENTER_FRAME, ZoomCircle);
The format of adding an event listener should be familiar to you by now, and what used to be onEnterFrame/enterFrame in AS2 is now Event.ENTER_FRAME. This event listener repeatedly calls the ZoomCircle function as fast your frame rate allows.
In the next section, let's continue looking at the code by starting with the ZoomCircle function.
In the previous section, we started explaining what the code does. While doing that, you learned about how to add event handlers. In this page, we'll finish our code explanation and wrap up this tutorial.
function ZoomCircle(e:Event):void {
  // Getting the clicked circle
  var circleMC:MovieClip = MovieClip(e.target);
  // Incrementing the scale
  circleMC.scaleX += .05;
  circleMC.scaleY += .05;
  // Fading circle out after it reaches a certain size
  if (circleMC.scaleX < 2) {
  circleMC.alpha += .03;
  } else {
  circleMC.alpha -= .03;
  // Stopping enter frame event after circle becomes (almost) invisible
  if (circleMC.alpha < .1) {
  circleMC.removeEventListener(Event.ENTER_FRAME, ZoomCircle);
  }
  }
}
The ZoomCircle function fits the standard formula for being a function called by an event handler. It takes in one argument of type Event, and its return type is void. The rest of the code deals with causing our circle to zoom in, so there is nothing complicated that goes on.
What is worth nothing is stopping the animation by removing the event listener we added earlier:
// Stopping enter frame event after circle becomes (almost) invisible
if (circleMC.alpha < .1) {
  circleMC.removeEventListener(Event.ENTER_FRAME, ZoomCircle);
}
To remove an event listener, you can use the removeEventListener function. The arguments you pass to removeEventListener must match the arguments you made earlier when adding the listener to you object. In other words, both the event and function called must be the same.
Knowing which object was the source of an event is very important. In our case, we need to know which movie clip held the event listener that fired the ZoomCircle function so that we can remove that event listener.
Determining the object that triggered the event can be determined by your event object's target method:
var circleMC:MovieClip = MovieClip(e.target);In the above line of code from the ZoomCircle function, I determine which movie clip called the event by checking our Event object e's target property.
e.target returns an object of type Object. Since I am interested in the movie clip version, I can cast the returned object into a movie clip by typing MovieClip(object) where object is the what you wish to typecast. In our case, the object returned by e.target is typecast into a MovieClip.
This tutorial covered a lot of ground! Hopefully you learned how to use event handlers to animate dynamic movie clips. Beyond that, knowing the details such as how to add/remove event handlers, determining the target of an event, etc. can come in quite handy.
The ENTER_FRAME event is what allows you to create smooth animations. Unlike a traditional loop, an enter frame action does not flood the internal message queuing mechanism. This means that your animation can do other things such as respond to mouse clicks, whereas a loop will freeze your application until it has run its course.
You have to use addEventListener to attach an object to an ENTER_FRAME event that will call a function. This step requires a slight reprogramming of how you may have learned to dynamically animate (see older tutorial) in ActionScript 2, but in the long run, you will find the new way to be more consistent with the syntax and style found in other programming languages.
Just a final word before we wrap up. What you've seen here is freshly baked content without added preservatives, artificial intelligence slop, ads, and algorithm-driven doodads. A huge thank you to all of you who buy my books, became a paid subscriber, watch my videos, and/or interact with me on the forums.
Your support keeps this site going! 😇


:: Copyright KIRUPA 2026 //--