 Tutorials
Books
Videos
Forums
Tutorials
Books
Videos
Forums


This is an archived tutorial from the kirupa.com legacy collection. It covers software that may no longer be available, but it is kept online because the ideas still hold up.
If you don't know what web services are, don't worry. A web service is basically a friendly, consistent face through which you can communicate to some application behind the scenes. This application can be as simple as something that returns the current time to something more complicated like a Twitter or a Facebook server.
To get more specific, a more technical term for a
"friendly, consistent face" is API. An API, which stands for
application programming interface, defines how you can
communicate between two applications that know how to speak
the API's language.
Similarly, think of the web service
as a mini-application that exposes a common language, an
API. Your application can use the common language to
communicate with the web service, and the web service will
take your message and communicate with the remote
application that is hiding behind it.
Below, you will find a simple example of a Flash application communicating with a web service to return a movie name. Keep clicking on the Click Me button to see one of ten different movie titles displayed:
[ click on the Click Me button to display a movie name returned from a web service ]
By the end of this tutorial, you will learn how to create the above application by using Flash and ActionScript 3 (AS3) to communicate with a web service. Let's roll on.
For this tutorial, make sure you have Flash CS5 as well as Flash Builder 4 installed. Trial versions of both are available on Adobe's site, so feel free to give them a whirl if you haven't had a chance.
Once you have both Flash and Flash Builder installed, download and extract the following source files to a folder on disk:
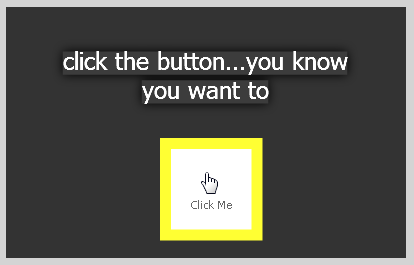
From the extracted files, open kirupa_webservice.fla in Flash CS5. your artboard will basically look as follows:
[ your artboard pretty much looks like the example you saw earlier ]
A basic UI will be displayed with a button and a textfield. There is some code associated with this document, but we'll get to that later.
The first thing we are going to do is tell Flash to load some libraries from Flash Builder. These libraries are essential to having our app communicate with a web service, but for some reason, these libraries are not incuded by Flash. Fortunately, these libraries are provided by a default Flash Builder installation, and best of all, those libraries pretty much "just work" when you tell Flash to use them.
To specify a library location, select an empty part of your artboard to deselect everything. From your Properties panel, click on the Edit button found to the right of the ActionScript 3.0 Settings property:
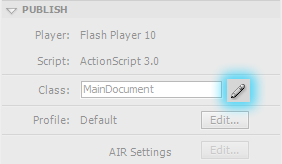
[ go ahead and edit your ActionScript settings ]
The Advanced ActionScript 3.0 Settings dialog will appear. From this dialog, make sure the Library path tab is selected:
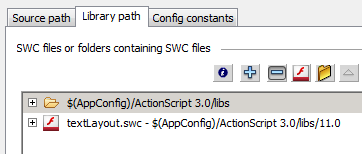
[ find your Library path settings ]
This Library path view allows you to specify additional locations Flash loads libraries from if needed. It is here that we will specify the location of the libraries installed by Flash Builder.
Go ahead and click on the Browse to Path button:
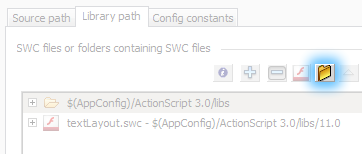
[ we'll need to browse to the location where the Flash Builder libraries live ]
Once you have clicked on the Browse to Path button, the Browse For Folder dialog will appear. In this dialog, browse to the folder where your Flash Builder libraries live. Relative to the Flash Builder installation directory, the path to the libraries folder is: \sdks\4.1.0\frameworks\libs
In case it helps, on my 64-bit Windows 7 setup, the full path to access the libraries folder is: C:\Program Files (x86)\Adobe\Adobe Flash Builder 4\sdks\4.1.0\frameworks\libs
After you have selected the libs folder, click the OK button to select this folder and to close this dialog:
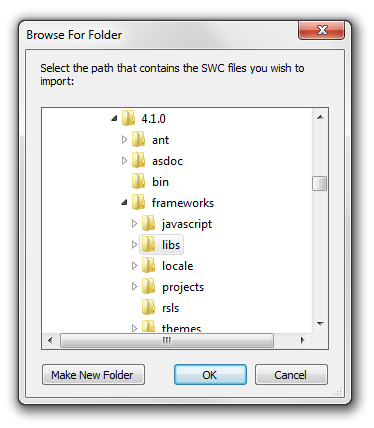
[ browse to the libs folder in your Flash Builder installation directory ]
You should now see our newly added folder path visible in the Library path tab of your Advanced ActionScript 3.0 Settings dialog:
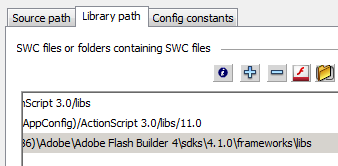
[ your libraries have now been added ]
Wohoo. By adding the path to the Flash Builder libraries, Flash now knows where to go in case you use classes that need them...which you will!
Ok, in the next section we'll get to more interesting things such as actually getting our application up and running.
In the previous section, you received a brief intro to what web services are. More importantly, you told Flash to look in the Flash Builder libraries folder for any classes that may be referenced inside them. In this page, we'll build your application and look at how communication with a web service works.
With Flash now correctly setup to deal with your project, let's go ahead and focus our eyes on the code. All of our code lives inside MainDocument.as, so ensure that document is open and currently displayed.
As you can see, some code is already provided for you inside MainDocument.as:
package
{
  import flash.display.MovieClip;
  import flash.events.MouseEvent;
  public class MainDocument extends MovieClip
  {
  public function MainDocument()
  {
  // setting up an event with an event handler
  startButton.addEventListener(MouseEvent.CLICK, SetupWebService);
  }
  function SetupWebService(event:MouseEvent):void
  {
  }
  }
}
Don't worry, the code that exists here is pretty boilerplate. These few lines of code just say, "Call the SetupWebService method when you click on the button."
Now that you know what you currently have on your plate called MainDocument.as, let's go ahead and pile some more code on.
Replace all of your code with the code you see below:
package
{
  import flash.display.MovieClip;
  import flash.events.MouseEvent;
  import mx.rpc.soap.*;
  import mx.rpc.events.*;
  import mx.rpc.AbstractOperation;
  public class MainDocument extends MovieClip
  {
  private var movieWebService:WebService;
  private var serviceOperation:AbstractOperation;
  public function MainDocument()
  {
  // setting up an event with an event handler
  startButton.addEventListener(MouseEvent.CLICK, SetupWebService);
  }
  function SetupWebService(event:MouseEvent):void
  {
  var url:String = "http://www.kirupafx.com/WebService/TopMovies.asmx?WSDL";
  movieWebService = new WebService();
  movieWebService.loadWSDL(url);
  movieWebService.addEventListener(LoadEvent.LOAD, BuildServiceRequest);
  }
  function BuildServiceRequest(evt:LoadEvent)
  {
  serviceOperation = movieWebService.getOperation("GetMovieAtNumber");
  serviceOperation.addEventListener(FaultEvent.FAULT, DisplayError);
  serviceOperation.addEventListener(ResultEvent.RESULT, DisplayResult);
  serviceOperation.send([GenerateRandomNumber(0,9)]);
  }
  function DisplayError(evt:FaultEvent)
  {
  trace("error");
  }
  function DisplayResult(evt:ResultEvent)
  {
  var movieName:String = evt.result as String;
  movieText.text = movieName;
  }
  function GenerateRandomNumber(min:int, max:int):int
  {
  return Math.floor(Math.random()*(1+max-min))+min;
  }
  }
}
The code that was there earlier is still there. I just figured copying and pasting the entire code would be easier than having you selectively paste the code that is different.
Once you have all of this code pasted, you should have everything necessary for making your application connect to a web service and return some data. Save this file and test your application by going to Control | Test Movie | Test or by pressing Ctrl + Enter.
Now that you have a working application that connects to a web service, let's understand how it all works. Before we get to the code, though, it is helpful to have an overview of what exactly happens when your application communicates with a web service.
The following six steps summarize the life of your data as it is communicated to your web service:
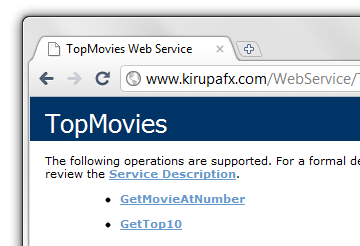
[ the list of operations this web service contains ]
Ok, now that you have a brief overview how data is communicated to and from a web service, let's look at how these six steps are mapped in the code.
In the previous section you got your application working, and you also learned the six steps of communicating with a web service. In this page, we'll look at how those six steps map to actual code.
Here comes the fun part - looking through each section of code and dissecting every sinister motive each line may be hiding.
private var movieWebService:WebService;
private var serviceOperation:AbstractOperation;
...
...
...
function SetupWebService(event:MouseEvent):void
{
  var url:String = "http://www.kirupafx.com/WebService/TopMovies.asmx?WSDL";
  movieWebService = new WebService();
  movieWebService.loadWSDL(url);
  movieWebService.addEventListener(LoadEvent.LOAD, BuildServiceRequest);
}
Let's start with the SetupWebService method, which as you saw on the first page itself, is invoked when the Click Me button is pressed. This method is responsible for helping to build the request that will be sent to your web service.
The first thing I do is declare a variable called movieWebService whose type is WebService:
private var movieWebService:WebService;This variable is initialized in the first line of the SetupWebService method where it officially becomes a WebService object:
movieWebService = new WebService();Once you have your WebService object, you can start doing all sorts of crazy things such as specifying the actual URL of your WebService and specifying the method to load once your WebService object is up and running:
var url:String = "http://www.kirupafx.com/WebService/TopMovies.asmx?WSDL";
.
.
.
movieWebService.loadWSDL(url);
movieWebService.addEventListener(LoadEvent.LOAD, BuildServiceRequest);
The loadWSDL method is what you use to specify the web service you want to connect to. The LoadEvent.LOAD event gets called when first contact with the web service is sufficiently made. Once contact is made, the BuildServiceRequest method gets called.
Let's look at BuildServiceRequest next:
function BuildServiceRequest(evt:LoadEvent)
{
  serviceOperation = movieWebService.getOperation("GetMovieAtNumber");
  serviceOperation.addEventListener(FaultEvent.FAULT, DisplayError);
  serviceOperation.addEventListener(ResultEvent.RESULT, DisplayResult);
  serviceOperation.send([GenerateRandomNumber(0,9)]);
}
The BuildServiceRequest method is responsible for taking what you started with your movieWebService object and filling in more missing details. The first thing you do is specify the web service operation you want to perform:
serviceOperation = movieWebService.getOperation("GetMovieAtNumber");The list of operations a web service contains can be found by either referring to the web service documentation or by just visiting the web service in your browser.
The operation I am interested in GetMovieAtNumber, and I pass that in to our web service's getOperation method.
Notice that I specify these alterations to the serviceOperation variable whose type is AbstractOperation. The AbstractOperation class takes over from our Web Service class to handle the remaining part of the communication.
The next thing I do is listen for some events on serviceOperation to handle both a case where everything works well and one where things don't work well:
serviceOperation.addEventListener(FaultEvent.FAULT, DisplayError);
serviceOperation.addEventListener(ResultEvent.RESULT, DisplayResult);
Notice that the events are FaultEvent.FAULT and ResultEvent.RESULT, and they are associated with the event handler DisplayError and DisplayResult respectively.
One of these events will fire when the request is sent off to the web service, and that is handled by the following line:
serviceOperation.send([GenerateRandomNumber(0,9)]);The send method on the serviceOperation object is responsible for sending our web service request off. It is in this method that you can pass in any arguments your web service operation may require.
If your web service operation requires no arguments, you could just do the following:
serviceOperation.send();If your web service operation requires one argument, you could just get away by passing that one argument plainly:
serviceOperation.send(5);If your web service operation requires 1 or more arguments, you can do what I did in the example and use array syntax such as [value1, value2, value3,..., valueN]:
serviceOperation.send([5, "Kirupa", "Blue"]);The GetMovieAtNumber operation does require one argument, and that is why you see what you see. The GenerateRandomNumber function returns a random number between 0 and 9, and its code is documented in my earlier Random Numbers in Flash tutorial.
With this line, your web request gets sent. After your web request gets sent, you wait for a response from the server. If the response back returns an error, the FaultEvent.FAULT will get fired, and the DisplayError method will get called.
Since I went there, let's look at the DisplayError method next:
function DisplayError(evt:FaultEvent)
{
  trace("error");
}
As you can see, this method is very simple in my implementation. If there is an error, just tell me that there is an error.
To get more detailed information about the error, just access the passed in FaultEvent object's fault, message, messageID, or statuscode properties.
To end on a positive note, let's now look at the case when your request is successfully sent and received. In this case, the ResultEvent.RESULT event gets fired, and that calls the DisplayResult method:
function DisplayResult(evt:ResultEvent)
{
  var movieName:String = evt.result as String;
  movieText.text = movieName;
}
The most important thing to know when handling the ResultEvent.RESULT event is that the data that gets returned is in your event's result property:
var movieName:String = evt.result as String;Once you have access to the value stored by the result property, you are done! In my case, I simply assign the value to the movieText text field that I have on my stage.
Phew - that was quite the trip. Hopefully this tutorial helped you to understand how to use Flash and ActionScript 3 to connect to a web service. The only slightly tricky part is getting Flash to recognize the Flash Builder libraries. Once you have done that, everything else is just putting the six steps to communicating with a web service into code.
If you want to see my final source code, download it from below:
Just a final word before we wrap up. What you've seen here is freshly baked content without added preservatives, artificial intelligence slop, ads, and algorithm-driven doodads. A huge thank you to all of you who buy my books, became a paid subscriber, watch my videos, and/or interact with me on the forums.
Your support keeps this site going! 😇


:: Copyright KIRUPA 2026 //--