 Tutorials
Books
Videos
Forums
Tutorials
Books
Videos
Forums


This is an archived tutorial from the kirupa.com legacy collection. It covers software that may no longer be available, but it is kept online because the ideas still hold up.
A popular effect that you can add to your applications is a mouse trail. In case you are not familiar with them, mouse trails are nothing more than some content that follows your mouse around the screen. What makes them a little different from a standard "follow mouse" effect is that they often trail your mouse movement by a few milliseconds.
This has the effect of providing you with the illusion of your mouse cursor leaving behind a trail of where it has been in the past. The following is an example of what you will be creating in this tutorial:
[ click on the Click Me text and move your mouse around ]
If you notice the title of this tutorial, it isn't simply Mouse Trail. We already have a tutorial on that here written by Syko. No, what we have a is a dynamic mouse trial. This means that your trail is not made up of preexisting content that lives on your stage. Instead, your trail gets dynamically generated and disposed as your mouse is moving around the stage.
First, you will need to create a movie clip. For this article, simply create a solid blue circle movie clip and, in the Library, give it the class name ColorfulCircle. If you don't know how to do that, feel free to read the detailed instructions below. Otherwise, jump on over to the next section!
The following instructions explain how to setup your movie and specify the blue circle:
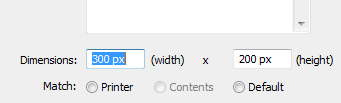
[ set your animation's width/height to 300 by 200 ]
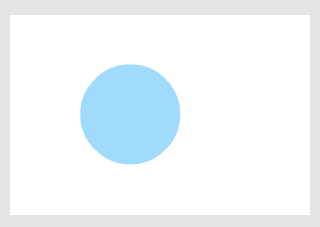
[ draw a blue, solid, filled circle ]
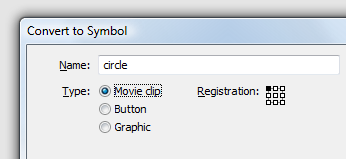
[ give your symbol the name circle and make sure it is also set to be a movie clip ]
Do not hit OK just yet. Let's make some more modifications.
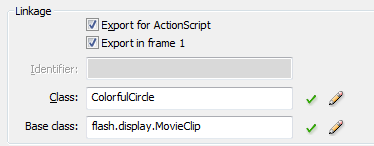
[ check 'Export for ActionScript and enter BlueCircle for your class ]
The Base class field will automatically be populated for you, but if it hasn't, make sure to enter flash.display.MovieClip as shown in the above image.
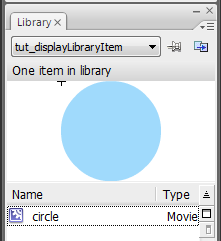
[ your circle in your Library ]
If you do not see your Library, press Ctrl + L to display it.
At this point, you should see a blank stage with your Library displaying the circle movie clip with the class name ColorfulCircle. Right now, nothing is really being done. Let's fix that...in the next section!
In the previous section, you drew a circle and converted it into a movie clip whose class name is ColorfulCircle. It might not make a lot of sense why that is relevant, but you'll see in this page.
What we are going to do next is add some code that will cause the circle movie clip we just created to appear as we move our mouse. To do this, go back to your timeline. You should see just one layer with one blank keyframe:
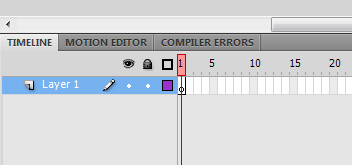
[ you will be adding some code to a blank keyframe ]
Right click on that keyframe and select Actions from the menu that appears, select Actions. Once you have selected Actions, the Actions window will appear. Copy and paste the following code:
function duplicateCircle(e:MouseEvent) {
  var xPosition:Number=stage.mouseX;
  var yPosition:Number=stage.mouseY;
  var scaleFactor:Number=.5;
  var circle:ColorfulCircle = new ColorfulCircle();
  circle.x=xPosition;
  circle.y=yPosition;
  circle.scaleX=scaleFactor;
  circle.scaleY=scaleFactor;
  this.addChild(circle);
}
function startListening() {
  stage.addEventListener(MouseEvent.MOUSE_MOVE, duplicateCircle);
}
startListening();
Don't worry about what this code does just yet. In time, I will explain in detail what each line of code does and how it contributes to the final effect you will soon fully create.
Getting back on track, if you test your application by pressing Ctrl + Enter and moving your mouse around the Flash player window, you will see something that looks like the following:
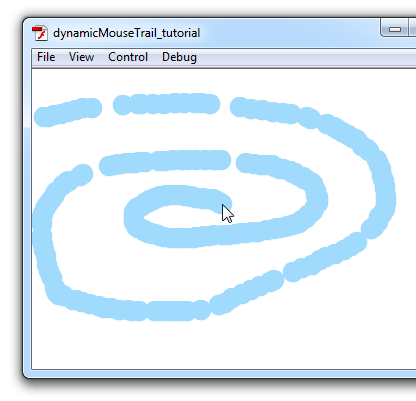
[ you have a mouse trail...literally ]
To look at the positve side first, you have a mouse trail. The circle you drew earlier and made into a movieclip is now being displayed at all the various locations your mouse has been. What we need to do is make each circle transition in and disappear once it is finished. Let's look at that next.
As you recall, you defined a class name called ColorfulCircle when you made your blue circle into a movie clip. When you run your application, the actual class is created for you by default. That allows you to get away with not explicitly defining the class, but you can't run away from that this time around.
In order to have your blue circles that appear at mouse point transition in and disappear, you are going to have to add some code that will live inside the ColorfulCircle class. You will have to override the default behavior by creating your own copy of the ColorfulCircle class that Flash will read instead of creating one automatically.
This is pretty straightforward. From Flash, go to File | New to display the New Document window. From this window, select ActionScript file and press the OK button:
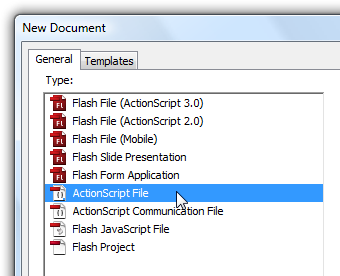
[ select the ActionScript file type from New Document ]
Once you have clicked OK, the New Document window will disappear, and your Flash drawing area will now be replaced by what is essentially a large code editor.
Before we proceed any further, let's save this file. Go to File | Save, navigate to the folder where your current Flash project is, change the current default filename to ColorfulCircle.as, and hit the Save button. A ColorfulCircle.as file will now be created in the same location as your dynamicMouseTrail.fla:
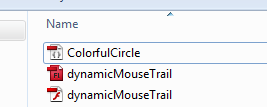
[ save your ColorfulCircle.as file in the same location as your dynamicMouseTrail.fla ]
Great. We just created our ColorfulCircle.as file. Now, its time for us to add some code to make all of this work. With your ColorfulCircle.as file open in Flash, copy and paste the following code into it:
package {
  import flash.display.*;
  import flash.events.*;
  import flash.geom.ColorTransform;
  public class ColorfulCircle extends MovieClip {
  var speed:Number;
  public function ColorfulCircle() {
  speed=.01+.02*Math.random();
  this.alpha = .5;
  SetRandomColor();
  this.addEventListener(Event.ENTER_FRAME, FadeCircleOut);
  }
  private function FadeCircleOut(e:Event) {
  this.alpha-=.5*speed;
  this.scaleX+=5*speed;
  this.scaleY+=5*speed;
  if (this.alpha<0) {
  this.removeEventListener(Event.ENTER_FRAME, FadeCircleOut);
  parent.removeChild(this);
  }
  }
  private function SetRandomColor() {
  var colorArray:Array = new Array(0xFFFF33, 0xFFFFFF, 0x79DCF4, 0xFF3333, 0xFFCC33, 0x99CC33);
  var randomColorID:Number = Math.floor(Math.random()*colorArray.length);
  var myColor:ColorTransform = this.transform.colorTransform;
  myColor.color=colorArray[randomColorID];
  this.transform.colorTransform = myColor;
  }
  }
}
After you have pasted all of the above code, run your application again by pressing Ctrl + Enter. This time around, notice that happens as you move your mouse around the Flash Player window:
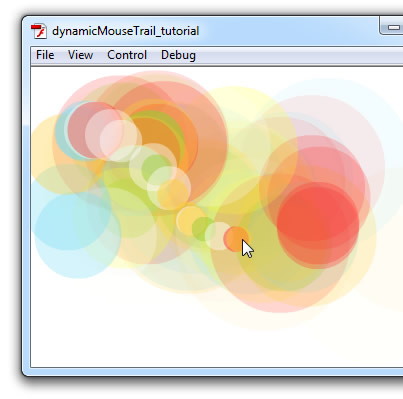
[ the circles....they are alive! ]
Wohoo! Your animation now works. Your animation working is just (albeit big) hurdle for you to cross. The bigger, more important one is knowing why the animation works the way it does. So let's dive into our code and see what is going on...in the next section/a>!
In the previous section, you copied and pasted all of the code needed to make your mouse trail to work. In this page, let's start to look at why the code works the way it does.
Let's start by looking at the code we pasted first into the first frame of our Flash file:
function duplicateCircle(e:MouseEvent) {
  var xPosition:Number=stage.mouseX;
  var yPosition:Number=stage.mouseY;
  var scaleFactor:Number=.1;
  var circle:ColorfulCircle = new ColorfulCircle();
  circle.x=xPosition;
  circle.y=yPosition;
  circle.scaleX=scaleFactor;
  circle.scaleY=scaleFactor;
  this.addChild(circle);
}
function startListening() {
  stage.addEventListener(MouseEvent.MOUSE_MOVE, duplicateCircle);
}
startListening();
Going from what gets called first:
function startListening() {
  stage.addEventListener(MouseEvent.MOUSE_MOVE, duplicateCircle);
}
startListening();
The first line of code that gets called is startListening. This function contains only one line of code that registers an event listener on our stage. This event listener associates the MouseEvent's MOUSE_MOVE event with an event handler (function) called duplicateCircle. This means that each time your mouse moves over your stage, the duplicateCircle function gets called.
Let's look at duplicateCircle next:
function duplicateCircle(e:MouseEvent) {
  var xPosition:Number=stage.mouseX;
  var yPosition:Number=stage.mouseY;
  var scaleFactor:Number=.1;
  var circle:ColorfulCircle = new ColorfulCircle();
  circle.x=xPosition;
  circle.y=yPosition;
  circle.scaleX=scaleFactor;
  circle.scaleY=scaleFactor;
  this.addChild(circle);
}
Because duplicateCircle is a function designated as an event handler, it takes one argument whose type is MouseEvent. If you recall from a few seconds ago, it is the MouseEvent.MOUSE_MOVE event you are listening for, so it all makes sense that duplicateCircle takes an argument that is of type MouseEvent as well.
var xPosition:Number=stage.mouseX;
var yPosition:Number=stage.mouseY;
var scaleFactor:Number=.5;
These three lines are pretty straighforward. I am declaring three variables of type Number. xPosition and yPosition store the current X and Y position of the mouse, and scaleFactor simply stores a number that you define.
var circle:ColorfulCircle = new ColorfulCircle();
circle.x=xPosition;
circle.y=yPosition;
circle.scaleX=scaleFactor;
circle.scaleY=scaleFactor;
The next set of lines deal with initializing your ColorfulCircle object called circle and setting default properties on it. The ColorfulCircle object is based on the circle you converted into a movie clip on the first page. When this line gets called, it is that circle that you drew that is being talked about because you set its class name to ColorfulCircle. Small world, isn't it?
Notice that the three variables you saw a few moments ago are being put to good use:
var circle:ColorfulCircle = new ColorfulCircle();
circle.x=xPosition;
circle.y=yPosition;
circle.scaleX=scaleFactor;
circle.scaleY=scaleFactor;
The initial X and Y position of your circle object are based on the X and Y positions of your mouse as stored in the xPosition and yPosition variables. The horizontal and vertical scale are set by the scaleFactor variable you saw earlier as well.
this.addChild(circle);At the end of previous section of code, you have in-memory a representation of a single instance of your ColorfulCircle movie clip with the X, Y, and Scale values set. To actually visualize that movie clip on the screen, you need to add it to your visual tree. That is done by calling the addChild method with the object you want to add passed in as an argument.
Ok, we just finished up looking at the code that causes your circle to appear where your mouse cursor is. Let's next look at the code that lives inside the ColorfulCircle class file that is responsible for creating the cool transition that you see....in the next section!
In the previous section, we started dissecting our code and seeing what it does. In this page, we continue doing that by looking at the code contained inside our ColorfulCircle ActionScript file.
All of the relevant code inside ColorfulCircle.as is:
var speed:Number;
public function ColorfulCircle() {
  speed=.01+.02*Math.random();
  this.alpha = .5;
  SetRandomColor();
  this.addEventListener(Event.ENTER_FRAME, FadeCircleOut);
}
private function FadeCircleOut(e:Event) {
  this.alpha-=.5*speed;
  this.scaleX+=5*speed;
  this.scaleY+=5*speed;
  if (this.alpha<0) {
  this.removeEventListener(Event.ENTER_FRAME, FadeCircleOut);
  parent.removeChild(this);
  }
}
private function SetRandomColor() {
  var colorArray:Array = new Array(0xFFFF33, 0xFFFFFF, 0x79DCF4, 0xFF3333, 0xFFCC33, 0x99CC33);
  var randomColorID:Number = Math.floor(Math.random()*colorArray.length);
  var myColor:ColorTransform = this.transform.colorTransform;
  myColor.color=colorArray[randomColorID];
  this.transform.colorTransform = myColor;
}
Let's start with the constructor...
public function ColorfulCircle() {
  speed=.01+.02*Math.random();
  this.alpha = .5;
  SetRandomColor();
  this.addEventListener(Event.ENTER_FRAME, FadeCircleOut);
}
Each time you create a new ColorfulCircle object, the code here gets called first. The first two lines are pretty straightforward:
speed=.01+.02*Math.random();
this.alpha = .5;
In the first line, I initialize my speed variable to be a ridiculously small random number. To get an idea of how small the number is, check out the trace from a few milliseconds of moving my mouse over the stage:
0.021233746903017166
0.016180226318538188
0.02926292160525918
0.018550447933375836
0.010719764912500977
0.019038971839472653
0.021952664144337178
0.012964947670698166
0.01569134642370045
0.01394037482328713
0.017277858732268215
0.011107641505077481
0.029695940371602773
0.012146786861121655
In the second line, I set the transparency (alpha) of our circle to a fixed value of .5. Remember that alpha goes from 0 to 1, so .5 means it is about 50% visible.
The next two lines are:
SetRandomColor();
this.addEventListener(Event.ENTER_FRAME, FadeCircleOut);
The first line calls the SetRandomColor() function. I am not going to describe SetRandomColor because the code for that is explained in far greater detail in my Random Colors in AS3 tutorial.
In the next line, I am simply binding the Event.ENTER_FRAME event to the FadeCircleOut event handler. At each frame tick, the FadeCircleOut function will be called.
Speaking of FadeCircleOut, let's go ahead and look at that next:
private function FadeCircleOut(e:Event) {
  this.alpha-=.5*speed;
  this.scaleX+=5*speed;
  this.scaleY+=5*speed;
  if (this.alpha<0) {
  this.removeEventListener(Event.ENTER_FRAME, FadeCircleOut);
  parent.removeChild(this);
  }
}
Like I mentioned a few moments earllier, FadeCircleOut is called at each frame tick because it is the event handler for the Event.ENTER_FRAME event. All of the code here is what is responsible for showing the transition.
The first three lines fade out the circle while making it larger at the same time:
this.alpha-=.5*speed;
this.scaleX+=5*speed;
this.scaleY+=5*speed;
Fading out is handled by decreasing the alpha property, and making it larger is handled by the scaleX and scaleY properties. Notice that my speed variable that you initialized in the constructor earlier is being used again.
The last chunk of code we will look at is:
if (this.alpha<0) {
  this.removeEventListener(Event.ENTER_FRAME, FadeCircleOut);
  parent.removeChild(this);
}
You can look at the code here as being the exact opposite of the constructor. When the circle becomes invisbile (alpha less than 0), I first kill our event listener that associates the ENTER_FRAME event with the FadeCircleOut event handler. Next, I remove this circle from the visual tree by calling parent.removeChild(this).
This is actually quite important because having items clog up your visual tree, which is very easy to do very quickly when you are adding items on a simple MOUSE_MOVE, it is important to optimize where you can.
There was a lot of code we covered in the preceding pages, and when focusing on lines and chunks of code, the big picture may get lost. Much like a 30-second summary of popular movies reenacted by bunnies, I am going to provide you with a quick overview of all of the code in one paragraph.
You first created a movie clip and linked it to the ColorfulCircle class. In the first frame of your Flash file, you have some code that does nothing but place these ColorfulCircle movie clip instances at the various locations your mouse has been. That is done by simply listening for the MOUSE_MOVE event and placing a movie clip at the X and Y position the event took place.
The actual task of having the circles look cool and transition out is handled entirely by the ActionScript file representing ColorfulCircle, ColorfulCircle.as. It is the code contained here that is responsible for making each circle mouse trail look cool. More importantly, the code here is also responsible for removing the circle once it is no longer needed.
Yay, you are done with this tutorial. Programmatic animations is one of my favorite things to do in Flash, and dynamically generating the things that get animated makes for some really cool effects - such as the mouse trail you created so far.
To see how my example turned out, download the source files below.
Just a final word before we wrap up. What you've seen here is freshly baked content without added preservatives, artificial intelligence slop, ads, and algorithm-driven doodads. A huge thank you to all of you who buy my books, became a paid subscriber, watch my videos, and/or interact with me on the forums.
Your support keeps this site going! 😇


:: Copyright KIRUPA 2026 //--
