This is an archived tutorial from the kirupa.com legacy collection. It covers software that may no longer be available, but it is kept online because the ideas still hold up.
The scrollpane is a very useful component that comes included with Flash Professional 8. This component allows you to display content in a viewing area, and if the content is larger than the viewing area, you get scrollbars with which you can move the content around. Using the scrollpane is easy for static movie clips or content stored on your stage or in the library. It is certainly a lot easier to use than making your own!
Note - Flash Professional 8
Because this tutorial requires the ScrollPane component, you need to use Flash Professional 8 instead of the regular version of Flash.
When you want to use a scrollpane for dynamic movie clips, though, things can get a bit tricky. That is where this tutorial comes in, but before I get to that, take a look at the following you will create by the end of this tutorial. In the example, keep pressing the plus/minus arrows to see items being added/removed from the scrollpane. Notice that the scrollpane's scrollbars appear when the number of items becomes greater than the height of the viewing area.
[ click on the plus/minus buttons to add/remove items from the scrollpane ]
By the end of this tutorial, you will have learned how to re-create the above functionality. Because much of the tricks employed deal with the code and some empty movie clips, I have provided a partial source file containing the main UI elements that you can re-use instead: Download Partial Source
Note - Kirupa's Blog Article on this Topic
For a more concise, non-tutorial explanation of how to use dynamic movie clips using the scrollpane component, check out Kirupa's blog post.
In the following sections, I will first explain how to re-create the above animation. Then I will go through and explain what each line of code accomplishes so that you have a better understanding of why loading dynamic movie clips into a scrollpane works the way it does.
In the previous section you got to play around with an animation I created that loaded dynamic movie clips into a scrollpane. In this page, let's work on creating that animation on your computer.
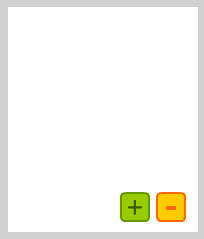
[ you should see a blank stage with a few buttons displayed ]
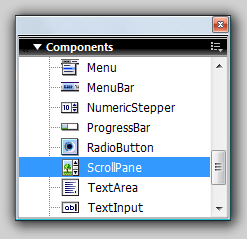
[ find the ScrollPane component ]
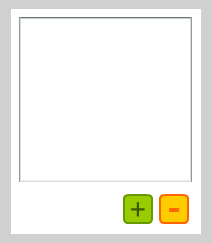
[ how your stage looks after dragging and dropping your scrollpane component ]
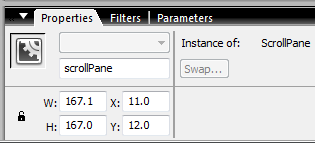
[ give your scrollpane the instance name scrollPane ]
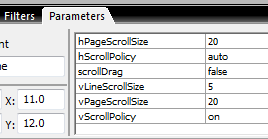
[ from the Parameters tab the vScrollPolicy to on ]
Ok, we are now done modifying the
scrollpane component. Now, make sure your Library panel
is displayed. Go to Windows | L (press Ctrl + L) to
display the Library panel if it isn't already displayed.
Right click on an empty part of your library and select
the New Symbol item from the pop-out menu:
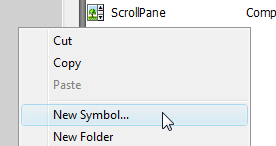
[ select New Symbol after right clicking on an empty part of a Library ]
The Create New Symbol window will
appear. Give your symbol the name scrollMovieClip.
From the same window, click the Advanced button and
check the box for Export for ActionScript.
You will notice that the Linkage Identifier text field
is automatically filled in with the scrollMovieClip text:
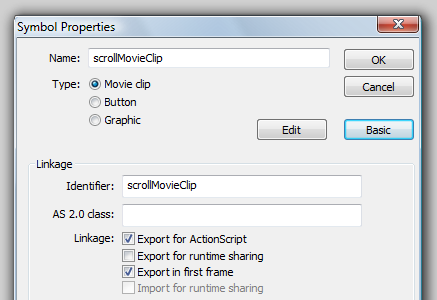
[ set your new symbol's Name and Identifier to scrollMovieClip ]
Press OK to accept the changes and close the Symbol Properties window. Note that you just created a movie clip with no real content inside it. It just has the name and Identifier set to scrollMovieClip.
We are almost done. In the next section, we will add some code that makes all of these UI elements work well together.
In the previous section you started adding things to the partial source. The interface of your animation should be complete, so this page covers all that remains - the code.
With our scrollpane component setup and
our empty movie clip created, it's time to add some
code. In the timeline, right-click on the first frame
and select Actions. The Actions window should appear.
Copy and paste the following code into the window:
var i:Number=0;
var mcMain:MovieClip;
function init() {
  //empty movie clip in library with linkage name "scrollMovieClip"
  scrollPane.contentPath = "scrollMovieClip";
  mcMain = scrollPane.content;
  trace(mcMain);
}
init();
btnAdd.onRelease = function() {
  //attaching blueMovie to the content location stored in mcMain
  mcMain.attachMovie("blueMovie", "blue"+i, mcMain.getNextHighestDepth(), {_y:50*i+5, _x:5});
  i++;
  scrollPane.invalidate();
};
btnRemove.onRelease = function() {
  if (i != 0) {
  i--;
  removeMovieClip(mcMain+".blue"+i);
  scrollPane.invalidate();
  }
}
Test your animation by pressing Ctrl + Enter. Notice that when you press the plus/minus buttons, shapes are automatically added or removed from the scene.
Ok, now that you have your own version of the scrollpane working, let's take a look at the code in greater detail so that you have an idea of why the animation works the way it does.
The following sections will go through each line of code and explain its significance to the overall animation:
var i:Number=0;
var mcMain:MovieClip;
I first declare two variables that I will be re-using in the movie. The variable i will store a Number value and the mcMain variable will store a MovieClip object.
function init() {
  //empty movie clip in library with linkage name "scrollMovieClip"
  scrollPane.contentPath = "scrollMovieClip";
  mcMain = scrollPane.content;
}
init();
The init function takes care of some initial housework before the rest of the code kicks in. I declare the init function and call it a few lines later.
scrollPane.contentPath = "scrollMovieClip";We finally get to the interesting stuff...the first line of code inside our init function! In this line of code, we set the scrollPane's contentPath property to that of the empty movie clip, scrollMovieClip, we created earlier.
To dig deeper, the scrollpane internally scrolls a movie clip. That movie clip needs to be defined somehow, and we can do that by setting the contentPath of the scrollpane to that of an external SWF file or a movie clip stored in the library. So in this case, the empty scrollMovieClip stored in the library becomes the movie clip used by the scrollpane.
mcMain = scrollPane.content;In this line, I set our mcMain variable I declared earlier to the movie clip used by the scrollpane. The scrollpane's internal movieclip, like I mentioned earlier, is scrollMovieClip as set by the scrollpane's contentPath property.
What mcMain refers to, though, is not scrollPane.scrollMovieClip as what one might expect! What it actually holds is the path to the movieclip at: _level0.scrollPane.spContentHolder.
spContentHolder is the name given to the movieclip stored inside our scrollPane. Our earlier use of scrollMovieClip from the library will no longer be used, even though spContentHolder refers to the same movie clip as scrollMovieClip.
There is more code that needs to be explained, so onwards to the next section!
In the previous section you added some code and started explaining how the code works. In this page, I will wrap up the code explanation and the tutorial.
btnAdd.onRelease = function() {
  //attaching blueMovie to the content location stored in mcMain
  mcMain.attachMovie("blueMovie", "blue"+i, mcMain.getNextHighestDepth(), {_y:50*i+5, _x:5});
  i++;
  scrollPane.invalidate();
};
btnRemove.onRelease = function() {
  if (i != 0) {
  i--;
  removeMovieClip(mcMain+".blue"+i);
  scrollPane.invalidate();
  }
}
The above two sections of code are linked to the onRelease handlers of the add and remove buttons that add or remove items from our scrollpane. Much of this code only deals with attaching a movieclip or removing a movieclip.
To attach a movieclip, I use the following code:
mcMain.attachMovie("blueMovie", "blue"+i, mcMain.getNextHighestDepth(), {_y:50*i+5, _x:5});The interesting thing to note is that I am attaching the movie blueMovie into the location referenced by the mcMain movieclip. The depth of the newly attached movie clip is also relative to the mcMain movie clip as shown by:
mcMain.getNextHighestDepth()Be sure to also notice how I am using the i variable to act as a pointer to the next location for the next movie clip. I am not going to dwell too much on the intricacies of the attachMovie function, for I will save that for a future tutorial.
What is relevant is this line of code found after both the attachMovie and removeMovieClip functions in both the btnAdd and btnRemove functions:
scrollPane.invalidate();The scrollPane's invalidate method repaints/refreshes the scrollpane. This ensures that our scrollbars and scrollbuttons are displayed and up-to-date on how far they need to scroll. If you do not call the invalidate method, you will see the blueMovie movieclips being added to your scrollpane, but you will not see the scrollbars appear when the number of movie clips exceeds the boundaries of the scrollpane itself.
Hopefully this tutorial helps you to better use the scrollpane component. Most of the Adobe documentation deals with other uses of the scrollpane such as using it to load external movies, so be sure to check their excellent scrollpane articles here.
I have provided the final source file that you can use to see how my implementation I explained in this tutorial works:
Just a final word before we wrap up. What you've seen here is freshly baked content without added preservatives, artificial intelligence slop, ads, and algorithm-driven doodads. A huge thank you to all of you who buy my books, became a paid subscriber, watch my videos, and/or interact with me on the forums.
Your support keeps this site going! 😇


:: Copyright KIRUPA 2026 //--