 Tutorials
Books
Videos
Forums
Tutorials
Books
Videos
Forums


This is an archived tutorial from the kirupa.com legacy collection. It covers software that may no longer be available, but it is kept online because the ideas still hold up.
Every year during Christmas time, unsurprisingly, the falling snow tutorial is one of the most popular tutorials on the site. In case you don't know what exactly it is, click on the Let It Snow banner in the below movie:
Once you have clicked on the Let It Snow banner, you'll see a fair number of snow-like circles oscillating as they fall to the ground....just like real snow!
This effect is something that has been covered on the site extensively over the years, but this one is newer and shinier. It is newer and shinier because, in this tutorial, you will learn how to implement the snow effect using ActionScript 3 in Flash CS4 instead of something older.
So what are you waiting for? Let's get started!
Let's start at the very beginning and work our way up:
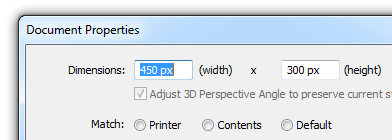
[ set your animation's width/height to 450 by 400 ]
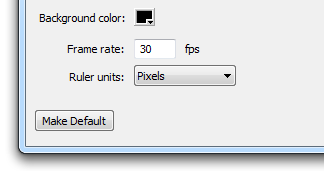
[ since you are already here, set the frame rate to 30 ]
The animation size, background color, and frame rate are the only things that you will need to change from the Document Properties dialog. Once you have made these changes, go ahead and click OK to commit the changes and to close the dialog.
Your stage will now look as follows:

[ wow, this is a work of art ]
With your stage setup, let's move on to the bigger piece that is creating the SnowFlake movie clip.
Each circle that you see falling down is a movie clip with a class file associated with it. If the preceding sentence did not make a lot of sense to you, I strongly suggest you read my earlier Classes and Movie Clips article before continuing on.
What we are going to do now is draw a circle, make it into a movie clip, and edit the movie clip's properties to require a class file be used for defining its functionality.
Let's get started:
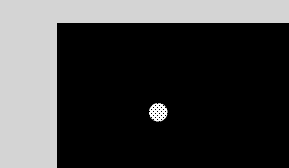
[ this circle will be your snowflake ]
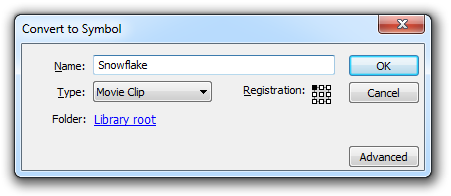
[ conver the circle into a movie clip symbol ]
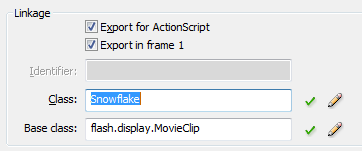
[ we want to have a class file assocated with this circle ]
Once you have checked that box, a few more fields will be autocompleted for you. Notice that the Class name is listed as Snowflake. That will come in handy in a little bit.
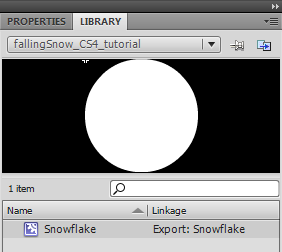
[ your library will now display your movie clip ]
Ok, this seems like a good place to take a small break. In the next section, we'll create the class file that links the movie clip you created with the code that will power it.
In the previous section, you setup your stage and created the Snowflake movie clip. In this page, let's create the class file the movie clip will refer to.
Ok, let's create this class file once and get it over with:
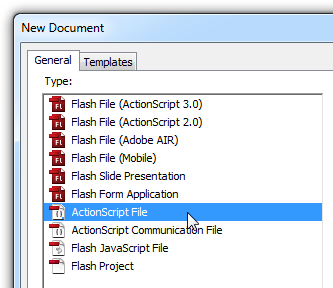
[ create a new ActionScript File ]
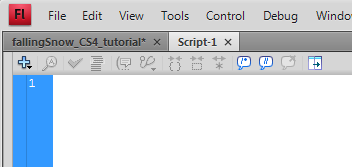
[ the blank code editor represents your class file ]
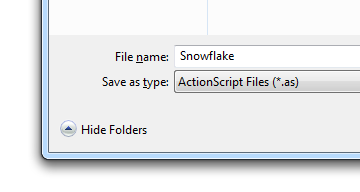
[ gives this class file the name Snowflake - with the capital 'S' ]
Note, it is extremely important that you save your Snowflake ActionScript file in the same directory your Flash source file is in. For example, here is my directory where the FLA file and the AS file are stored:
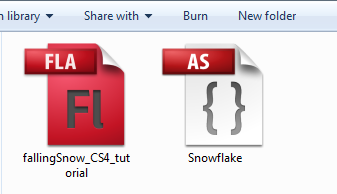
[ the FLA and the AS file are in the same folder - such a happy family ]
package
{
  import flash.display.*;
  import flash.events.*;
  public class Snowflake extends MovieClip
  {
  private var xPos:Number = 0;
  private var yPos:Number = 0;
  private var xSpeed:Number = 0;
  private var ySpeed:Number = 0;
  private var radius:Number = 0;
  private var scale:Number = 0;
  private var alphaValue:Number = 0;
  private var maxHeight:Number = 0;
  private var maxWidth:Number = 0;
  public function Snowflake()
  {
  SetInitialProperties();
  }
  public function SetInitialProperties()
  {
  //Setting the various parameters that need tweaking
  xSpeed = .05 + Math.random()*.1;
  ySpeed = .1 + Math.random()*3;
  radius = .1 + Math.random()*2;
  scale = .01 + Math.random();
  alphaValue = .1 + Math.random();
  var stageObject:Stage = this.stage as Stage;
  maxWidth = stageObject.stageWidth;
  maxHeight = stageObject.stageHeight;
  this.x = Math.random()*maxWidth;
  this.y = Math.random()*maxHeight;
  xPos = this.x;
  yPos = this.y;
  this.scaleX = this.scaleY = scale;
  this.alpha = alphaValue;
  this.addEventListener(Event.ENTER_FRAME, MoveSnowFlake);
  }
  function MoveSnowFlake(e:Event)
  {
  xPos += xSpeed;
  yPos += ySpeed;
  this.x += radius*Math.cos(xPos);
  this.y += ySpeed;
  if (this.y - this.height > maxHeight)
  {
  this.y = -10 - this.height;
  this.x = Math.random()*maxWidth;
  }
  }
  }
}Wow, you covered quite a bit of ground this page. All of this has basically allowed you to have one snowflake fall. Don't worry, there is more, so let's look at how to turn your single snowflake into a mild winder storm in the next section.
In the previous section, you finished creating your Snowflake movie clip and got a single snowflake working. For the most part, you don't want to have just a single snowflake falling. You will want more, and there are two ways you can have more snowflakes fall.
One way is by manually creating Snowflake movie clips, and the other way is by programmatically creating snowflakes. Let's look at how to accomplish both of them...starting with the manual approach on this page.
To create snowflakes manually, open your FLA file where you will see your single, lonely snowflake movie clip:
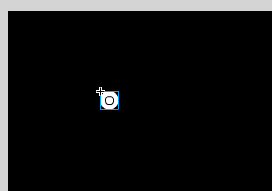
[ a singleton ]
Select your movie clip and press Ctrl + C to copy it. Once you have copied the movie clip, press Ctrl + V and paste it. You will now see another movie clip:
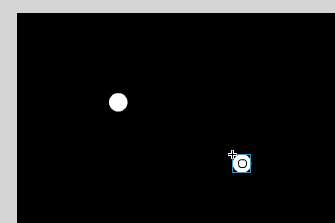
[ two of a kind ]
Two is still not enough. So keep copying, pasting, and repositioning movie clips until you have something that is worth writing home about:
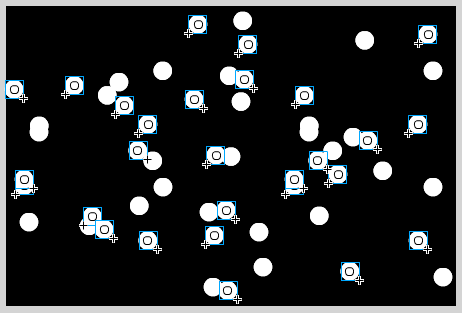
[ many two of a kinds ]
Once you have enough movie clips, press Ctrl + Enter to preview your application. Notice that now you see many snowflakes doing what they do best - falling:
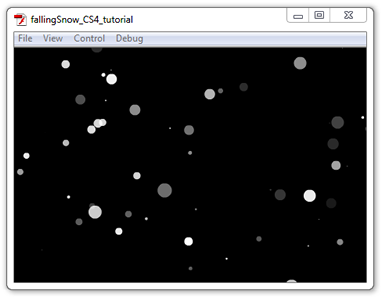
[ what you see as your output ]
Right now, you are probably very content. There may be one thing that you may not like about the final output. Notice how the snowflakes look on your stage and notice how the snowflakes look in the final version:
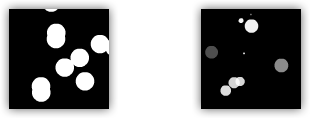
Programmatically, the snowflake you drew is randomly scaled and given a dash of transparency to make each snowflake unique. If you want precise control over the look and feel of each of your snowflakes, you don't want this. Fortunately, overriding this functionality requires commenting out (or removing) just a few lines of code.
To prevent the random sizing and alpha'ing of your snowflakes, in your Snowflake.as file, comment out or remove the highlighted lines found below:
package
{
  import flash.display.*;
  import flash.events.*;
  public class Snowflake extends MovieClip
  {
  private var xPos:Number = 0;
  private var yPos:Number = 0;
  private var xSpeed:Number = 0;
  private var ySpeed:Number = 0;
  private var radius:Number = 0;
  private var scale:Number = 0;
  private var alphaValue:Number = 0;
  private var maxHeight:Number = 0;
  private var maxWidth:Number = 0;
  public function Snowflake()
  {
  SetInitialProperties();
  }
  public function SetInitialProperties()
  {
  //Setting the various parameters that need tweaking
  xSpeed = .05 + Math.random()*.1;
  ySpeed = .1 + Math.random()*3;
  radius = .1 + Math.random()*2;
  scale = .01 + Math.random();
  alphaValue = .1 + Math.random();
  var stageObject:Stage = this.stage as Stage;
  maxWidth = stageObject.stageWidth;
  maxHeight = stageObject.stageHeight;
  this.x = Math.random()*maxWidth;
  this.y = Math.random()*maxHeight;
  xPos = this.x;
  yPos = this.y;
  this.scaleX = this.scaleY = scale;
  this.alpha = alphaValue;
  this.addEventListener(Event.ENTER_FRAME, MoveSnowFlake);
  }
  function MoveSnowFlake(e:Event)
  {
  xPos += xSpeed;
  yPos += ySpeed;
  this.x += radius*Math.cos(xPos);
  this.y += ySpeed;
  if (this.y - this.height > maxHeight)
  {
  this.y = -10 - this.height;
  this.x = Math.random()*maxWidth;
  }
  }
  }
}
Once you comment out or remove those lines of code, your final animation will now feature snowflakes that look exactly how you defined them. For just plain circles, that may not be exactly what you want, but as you will see later, changing from a circle to some other shape is fairly easy.
Anyway, this wraps up the manual approach where each snowflake was manually copied and pasted. The other approach is to programmatically generate the snowflakes, and we'll look into doing just that in the next section.
In the previous section, you learned how to create a snow flurry by manually duplicating movie clips. In this page, you will create a similar effect. The difference is that you will do that programmatically instead of manually copying and pasting.
To create snowflakes automatically, first clear your stage of any snowflakes. That means that your single solitary snowflake has to be removed as well.
[ yes, I did reuse the image from the previous section ]
What you will have now is nothing more than a black background with nothing in it. As strange as that sounds, that is exactly what we want.
Now, go over to your timeline, right click on the first frame, and select Actions (from the menu that appears). The Actions window will now be visible. Copy and paste the following code:
function makeItSnow()
{
  for (var i:int = 0; i < 100; i++)
  {
  var newSnowFlake:Snowflake = new Snowflake();
  this.addChild(newSnowFlake);
  newSnowFlake.SetInitialProperties();
  }
}
makeItSnow();
Don't test your application just yet, for there are some changes that you need to make to your Snowflake.as file. Open your Snowflake class file and delete or comment out the highlighted line:
package
{
  import flash.display.*;
  import flash.events.*;
  public class Snowflake extends MovieClip
  {
  private var xPos:Number = 0;
  private var yPos:Number = 0;
  private var xSpeed:Number = 0;
  private var ySpeed:Number = 0;
  private var radius:Number = 0;
  private var scale:Number = 0;
  private var alphaValue:Number = 0;
  private var maxHeight:Number = 0;
  private var maxWidth:Number = 0;
  public function Snowflake()
  {
  SetInitialProperties();
  }
  public function SetInitialProperties()
  {
  //Setting the various parameters that need tweaking
  xSpeed = .05 + Math.random()*.1;
  ySpeed = .1 + Math.random()*3;
  radius = .1 + Math.random()*2;
  scale = .01 + Math.random();
  alphaValue = .1 + Math.random();
  var stageObject:Stage = this.stage as Stage;
  maxWidth = stageObject.stageWidth;
  maxHeight = stageObject.stageHeight;
  this.x = Math.random()*maxWidth;
  this.y = Math.random()*maxHeight;
  xPos = this.x;
  yPos = this.y;
  this.scaleX = this.scaleY = scale;
  this.alpha = alphaValue;
  this.addEventListener(Event.ENTER_FRAME, MoveSnowFlake);
  }
  function MoveSnowFlake(e:Event)
  {
  xPos += xSpeed;
  yPos += ySpeed;
  this.x += radius*Math.cos(xPos);
  this.y += ySpeed;
  if (this.y - this.height > maxHeight)
  {
  this.y = -10 - this.height;
  this.x = Math.random()*maxWidth;
  }
  }
  }
}
Once you have commented out that line, test your application by pressing Ctrl + Enter or by going to Control | Test Movie. You will see 100 snowflakes animating and falling to the ground. Best of all, you didn't actually have to manually specify each of the 100 movie clips. They were automatically placed on the stage for you.
In this and the previous few pages, you've been exposed to a lot of code that I never explained fully how it works. Fortunately, the code presented here is not that much different from the code that you have seen in some earlier tutorials. Therefore, instead of explainining the code, I am going to point you to other tutorials that will help you out instead: Colorful Explosion, Classes and MovieClips, Trigonometric Animations. I am sure after reading those three tutorials - especially Colorful Explosion - how to programmatically animate movie clips will be made very clear.
Anyway, despite me weaseling out of explaining how the code works, you aren't done yet. In the next section, let's look at how to make some common changes and modifications to this falling snow effect.
In the previous sections, you started from scratch and created a falling snow effect. Outside of two variations in how your snowflakes get geneated, you really haven't customized your snow effect in any great form or fashion. In this page, let's look at a few of those customizations and how to go about doing them.
It should be no surprise by now that the snowflake you see is just a filled-in circle. A real snowflake looks quite a different than that, so if you wanted to change the look of your snowflake, how would you do it? You would do that by editing the look of your Snowflake movie clip itself.
In Flash, make sure your Library panel is visible. Inside your Library panel, you will only see one thing - your Snowflake movie clip:
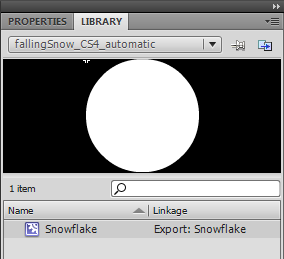
[ your Snowflake movie clip can be accessed via the Library ]
Right click on the Snowflake movie clip name and select Edit. Your stage will now be showing the contents of your Snowflake movie clip which, as I mentioned earlier, is just a circle:
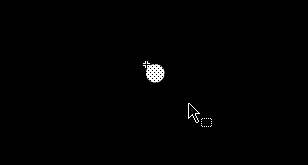
[ you are now editing the Snowflake file ]
Replace this circle with whatever element that you want. Just for kicks, I decided to replace the circle with that of the Santa Claus smiley face you have on the forums. The end result is as follows:
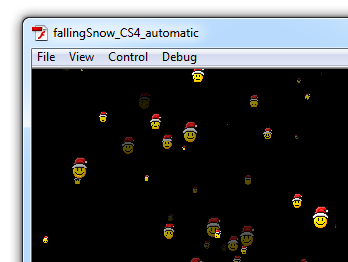
[ even I think this looks ridiculous ]
Of course, I'm hoping you'll find something a bit more tasteful to replace the white circle with haha.
A snowflake doesn't fall without some slight rotation. If you do decide to go with a non-circular snowflake, the rotation will add a really nice touch of realism to this effect. This does require some changes to be made in code. In your Snowflake class file, find the MoveSnowFlake function and add the line of code that I've highlighted below into the same location:
function MoveSnowFlake(e:Event)
{
  xPos += xSpeed;
  yPos += ySpeed;
  this.x += radius*Math.cos(xPos);
  this.y += ySpeed;
  if (this.y - this.height > maxHeight)
  {
  this.y = -10 - this.height;
  this.x = Math.random()*maxWidth;
  }
  this.rotation += xSpeed;
}
Once you have added this line of code, you will find that your snowflake will slowly rotate as it is heading towards the ground.
The final customization I will explain is how to add more snowflakes. For the manual case, you know how to do that easily - you just copy and paste in a few more snowflakes. For the automatic case, you will have to change a number that indicates how many snowflakes you want.
You copied and pasted some code that looks like the following:
function makeItSnow()
{
  for (var i:int = 0; i < 100; i++)
  {
  var newSnowFlake:Snowflake = new Snowflake();
  this.addChild(newSnowFlake);
  newSnowFlake.SetInitialProperties();
  }
}
makeItSnow();
In that code, change the highlighted numberf from 100 to whatever number you want. This number specifies the number of snowflakes you will have in your snow shower. Do note that having a large number of snowflakes will cause high CPU usage on even the fastest of machines.
Well, that's all there is to creating your own falling snow effect. As you can see, this is one of those effects that is more code heavy than design heavy. All you did was draw a circle and convert it into a movie clip. All of the remaining magic was performed using the ActionScript code that you copied and pasted. Hopefully the tutorials I referred to earlier help decipher how the code actually work to do what you see.
In case you are curious to see how my version of the falling snow effect looks like, the following Zip file contains both the manual as well as automatic approaches for generating a snow storm:
Just a final word before we wrap up. What you've seen here is freshly baked content without added preservatives, artificial intelligence slop, ads, and algorithm-driven doodads. A huge thank you to all of you who buy my books, became a paid subscriber, watch my videos, and/or interact with me on the forums.
Your support keeps this site going! 😇


:: Copyright KIRUPA 2026 //--
