


Many people have had a few problems understanding the shine effect in our previous tutorial. Therefore, this one is designed so you should have no problems. Simply put, a shine effect is a glare, or a "glint" if you will, on a particular shape. It gives the illusion that a part of an image or any other medium you use is glaring from light.
In this tutorial, you will
learn to the create the above glint effect. The following
steps should help you!
Here's How Its Done:
- Start a new Flash document and use a background color that will make the shine noticeable to the eyes. In other words, preferably something dark would work better. Adjust your stage and frame rate as you wish.
- On your first layer,
import (Ctrl+R) an image you'd like to apply the shine
effect to. Lock
your "Image" layer.
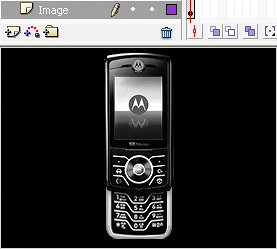
[ I'll be using a cell phone image ]
- You'll have to decide
whether you plan to add this shine effect to the whole
image or just a part of it. For this tutorial, I chose
to import a cell phone, and I have chosen to shine only
the screen.
Let's say you choose to shine a part of the image. The next step is to make a special gradient. Create a new layer and make a rectangle with only a fill about two times bigger than the part of the image like so:
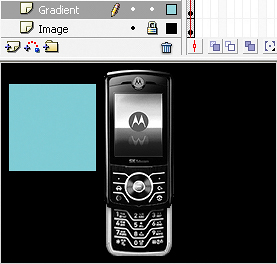
[ draw a solid rectangle that is twice the size of the shine effect ]
That is the core idea behind the shine effect. Once you have the base animation working, you can experiment with the speed, blur amount, and highlight size to get the exact look you want.
Just a final word before we wrap up. What you've seen here is freshly baked content without added preservatives, artificial intelligence, ads, and algorithm-driven doodads. A huge thank you to all of you who buy kirupa's books, became a paid subscriber, watch the videos, and/or interact on the forums.
Your support keeps this site going! 😇
-Sharif Karim aka REEF
