 Fill
Techniques
Fill
Techniques
by
kirupa
Close your eyes and imagine a world filled
with nothing but outlines and sketch marks. That is how a
world without fills would look. Now that the obligatory
interesting introductory sentence is complete, let's deal
with more important issues.
The following animation highlights the
various fills that you will learn in this tutorial:
[ each
number represents a fill variation ]
Since there are about five
major fill methods, this tutorial will spend a short period
of time covering each method. In order to liven up this
otherwise dry tutorial, all the sections will be titled
similarly to chapter names in Charles Dickens' books.
Method the First: The Fill
-
First, create a new document. Draw a rectangle in your
work area. The dimensions of your rectangle are not
important, but make sure the rectangle is large enough so
you can see what you are doing.
-
Now, once the rectangle has been drawn, click the Paint
Bucket tool:

[ click the
Paint Bucket tool ]
-
Once you have clicked the Paint Bucket tool icon, look a
few inches below that icon to find the section on your
right marked "Color." You should see two icons. We are
primarily interested in the second icon, the Fill Color
icon. Click that icon:
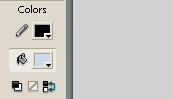
[ the Fill
Color icon]
-
After you have clicked the Fill Color icon, a sub-menu
will appear with a lot of colors for you to choose. Select
a color that you like. After you have selected your color,
click anywhere in the rectangle you drew:
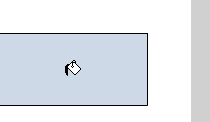
[ notice
that your mouse cursor changes to the Fill Color icon ]
-
To change your color, you can easily repeat the above
steps. The following Tip provides two additional, slightly
easier methods of changing the fill color.
 |
Two
Random Fill Tips |
-
You don't have to use the Fill Bucket tool to
change the fill color. For example, click the
Arrow Selection icon - the first icon in the top
of your toolbox. Your mouse cursor is just a
simple arrow.
Now, select your rectangle. Click on the Fill
Color icon and select a color. Notice that the
rectangle's color just changed to what you
selected.
-
The Fill Color icon is not located only on the
left side below the tool box. It is located in at
least two other areas:
- The Rectangle's Properties panel:
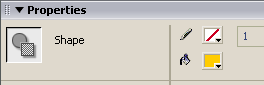
[ the fill color icon in the properties panel ]
-
The Color Mixer Panel:
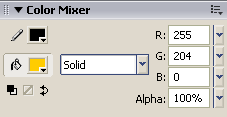
[
the fill color icon in the color mixer panel ]
|
|
You just learned the first and most basic
fill method. There are four more fill methods that you will
need to learn, and those methods will be covered in the next
few pages. Don't worry, I will not be as verbose when
covering the other fill methods.
This page is your intro to the world of
Fills - from here on out, you should try familiarize
yourself with the location of the Color Fill icon, Paint
Bucket icon, and any other things that may have seemed
confusing to you in this tutorial.
Let's learn about some other fill styles -
onwards to the next page!
|


