 Tutorials
Books
Videos
Forums
Tutorials
Books
Videos
Forums


Vertical shooters are also known as Fixed Shooter.
A fixed shooter has players only able to control their two-dimensional position on the screen and sometimes the direction they are facing. Source: Wikipedia.
So, we will create a game using our super hero Pawel to kill dragons that are coming from one side of the screen. I have provided an FLA with all of the graphics you will need, but you will need to place the graphics in the right spot. This tutorial is more of an explanation of the code with some design work as opposed to a fully-featured tutorial covering every aspect of a vertical shooter.
The following animation is an example of a vertical shooter. Click inside the animation to give it focus. Use your left and right keys to move left and right, and press the up key to fire an arrow at a dragon.
[ an example of a vertical shooter ]
Let's Start Because there are some sprites in the game, I have provided them for you. That way, you can focus more on the Flash as opposed to the actual design work. Download and open the following FLA for the sprites:
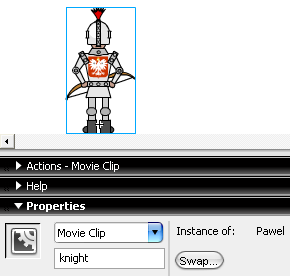
Now that you have your list of sprites, let's continue. We need a sprite to make it walk, in this case I use a movieclip of Pawel (see sprite.fla) and as he is a knight, the instance name is knight:
On another layer, in the first frame of our timeline copy and paste the following ActionScript:
//---- variables ----

	var steps:Number
	= 5;

	var spriteX:Number
	= 265;

	var spriteY:Number
	= 265;

	//---- functions ----

	function checkKeys()
	{

		if (Key.isDown(Key.RIGHT))
		{

			spriteX +=
			steps;

		} else
		if (Key.isDown(Key.LEFT))
		{

			spriteX -=
			steps;

		}

	}

	function updatePawel()
	{

		knight._x
		= spriteX;

		knight._y
		= spriteY;

	}

	this.onEnterFrame
	= function()
	{

		checkKeys();

		updatePawel();

	};
Ok, our hero is moving from side to side on the screen but, he can even move outside of the stage! We can animate the legs and the arms so it will look better and it will add the option of throwing arrows (we don't have arrows yet).
If you double click on your knight movie clip, you should be in the timeline for that movie clip. You will see three layers corresponding to the body, arms, and legs:
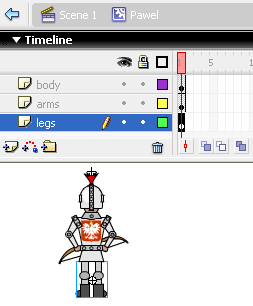
More importantly, notice that the arms and legs are movie clips with the instance names...arms and legs! If you look inside the arms and legs movie clips, you will find that they have some keyframes that provide some extra animation for movement.
Let's modify our code to take advantage of the new movement in the legs and arms:
//---- variables ----

	var steps:Number
	= 5;

	var spriteX:Number
	= 265;

	var spriteY:Number
	= 265;

	//---- functions ----

	function checkKeys()
	{

		if (Key.isDown(Key.RIGHT)
		&& spriteX<510)
		{

			spriteX -=
			steps;

			knight.legs.play();

		} else
		if (Key.isDown(Key.LEFT)
		&& spriteX>40)
		{

			spriteX -=
			steps;

			knight.legs.play();

		}

		if (Key.isDown(Key.UP))
		{

			knight.arms.play();

		}

	}

	function updatePawel()
	{

		knight._x
		= spriteX;

		knight._y
		= spriteY;

	}

	this.onEnterFrame
	= function()
	{

		checkKeys();

		updatePawel();

};Adding a Background Now we are able to move our sprite, but our sprite is "in the air." We will fix that by adding a background.
To add a background is easy as you already know. Just add another layer in the main timeline and draw your background (I drew mine in Freehand and pasted it into Flash):
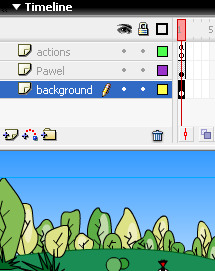
If you don't have time to create a background, a giant colored rectangle should suffice for now.
Drawing the Arrow The arrow can be drawn in Flash as well (I used Photoshop to draw mine). If you take a look at my FLA, you will see the arrow movie clip and image in the Library. Whether you create your own arrow, or use my arrow, just ensure that your arrow is inside a movie clip. The arrow should be a movieclip and we should leave it in the library, not on the stage.
Now the script look like:
//---- variables ----

	var steps:Number
	= 5;

	var spriteX:Number
	= 265;

	var spriteY:Number
	= 265;

	var speed:Number
	= 25;

	var arrowActive:Boolean
	= false;

	//---- functions ----

	function checkKeys()
	{

		if (Key.isDown(Key.RIGHT)
		&& spriteX<510)>40)
		{

			spriteX -=
			steps;

			knight.legs.play();

		}

		if (Key.isDown(Key.UP)
		&& arrowActive
		== false)
		{

			knight.arms.play();

			attachMovie("arrow",
			"arrows", 8);

			arrows._x
			= spriteX;

			arrows._y
			= spriteY+50;

			arrowActive =
			true

		}

	}

	function updatePawel()
	{

		knight._x
		= spriteX;

		knight._y
		= spriteY;

	}

	function updateArrow()
	{

		if (arrowActive
		== true)
		{

			arrows._y
			-= speed;

		}

		if (arrows._y<-10)
		{

			arrowActive =
			false;

			removeMovieClip(arrows);

		}

	}

	this.onEnterFrame
	= function()
	{

		checkKeys();

		updatePawel();

		updateArrow();

};Our game is progressing nicely so far. We just need to add our dragon. In this page, we will deal with the dragon and wrap up what we have done so far.
Adding the Dragon! Pawel shoots arrows, moves and there is a beautiful background (hopefully), but Pawel is shooting into an empty sky! We need the dragons.
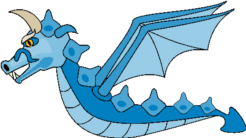
Again, as we did with the arrow, background, etc. we need to draw our dragons, I drew mine first using Freehand and then pasted into Flash. You can find a dragon movie clip in my sprite FLA's library, so don't worry if you aren't familiar with drawing a dragon.
Here is how my dragon looks like:
[ our dragon - scary thing, ehh? ]
For the sake of this tutorial, let's leave it as an image. You can make an animation of the wings/tail/etc. if you really really want to.
We don't need instances of our dragon on the stage but we need it in the Library as a movieclip. Like we did with the arrow, let's change it's Linkage Properties.
Open the Library and right click on the dragons movieclip to open the Linkage Properties window, tick Export for Actionscript, and leave the identifier as default (dragon).
Back to the ActionScript We now need to add some more variables:
var dragons:Number
	= 3;

	var i:Number
	= 0;

	var score:Number
	= 0;
dragons is the number of dragons we will have on the stage.
The variable i is a bit difficult to explain right now, for it does several things. Hopefully with the rest of the code, you will see what i does.
score is to store our score, we can add a dynamic text box on the stage with variable name score so we know how good we are killing dragons.
Just a final word before we wrap up. What you've seen here is freshly baked content without added preservatives, artificial intelligence, ads, and algorithm-driven doodads. A huge thank you to all of you who buy kirupa's books, became a paid subscriber, watch the videos, and/or interact on the forums.
Your support keeps this site going!
- Ernesto Quezada aka _Bruno

:: Copyright KIRUPA 2026 //--
