 Tutorials
Books
Videos
Forums
Tutorials
Books
Videos
Forums


Basically, today's modern Flash websites mostly have some video looping involved. There are also dozens of websites that offer Flash video loops for you to purchase. But today you won't be purchasing anything. You'll make your own video loop which you will be able to use in many different ways and shapes in your next or current Flash project.
The following is how your animation should loop after following this tutorial:
[ our final SWF incorporating a video loop ]
This tutorial is part Macromedia Flash and part Adobe After Effects. Let's create the video loop first, so start up After Effects and get started!
Making a new Composition

[ composition settings window ]
In the Composition Setting window, many of the functions are important so you should plan ahead before going any further. Let's look at that step by step.

[ composition name ]

[ composition size ]

[composition frame rate]

[ composition duration ]
Duration of the frame is THE setting when it comes to file size. Let's face it. You HAVE to think about your file size. You don't want visitors to quit your website before it even loads, don't you? Except you're working on a CD/DVD presentation. In that case, just pull out any duration of your choice. Let me finally explain what I'm talking about. If you're doing a video loop in 30 frames per second. The 3 seconds would make exactly 90 images. One extra second would make an extra 30 images. In this case, replace frame rates with images and it'll be easier to understand.
Adding Effects to a Solid

[effects & presets panel]

[effect controls for the Solid layer]
Now that our shape is drawn, let me explain how to go about modifying the effects.
Controlling the EffectsThe following ALL depends on your own personal taste. But for the sake of the tutorial, follow my steps and after finishing the tutorial you will be completely free and on your own.
Cell Pattern: Bubbles - we want our pattern to be bubbles.
After all, we're making bubbles. So we want the bubbles!

Check the Invert to invert the colors. Looks better if you ask me, but it'll look even better later on.
Raise the contrast to about 150%.
Leave the Overflow as it is (Clip).
Raise the Disperse to the maximum of 1,50%. To get the randomness look better.
Pull the size down to about 50-40% or whichever size suits you.
Leave everything else untouched but pull down the Evolution and Evolution Options.
Make sure that you are at the beginning of the timeline and click on the little stopwatch by Evolution. The Evolution should turn to some bluish color.
Under Evolution Options check the Cycle Evolution checkbox.
Go to the end of the timeline by going to Window>Timeline Controls (Ctrl+3) and clicking the Last Frame button (
 ) or by pressing the END button on your keyboard.
In the Evolution above the circle where it says 0 x + 0,0 change the first zero to 1 so it would say 1 x + 0,0.
Explanation
In Step 11, 1 x + 0,0 means that it will make one circle of evolution from the beginning to the end. You can also make it faster by typing in a higher number. If you wish to change the number, be sure to be on the last frame of the animation! After Effects automatically makes a keyframe wherever you change the setting. We don't want to have it wherever. We want it at the end. But hey, who says that you HAVE to? Why not doing one circle from the beginning to the half of the animation and then a hundred more to the end? Just kidding. But then again, let your imagination go wild. ;) Now stop playing around and delete all the keyframes you accidentally made and make sure you have only one at the beginning and one at the end.
If you're new to After Effects you should be asking: "...but luksy, how do I delete the keyframes I made when I was letting my imagination go wild?" Let me show you young padawan. But first, let me show you what your Effect Controls window should look by now (at the end of the timeline).

[ effect controls at the end of the timeline after adjusting the options ]
Deleting Unnecessary FramesIf you're aware of how to do this in After Effects, you can step away, ignore this part, and go to the next one.

[ the arrow I'm talking about ]
Effects and Transform should appear. Open up Effects by clicking on the little arrow pointing right. The name Cell Pattern should appear.
Open up Cell Pattern by clicking on the arrow thingy.
A lot of options should appear. These all options show you what can be animated by adding keyframes and such. At this point, only Evolution interests us. The little clock should be turned on and by looking right on the timeline you should see two keyframes. One at the beginning and one at the end. Oh yeah, maybe more if you did some of your own Evolution tweaking.
To delete a keyframe, just click on it to select it and then simply press Delete button on your keyboard to delete it. If you have only two keyframes of Evolution at the beginning and the end, don't delete anything, but if you do have more keyframes, just delete them all except the first and the last one.
You are almost done. We just have to do finish up some loose ends with our video and get the video into Flash!
You did most of the hard work on the last page, so you are almost done!
Testing (RAM Preview)
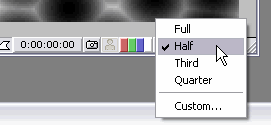
[ setting the quality to half ]

[ slider and marker positions ]
Exporting the Whole Thing
Go to File | Export | Macromedia Flash (SWF).
Choose your destination path and the filename.
For the quality, you will have to decide that for yourself. Export in different qualities, check the file sizes of the swiffs and choose what suits you best. For the sake of the tutorial, leave it to 5.
Choose Rasterize (where it says Ignore / if it says Ignore).
In the Options, check the Loop Continuously in the checkbox.
Wait for the whole thing to get rendered and open up your all time
favourite program - Flash

Preparing the Loop in Flash
Create a new document, set it's properties (Ctrl + J) to 30fps, go to Insert | New Symbol (CTRL + F8), name it a 'Bubble Video Loop' or something, check the option for Movie Clip and press OK!
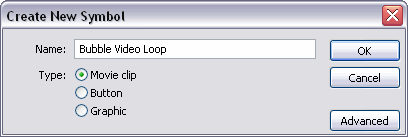
[ the create new symbol dialog box ]
You will be automatically inserted into this new symbol. Now go to File>Import>Import to Stage...
Import the swiff (swf) file of the loop you exported from After Effects.
90 new frames will be inserted into your symbol. Each frame contains an image file (check library for more info). Exit the symbol by click on the Scene 1 button at the top left corner.
Open up the Library by going to Window>Library (Ctrl+l or F11) and drag the symbol onto the stage.
Test your movie by going to Control>Test Movie (Ctrl+Enter). Now you have your own video loop! BUT - if you have a good eye, you'll notice that the loop stops for 0.1 second at one point. That point is between the end and the beginning.
Go into the symbol again (double click it) and click on frame 1. Now click on frame 90. Notice anything? It's the same thing that plays twice in a row!
Right click on the last frame (90) and click Remove Frames.
Now, you have a perfect loop! Play with it! Go out with it! Insert it into a new empty movie clip and tween its tint color to make it colorful (which you can also do in After Effects but maybe more on that some other time)! Mask it into different shapes! The only limit is your imagination! But don't forget to keep an eye for the file size. These things can get big. And I mean BIG.
I have provided the source file for the video you have been working on. You can download it by clicking on the Download AEP link below:
Ok, we're done here. Thanks for checking the tutorial and hopefully you've done it all properly, if not, post your problem in the kirupaForums. See you in some other tutorial!
Just a final word before we wrap up. What you've seen here is freshly baked content without added preservatives, artificial intelligence, ads, and algorithm-driven doodads. A huge thank you to all of you who buy kirupa's books, became a paid subscriber, watch the videos, and/or interact on the forums.
Your support keeps this site going! 😇

:: Copyright KIRUPA 2026 //--