 Tutorials
Books
Videos
Forums
Tutorials
Books
Videos
Forums


So lets get you started by building your very first Flex Application. Assuming youre not a newly born human or have recently crawled out from under a rock and have decided that learning Flex is the first thing that your heart desires, Ill spare you the basic tour of the Flex interface.
There are two ways of creating a Flex Application:
Now, the simple difference should be obvious; a Flex Project can house all of the current projects assets ActionScript, Images, .SWF Files, and even other Flex Applications. The Flex Application is kind of like the index.html inside of a website root folder. It is the base of your application and is what everything else if build around. I hope that makes sense.
For this tutorial, well be creating a new Flex Project. Why? Well, the important thing to note here is that if you havent already created one, there is no place to create a singular Flex Application, or anything else for that matter. Thus, well create a new project called HelloWorld.
When the Create a Flex Project dialog first appears, you can see that there are a few things to consider:
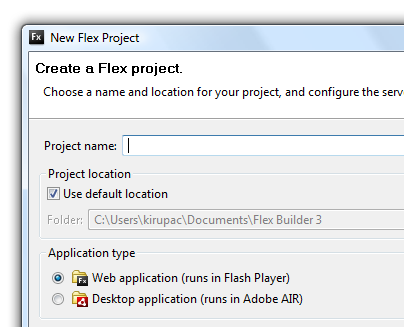
[ create a new Flex project first ]
First of all, you need to give the project a name, which we decided is going to be HelloWorld (without the quotes, of course). Now, Im going to assume that you have a naming convention that you have learned and tend to stick with, and if you feel confident in your abilities, by all means, have at it. For the sake of consistency on my end, I always name a project capitalizing each word in the name, no spaces or special characters youll notice that even if you try to use an unorthodox naming convention, it wont let you.
Secondly, you are able to decide where your Flex project(s) will live. I use the default folder structure on my Mac, and in most cases, is automatically stored in your systems default Documents folder.
The Application type specifies whether or not you would like you Flex Application to run on the Web, or run as an Adobe AIR (desktop) application. For now, lets just stick with Web application since it suites our needs at this time.
Lastly, you can choose to associate a Server technology such as ASP.NET, ColdFusion J2EE, PHP, or some Other server language. Were not going to associate this little test project with any special languages, so just ignore that for now. I STRONGLY SUGGEST that you take the time to click that tiny little question mark at the bottom left of the dialog box and learn the more about your options when creating a new Flex Project. Dont be shy, just do it youll love it! Click Finish and were off.
Application
To add
functionality to the application, lets make sure were in
the Design Mode. Once weve set up all of the visual
components on the stage, well make our way to the Source
Mode so we can edit the code. Those buttons are located
towards the top of the main stage of your application.
Once in Design Mode, to the lower left-hand corner there
will be a Components Panel that houses all of the available
Flex Components. Take a look through the available
components and feel free to experiment with them once youve
completed this basic tutorial. Lets select a Label
component and drag it to the stage. Go ahead and place it
anywhere, but as you do, youll notice that Flex will
automatically give you guide lines when youre either close
to a corner, or right smack-dap in the middle of the Stage.
This is extremely useful when youre trying to align your
components within the Design Mode.
The purpose of the
Label Component is to display a single line of text (i.e.
header names, pages titles, etc). Once your Label is in
place, there are two ways of editing its Text attribute.
One way is to simple double-click on the component and edit
its text right there. The second way directs us to the
all-important Properties Panel. Youll see that to the right
hand side of the Flex IDE. There are a few things to note
that are arranged within the Common sub-category of the
Properties Panel:
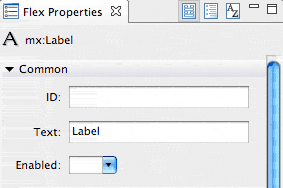
[ your Properties panel ]
The ID field is the components identification, or for
you Flash users, its like the Instance Name that you can
give to any component with that available property. The
Text field, in this case, is the visual text property that
the Label component displays. Lets set that to Hello
World! Lastly, the Enabled option lets you decide
whether or not you would like your Label component to be
enabled or disabled. In this specific case, all this really
does it visually change the Label to a slightly greyed
disabled look and feel. Once we preview the application,
go ahead and change that property to True and youll see
what I mean.
On that note, lets preview our very first
Flex Application. Towards the top of the Flex IDE, there are
a series of buttons:

[ the Flex IDE toolbar buttons ]
Lets concern ourselves with the second set of controls, the greenish ones. The fastest way to get familiar with everything in the Flex IDE, is to just hold your mouse over top of each icon and wait until the tool tip appears. The big green button is the Run button, this will compile your application and allow you to preview it just as anyone would within the browser. The little bug icon is just that Debug. This is the button that you would want to press if you wanted to debug your project and find out more information as to why something isnt working quite right or check your trace statements. Thats all fine and dandy, but for this application, lets just stick to the Run button. Go ahead and click it and lets see the magic happen. As youll notice, a couple of dialog boxes may shown themselves, and in that case, just tell Flex to automatically save your application if you so desire, and move on. The Flex Builder will compile your entire application and open a new browser window to display your Hello World Label in all of its glory:
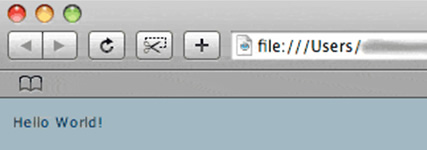
[ a default, simple style ]
As was explained in my previous tutorial, Flex generates its own .SWF file, embeds it in an HTML file which is automatically named according to your application name (HelloWorld.html) and injects the appropriate JavaScript for browser Flash Player detection and all of that jazz.
What I want you to do now, is explore the properties panel and feel free to change the Label components Style properties. Give it a different font, or set it as Bold, and if you really want to go wild, you can click on the Stage and change its Style properties and you may even end up with something as freakishly stellar as this:
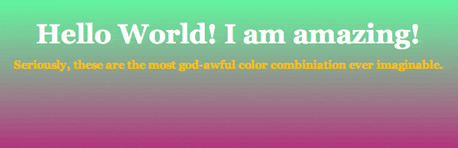
[ my really cool final output! ]
Just a final word before we wrap up. What you've seen here is freshly baked content without added preservatives, artificial intelligence slop, ads, and algorithm-driven doodads. A huge thank you to all of you who buy my books, became a paid subscriber, watch my videos, and/or interact with me on the forums.
Your support keeps this site going! 😇


:: Copyright KIRUPA 2026 //--