One great effect that can be created in Flash very easily is fading text. It can make your site look a lot cooler, and it also gives you the ability to fade between images. This tutorial will show you exactly how to do this.
[ you will be creating the above movie ]
- Create a new movie, change the size to 200x100, and enter the text `KIRUPA.COM`. Set the font color to something other than white.
- Click on the text so it gets a blue box around it, and make sure you are using the Arrow tool. Then right-click on the text and choose `Convert to Symbol`, or press `F8`. Convert the text to a Movie Clip and press OK.
- A small circle should appear now in the center of your text. That is the sign that tells you the text is now a symbol:
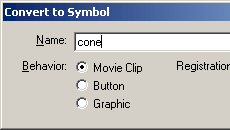
[ the convert to symbol dialog box ]
- Now right-click on the movie clip and click on `Properties`. You should see a panel appear, and at the bottom right you will see a `Color` section. Click the drop-down menu and choose `Alpha`. To the right of the menu, a percentage slider will appear. Drag this down to `0%`. This will make your text invisible.
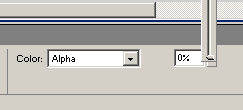
[ the alpha slider at 0% ]
- Insert a keyframe at about frame 30 and right-click on the clip again. Go back to `Properties`, return to `Alpha`, and this time change the alpha to `100%`. Then exit the Properties panel, highlight the layer, right-click, and choose `Create Motion Tween`. This will add a colored arrow into the timeline. Press `Ctrl+Enter` to view the movie.
- If you want your text to fade back out like the sample, insert another keyframe at about frame 50 and change the alpha again to `0%`.
There, you have created some groovy fading text!
Just a final word before we wrap up. What you've seen here is freshly baked content without added preservatives, artificial intelligence, ads, and algorithm-driven doodads. A huge thank you to all of you who buy kirupa's books, became a paid subscriber, watch the videos, and/or interact on the forums.
Your support keeps this site going! 😇
-Tom
 Tutorials
Books
Videos
Forums
Tutorials
Books
Videos
Forums


