If there is one thing I like in a Flash animation, it has to be simplicity. I am usually not impressed with large background images with an Eric Jordan (2Advanced) inspired look. I was playing around with some ActionScript, and decided there needed to be a better method of making objects move in circles without having to use a guide layer.
With ambition and pure luck (not to mention page 496 of Colin Moock's ASDG) I figured out an efficient method of making movie clips move in circles:
[ movie clips moving in circles ]
You will create something similar to the above animation in under 5 minutes by following the instructions in this tutorial.
Creating Circular Motion:
-
Create a new movie in Flash
MX. Set the width and height to anything you want.
- Now, draw something and make it a movie clip. To convert something into a movie clip, select it and press F8. From the Convert to Symbol Dialog box that appears, select the Movie Clip option and press OK:
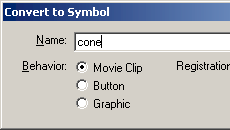
[ the convert to symbol dialog box ]
-
Once you have created your movie clip, here comes the
complicated process of Copying and Pasting. Right click on
the movie clip and select Actions:
Copy and paste the following code into your Actions dialog box:
[ copy and paste the above code into the Actions dialog box ]
-
After the rigorous process of Copying and Pasting you
undertook in Step 3, select your movie again. Press
F8 and select Movie Clip from the Convert to Symbol
Dialog box.
[ NOTE: This is not a redundant instruction; you are making the object a movie clip for the second time. ]
- Now, copy and paste your movie clip as many times as you want on the stage.

[ multiple
copies of the movie clip ]
ActionScript Explained
Not to leave you in the dark, I will
explain what each major section of ActionScript's function
is.
var radius = 10 + Math.random() * 50;
var speed = 5 + Math.random() * 20;
var xcenter = this._x;
var ycenter = this._y;
var degree = 0;
var radian;
}
In the above lines of code I am declaring variables and assigning them values. For both the speed and radius variables, I assign them a random number. I could have assigned a static value, but that would have made all the movie clips rotate with the same speed and radius - it would have been quite monotonic and dull.
For xcenter
and ycenter, I am specifying
the center of the circular motion to be the current position
(x and y) of the movie clip. If I were to assign a numerical
value in the place of this._x
and this._y, the movie clip,
when run, would default to the new location specified in the
code - instead of the location you specify by dragging the
movie clip to a place on stage.
onClipEvent
(enterFrame)
{ The
majority of the movement focuses on the above lines of code.
In the first line, I am incrementing the
variable speed and assigning
it to the variable degree.
In the second line, I am converting the
degree values into radians using the mathematical degree to
radian conversion. Failing to convert the degrees to radian
values will cause the movie clip to move in an erratic path instead of in
a circle.
In the third and fourth lines, I am telling
the movie clip's x and y values to follow the path taken by
any object in a radian plane. The horizontal value as
denoted with the cosine function multiplied by the radius
generate the horizontal position of the movie clip. The
vertical position is calculated in a similar fashion using
the sine function multiplied by the radius.
You have just completed the tutorial! As
always, I have provided the source code for you to take a
peek at:
degree +=
speed;
radian =
(degree/180)*Math.PI;
this._x
= xcenter+Math.cos(radian)*radius;
this._y
= ycenter-Math.sin(radian)*radius;
}