 Tutorials
Books
Videos
Forums
Tutorials
Books
Videos
Forums


This is an archived tutorial from the kirupa.com legacy collection. It covers software that may no longer be available, but it is kept online because the ideas still hold up.
In Silverlight and WPF, you have a lot of choices in how to lay out your content. This is accomplished via layout panels whose only purpose is to help arrange all of the content that you decide to place inside them. In this article, we will look at two panels known as WrapPanel and StackPanel.
Note:
While both panels exist in WPF,
Silverlight only has the StackPanel. You can get the
WrapPanel for Silverlight by installing the
Silverlight Toolkit.
As their name implies, WrapPanels wrap any content stored within its boundaries, and StackPanels stack content. That seems pretty simple, but just to highlight what makes them useful, let’s look at quick examples of both layout controls in action.
A WrapPanel allows you to place content inside it, and it wraps the content over new rows and columns if there isn’t enough space available. The following screenshot shows you some square shapes placed inside a WrapPanel whose orientation is Horizontal where rows are filled first:
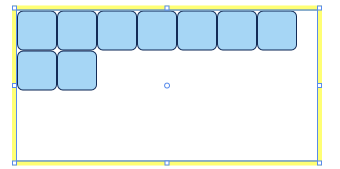
The WrapPanel ensures that no elements stored inside it go beyond the panel’s boundaries. That is why you see some of our squares starting on a second line instead of extending the first line of squares indefinitely.
You can also set the orientation to be Vertical, and our WrapPanel fills columns first:
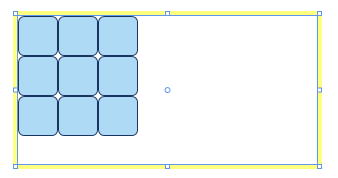
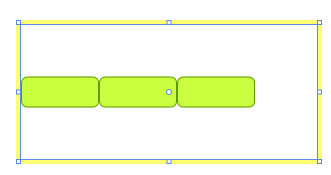
The StackPanel is similar to WrapPanel, but a major difference is that it doesn’t wrap the content. Instead, it allows you to stack contents either horizontally or vertically. The following image shows you some green squares placed inside a StackPanel whose orientation is Horizontal:
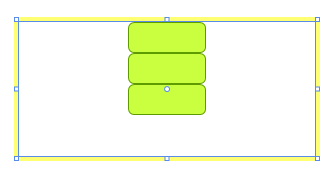
Likewise, if we change our above StackPanel to have a Vertical orientation, our green squares are stacked as shown in the following image:
These panels are great because they take care of the positioning of the individual content inside them automatically. You add your content, and poof, everything works.
Using WrapPanels and StackPanels
Now that you
have an introduction to how they work,
In a nutshell, transforms are modifications you make to your element such as scaling, rotating, skewing, etc. With our StackPanel and WrapPanel, any transforms you apply to your element cause it to shift neighboring elements to accommodate any changes to the layout caused by the transformed element.
For example, the following image shows you how our WrapPanel looks like with no transforms applied to any elements:
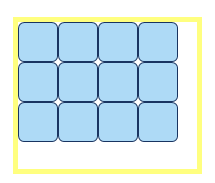
Now, let’s say you rotated one of the center squares. The following is what your WrapPanel will now look like:
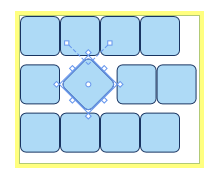
Notice that all of the neighboring squares shifted to accommodate our rebellious, transformed square. Like I mentioned before, both the WrapPanel and StackPanel take care of shifting neighboring elements as needed automatically.
You can do all of the above in Expression Blend - which is what I did. You can add your Stack/WrapPanels, create the content to go inside them, etc. There is one hitch though. Let’s say you have a StackPanel with a few green rectangles as shown below:
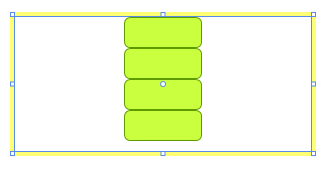
In Blend, let’s rotate the second rectangle. Ideally, based on what we’ve seen and explained, rotating the second rectangle should cause the other rectangles to shift to make room for the newly rotated rectangle. Instead, the following is what you see:
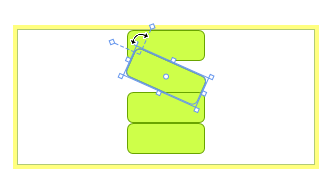
When you rotate the rectangle in Blend using the rotate handles, notice that the rectangle is actually overlapping with its neighbors. That shouldn’t be happening!
The reason why the above rotation doesn’t shift the content is because of the type of transform involved. When you transform an element by selecting it and manipulating its handles, you are altering your selected element’s RenderTransform properties. While using the element’s handles is a quick/easy way to apply transforms, when it comes to this scenario, this approach is less useful because the RenderTransform properties are what get altered. What you need to adjust is the LayoutTransform properties instead.
Unfortunately, and please let me know if I am wrong, you cannot use the handles around a selected element to alter the LayoutTransform. You need to go directly to the LayoutTransform panel found in the Transform panel under Properties and make your changes there:
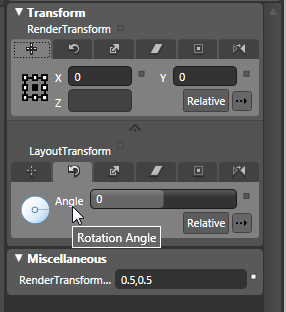
For example, when I alter the Rotation Angle via the LayoutTransform panel, notice how my transformed rectangle and its neighboring rectangles look like:
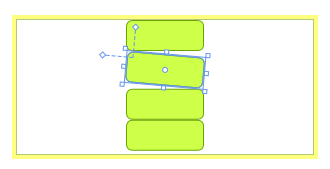
This time, there is no overlap, but instead, there is a shifting of the neighboring elements to accommodate the rotation by our selected rectangle.
While this solution works well without you having to manually edit the XAML, there is room for improvement. From a usability point of view, you and I are probably very comfortable using the transform handles directly located on the selected element. It feels a bit unnatural manipulating an element on your Artboard by making changes to sliders and textboxes located in the LayoutTransform panel.
Cheers!
Kirupa

Just a final word before we wrap up. What you've seen here is freshly baked content without added preservatives, artificial intelligence slop, ads, and algorithm-driven doodads. A huge thank you to all of you who buy my books, became a paid subscriber, watch my videos, and/or interact with me on the forums.
Your support keeps this site going! 😇


:: Copyright KIRUPA 2026 //--