


This is an archived tutorial from the kirupa.com legacy collection. It covers software that may no longer be available, but it is kept online because the ideas still hold up.
When you think of a listbox in either WPF or Silverlight, you probably think of some rectangularly shaped container with scrollbars for scrolling through a list of content stacked either vertically or horizontally:
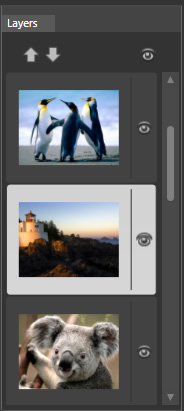
[ an example of a standard listbox with a stack of content ]
There are many cases, though, where a flat list of items is not what you want. You want your items to actualy wrap such as a collection of albums shown in Zune's album view:
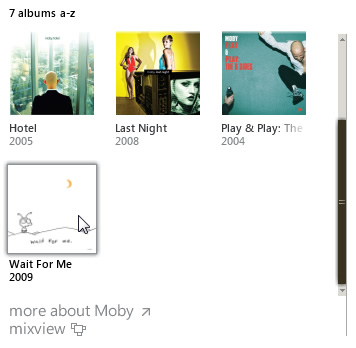
[ a listbox whose content is wrapped ]
If you are creating your application, unfortunately, there is no default property that you can just set on a listbox to enable such wrapping. That is where this tutorial comes in. In this and the next section, I will show you how to modify the internals of your listbox to support your content wrapping.
First, launch Expression Blend and create a listbox with some items inside it. By default, all of your items will be stacked vertically. This is OK, because we will be changing really soon how the items actually get displayed.
For adding items to your listbox, the easiest way is to manually just create / draw / copy / paste content into it. If you want to get a bit more fancy, you can always add items to your listbox manually as shown in this tutorial, or you can use the Sample Data feature in Blend 3.
Whichever approach you take, you should have a listbox that contains enough items to show scrolling (and eventually, wrapping). For my example, all I am doing is just copying and pasting some rectangles:
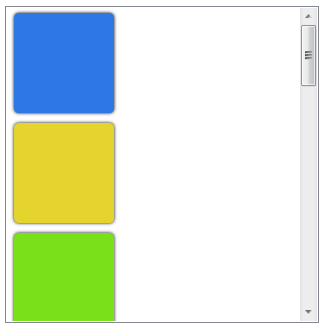
[ here is a ListBox with some rectangles as its content ]
If you want to just use my example instead of creating your own, feel free to download, extract, and open the solution found below:
Download Source (WPF) for Listbox Containing Rectangles
Don't worry. My example only contains the listbox with the rectangles. Everything else you will have to do by following the instructions you will see...in the next section!
In the previous section, I described the problem you are trying to solve and provided some basic instructions on how to get your project setup. In this page, let's dive right into tackling the first part of the problem.
There are a handful of controls that you can use to display lists of information. Your ListBox is one such control. What these controls share is that they use something known as an ItemsPanel internally.
As its name implies, the ItemsPanel is responsible for the layout of any items they plan on displaying. As you can guess, a ListBox's ItemsPanel helps display items horizontally or vertically. What we are going to do is modify our ListBox's ItemsPanel to have its items wrapped.
To modify the ItemsPanel, right click on your ListBox, and from the menu that appears, go to Edit Additional Templates | Edit Layout of Items (ItemsPanel) | Create Empty:

[ edit your ItemsPanel by creating a new one ]
A dialog titled Create ItemsTemplatePanel Resource will appear:

[ accept the default values for creating your new ItemsPanel ]
Accept the default Name value provided for you and just hit OK. Once you have clicked OK, the dialog will disappear and now you will be editing the template for your items panel. The items panel that is used by default for a ListBox is a StackPanel (or a variant of it), and you can tell this by looking at the object tree:

[ you can easily see the default panel used in your ItemsPanel ]
Select your StackPanel either in the object tree or on the artboard and delete it by hitting your Delete key. You have just gotten rid of your items panel - oh the horror!:

[ delete the default StackPanel that is provided for you ]
Don't worry. This removal is entirely temporary. The next step is for you to replace your recently removed StackPanel with a WrapPanel. There are several ways you can do this. The easiest way is to display your Assets tab (Window | Assets) and search for WrapPanel:

[ do a search for WrapPanel to insert it ]
Note - if you are in a Silverlight project, you will need the Silverlight Toolkit installed to be able to use WrapPanel.
Once you have found your WrapPanel, just double click on it to insert it. It will automatically become the panel that is used as your ItemsPanel. Notice that your object tree now displays the WrapPanel instead of your StackPanel that was visible earlier:

[ let's all welcome the WrapPanel to the ListBox family ]
Ok, you are now done modifying the template that represents your ItemsPanel, so it is time to scope back up. You can do that by clicking on the Listbox button in your breadcrumb bar found towards the top of your artboard:

[ let's go back to editing the ListBox as a whole ]
You will now be back and viewing your listbox as a whole. Notice that your ListBox's contents look a bit different now:

[ your listbox's contents are now stacked horizontally ]
Instead of your contents being vertically stacked, they are now horizontally stacked. This isn't exactly what we were hoping for when you swapped out your StackPanel with a WrapPanel. Before you think you've done something incorrect, you have not. This is expected, for there is one more thing you need to do.
In the previous section you went into your ListBox's ItemsPanel and replaced the StackPanel with a panel that wraps - aptly called a WrapPanel. In this page, we will make some minor changes to make your content truly wrap.
As you saw in the previous section, despite change your ItemsPanel to a WrapPanel, our content isn't actually wrapping. The change to make that happen is very simple.
First, make sure to scope back up (use the breadcrumb bar like you did before) to the ListBox level and ensure your ListBox is selected. Find the Layout category and expand it by clicking on the little expander found towards the bottom of that category:
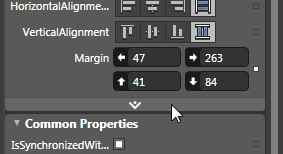
[ advanced properties are hidden by default ]
Click on that expander to display all of the advanced properties found in the Layout category. One of the properties you will see is something called HorizontalScrollbarVisibility, though it may be truncated due to space limitations:
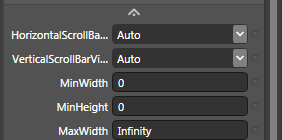
[ find the HorizontalScrollbarVisibility property ]
Change the value of the property from Auto to Disabled. This change will cause the Listbox to no longer allow horizontal scrolling, and that (strangely enough) ensures your content wraps properly:
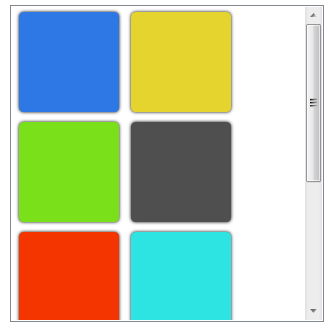
[ the content is now wrapped ]
Hopefully this tutorial helped you wrap your head around wrapping (ha!) items in a ListBox. Looking back, what you did was pretty straightforward. You went into your ItemsPanel and replaced the StackPanel that was there with a WrapPanel. Next, you simply told your listbox that scrolling horizontally is off the table.
Straightforward does not mean trivial or easy, so if you find your final result not matching mine, feel free to download the final source file:
Just a final word before we wrap up. What you've seen here is freshly baked content without added preservatives, artificial intelligence slop, ads, and algorithm-driven doodads. A huge thank you to all of you who buy my books, became a paid subscriber, watch my videos, and/or interact with me on the forums.
Your support keeps this site going! 😇


:: Copyright KIRUPA 2026 //--
