|
by
kirupa | 30 March 2010
While many of your applications probably look
like a traditional windows application, with WPF,
you have the ability to make your applications look
and behave
differently with little effort. One such application that you will
learn to create in this tutorial is a what I call a
small overlay:

[ say hello everyone ]
The overlay application is something that is
permanently fixated at one of your monitor's sides
and is always visible over other applications:
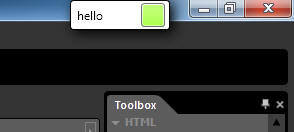
[ hello again ]
In this article, learn how to use Expression
Blend to create a window that looks and behaves just like this.
All you need to create this application is
Expression Blend. Be sure to download and install
the
trial version if you don't have it yet.
- First, launch Expression Blend and create a
new WPF project. Give your project any name that
you want:
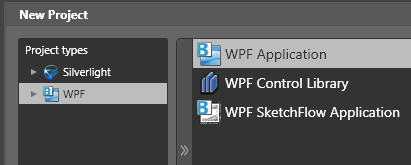
[ create a new WPF application ]
- Once you have created your
application, you will see an empty artboard with
a silhouette of a Windows application border:
- From the Objects and Timeline panel, go
ahead and select the Window object with your
mouse. When Window is selected, you will see
some resize adorners appear on your artboard:
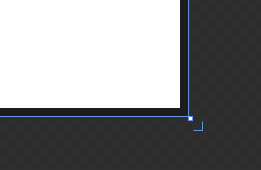
[ the resize adorners allow you to drag to resize
your window ]
- Use the adorners to resize your
window to make it really small:
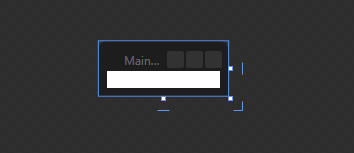
[ make your window really small ]
If you do not want to
use the adorners, you can always enter a width and
height manually in the Width and Height properties
found in Properties Inspector's Layout category:
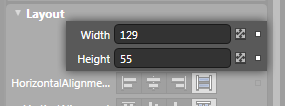
[ if you don't like the adorners, maybe the
properties are your calling ]
Regardless of how you
make your window small...just make your window
small.
- Go ahead and hit F5 and run your
application to see what things look like right
now:
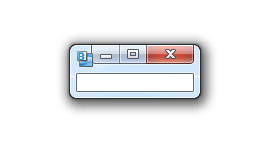
[ this looks too much like a traditional window ]
- There are several things we need
to change about what you see right now. Your
application is resizable, displays a border,
shows up in your taskbar, can be hidden behind
other applications, and it displays the Windows
minimize/maximize/close buttons. Let's remove
all of those niceties for our particular
application.
From your Objects and
Timeline panel, select your Window object:
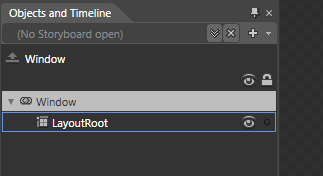
[ the Objects and Timeline panel displays all the
elements in your current scope ]
- Once your Window object has been
selected, go to your Properties Inspector. Let's
make the changes to customize how our Window
looks and behaves.
From the Appearance
category, set
AllowsTransparency to
True
and set WindowStyle
to
None:
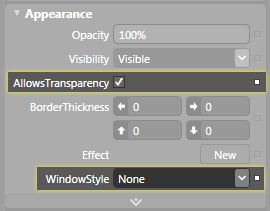
[ these properties get you closer to having the
ideal, overlay window ]
Next, move down to your
Common Properties category. Set the
ResizeMode property
to NoResize,uncheck
the ShowInTaskbar
property, and check the
Topmost propety:
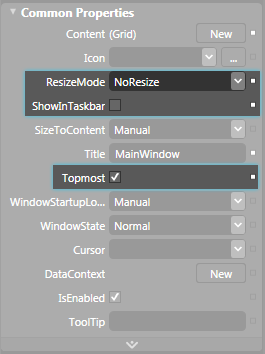
[ you are almost getting there... ]
- Your artboard should look very
plain and boring right now:
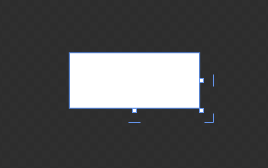
[ there is almost nothing there! ]
To fix this, draw a
colored rectangle and make sure its top edge is
positioned towards the top edge of your window area:
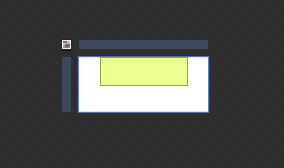
[ draw a rectangle to make your application display
something ]
- Once you have drawn the small
rectangle, go ahead and hit F5 to run your
application now. After a few seconds, you will
see your application appear:
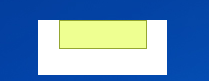
[ what your application looks like right now...! ]
- Yikes. This application looks
pretty hideous right now. Let's fix that later,
but don't worry - this tutorial won't be
concluded without making our application look
less hideous.
Instead, let's first go ahead and look at how to
position our application at the top of our
window...on the
next page!
Onwards to the
next page!
|



 Creating a Small Overlay Window -
Page 1
Creating a Small Overlay Window -
Page 1