Tutorials Books Videos Forums

Change the theme! Search!
Rambo ftw!

Customize Theme


Color

Background


Done

Modifying SL Animations Using C#

by kirupa   | filed under Silverlight, WPF, and Blend

This is an archived tutorial from the kirupa.com legacy collection. It covers software that may no longer be available, but it is kept online because the ideas still hold up.

In Silverlight you can create animations using just XAML, or you can create animations entirely using just C# code. What you can also do is mix and match an animation where part of it lives in XAML and another part lives inside your code. This blending allows you to create interactive animations that you simply would not have been able to do otherwise using just XAML or as easily using just code.

This tutorial will show you how to take a XAML animation and modify its properties using C# to create something pretty cool. By the end of this tutorial, you will have created something similar to the following animation:

[ click on the Randomize Color button to see what happens! ]

When you click on the Randomize Color button, notice that a small animation plays where the colors of your background are made different. Keep clicking this button to see different colors appear each time.

Let's Get Started

First, to save you some time, I have already created a basic project that provides you with the UI and a basic animation. Download this project from the following link:

Extract the files from this newly downloaded project and open the solution in Expression Blend. When you open this project in Expression Blend, you will see something that resembles what you saw earlier:
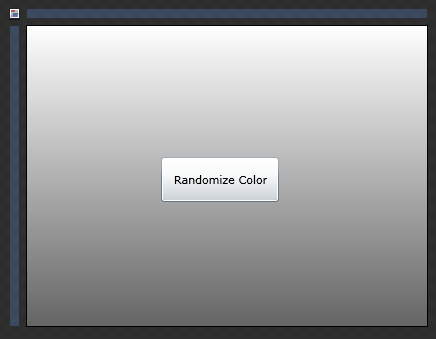
[ a basic UI should be visible on the artboard ]

When you hit F5 and run this application, notice what happens when you click on the Randomize Color button. Just like what you saw earlier, the background color changes a bit. The difference this time around is what happens when you keep clicking on the Randomize Color button. Nothing happens any more. The first click played the animation, but the subsequent clicks do absolutely nothing.

Great - this is all part of the plan! The application you currently have open in Blend basically contains just a single animation and some code on the button to play the animation when pressed. In the following sections, you will learn more about this animation and how to write code to modify the colors that your animation changes..

In the previous section, you got a brief overview of what you will be doing, and you downloaded the sample project I had created to help you follow along with my instructions. In this page, let's get a better understanding of the animation that you will be modifying.

Looking at the Animation

Before diving in and writing some code, let's look at what the animation is actually doing. The end result is easy. Your animation changes the background gradient from one pair of colors to another pair. How that is actually represented is interesting.

In Blend, select the ChangeColor storyboard by accessing it via the Storyboard picker from the Objects and Timeline panel:

[ select your ChangeColor storyboard by accessing it via the Storyboard picker ]

Once you have selected your ChangeColor storyboard, you will find yourself in the Timeline recording mode where you get to see what the animation is actually doing. From here, if you drag your playhead slider to the 1 second mark, notice what your Brushes panel in the Properties Inspector is showing:

[ your Brushes panel shows you the colors that you'll be animating to ]

You will have gone from having a gray/white gradient to the light blue/blue gradient you see in the above image. If you change the gradient colors to something else and test your application, you will see that your animation fades into the new colors that you chose when you click the Randomize Color button. In most cases, this is all you would really need to know about how to create or modify this animation.

As you can guess, though, what you are attempting to do does not fall under the "most cases" umbrella. Therefore, what I want you to focus on is the object tree:

[ in the timeline recording mode, your object tree emphasizes what is being animated ]

The red triangles in the object tree indicate the element and its main property that the animation is modifying. Keep expanding the red triangles until you hit the last node and can expand no more:

[ expand the properties until you hit both of the Color nodes ]

What you are seeing is the expanded path to the property whose value you are modifying. On the surface, all you did was change your gradient colors in the Brushes panel. Under the hood, that simple gradient color change is is actually a fairly complex path that ends at the two Color properties you see.

Make sure your playhead slider is at the 1 second mark and select the first Color property under the [0] node as shown below:

[ select the first Color node ]

Once you have selected that Color property, take a look at what you see in your Properties Inspector. You will see an entry for just the first color from the gradient you had in the Brushes panel before:

[ the first Color corresponds to the first color in your gradient ]

Isn't it pretty cool how you can micro in on the keyframe and the actual value of the property that is being modified?! Anyway, not everything in this page is just sightseeing. In the Name field, give this color the name Color0:

[ give this keyframe the name Color0 ]

Repeat what you just did for your second gradient color. In your object tree, click on the Color property under [1]:

[ select the second Color property in your Object Tree ]

In your Properties Inspector, in the Name field, give this color the name Color1:

[ give this color the name Color1 ]

What you have just done is given each of the keyframes representing your two gradient colors a name. By giving them a name, you make it easier to access them via code as you will see shortly in the next section.

In the previous section, you looked at your animation in fairly great detail and gave the keyframes responsible for animating your gradient a name - Color0 and Color1. In this page, let's add some code to make all of this work.

Adding the Code

You already have some code already that plays your animation when you click on the button. What we are going to do is modify our code to have a random color be picked when you click on the Randomize Color button instead of having the same animation play just once. Let's do that now.

Open this same project in Visual Studio by going to your Project pane, right-clicking on your solution icon, and selecting Edit in Visual Studio:

[ you can choose to Edit in Visual Studio directly from the project pane ]

A few seconds later, Visual Studio will open. Open Page.xaml.cs inside it, and you will see the following code displayed:

namespace ChangeColorTutorial
{
  public partial class Page : UserControl
  {
  public Page()
  {
  // Required to initialize variables
  InitializeComponent();
  }
  private void RandomizeColors(object sender, RoutedEventArgs e)
  {
  ChangeColor.Begin();
  }
  }
}

The RandomizeColors method is the event handler your Button's click event is hooked up to, so each time you click your button, the RandomizeColors method gets called. Currently, your code just plays the ChangeColor storyboard by calling the Begin method on it. We are going to modify this a bit.

Look at your code and add the following lines shown below. You can also just copy everything below and just overwrite everything below your line containing your namespace declaration if you find that easier:

namespace ChangeColorTutorial
{
  public partial class Page : UserControl
  {
  private Random seed;
  public Page()
  {
  // Required to initialize variables
  InitializeComponent();
  }
  private void RandomizeColors(object sender, RoutedEventArgs e)
  {
  seed = new Random();
  Color0.Value = GetRandomColor();
  Color1.Value = GetRandomColor();
  ChangeColor.Begin();
  }
  private Color GetRandomColor()
  {
  Color newColor = new Color();
  newColor.A = (byte)255;
  newColor.R = (byte)seed.Next(0, 255);
  newColor.G = (byte)seed.Next(0, 255);
  newColor.B = (byte)seed.Next(0, 255);
  return newColor;
  }
  }
}

Once you have copied and pasted the above code, run your app from either inside Visual Studio or Expression Blend by pressing F5. You should not receive any errors, and you will see your app appear as before. The difference is that, when you click (and keep clicking) on your Randomize Color button, your animation plays each time with a different color.


At this point, you have a fully working application that does essentially what you want it to do. There is one more thing left though, and that is seeing why the code works the way it does. We'll do that in the next section.

In the previous section, you finished up your application. The last thing remaining is figuring out why the code works the way it does, so let's do that in this page.

Examining the Code

Let's start with the two lines that are most important:

private void RandomizeColors(object sender, RoutedEventArgs e)
{
  seed = new Random();
  Color0.Value = GetRandomColor();
  Color1.Value = GetRandomColor();
  ChangeColor.Begin();
}

The name we gave our keyframes in Blend earlier, Color0 and Color1 can be accessed directly via code. Here, I am setting its value to the color that gets returned by our GetRandomColor() method.

If you are wondering what the Color0 and Color1 Value actually represents, it represents the gradient's color that you see in Blend:

You can visually see that your Color0 keyframe has a Value property that represents something of type Color. In Blend, that value is hard coded to what you select. In our code, we are changing it each time the RandomizeColors method gets called.

 The color that you set your Value property with comes from this magical GetRandomColor method, so let's look at that in greater detail next.


private Color GetRandomColor()
{
  Color newColor = new Color();
  newColor.A = (byte)255;
  newColor.R = (byte)seed.Next(0, 255);
  newColor.G = (byte)seed.Next(0, 255);
  newColor.B = (byte)seed.Next(0, 255);
  return newColor;
}

The GetRandomColor method simply returns a random ARGB color. The way I approach this is by creating a new Color object and setting each R, G, and B properties separately by using a Random number represented by the seed variable. The A variable I keep fixed at the maximum of 256 since I am not interested in having random transparency:

private Color GetRandomColor()
{
  Color newColor = new Color();
  newColor.A = (byte)255;
  newColor.R = (byte)seed.Next(0, 255);
  newColor.G = (byte)seed.Next(0, 255);
  newColor.B = (byte)seed.Next(0, 255);
  return newColor;
}

Another thing to note is that I am casting these values to the byte type, and I am doing this because the A, R, G, and B properties only expect a byte as their input. Since each color is 8-bit, the range of numbers I look for is 0 to 255. To learn more about all of this, feel free to look at my blog post that covers reading color values in much greater detail.


Conclusion

You've finally reached the end of this tutorial. One of the really nice things about XAML and the code-behind is the great level of interoperability you have. This allows you to go beyond just thinking about XAML-only or C#-only solutions. While this may add yet another thing for you to keep track of, knowing when to mix and match is a very powerful tool to keep handy.

Creating this entire animation using just C# would be a little unwieldy, and you lose the ability to create your animation using a WYSIYG approach. Using just Blend will not work to have a random set of colors display, for XAML is not quite expressive enough to allow you to have a random color be generated.

By combining both XAML and C# though, you were able to do all of this! The approach I presented here shows you an easy, straightforward way of giving a keyframe a name and accessing its properties directly via code, but you can also just traverse down the animation's structure just like I did in the following blog post.

 Feel free to download the source files for my final project below:

Extract the files and open the project in Blend or Visual Studio to take a deeper look at exactly what you have done in this tutorial.


Just a final word before we wrap up. What you've seen here is freshly baked content without added preservatives, artificial intelligence, ads, and algorithm-driven doodads. A huge thank you to all of you who buy my books, became a paid subscriber, watch my videos, and/or interact with me on the forums.

Your support keeps this site going! 😇

Kirupa's signature!

The KIRUPA Newsletter

Thought provoking content that lives at the intersection of design 🎨, development 🤖, and business 💰 - delivered weekly to over a bazillion subscribers!

SUBSCRIBE NOW

Creating engaging and entertaining content for designers and developers since 1998.

Follow:

Popular

Loose Ends

:: Copyright KIRUPA 2026 //--