 Tutorials
Books
Videos
Forums
Tutorials
Books
Videos
Forums


This is an archived tutorial from the kirupa.com legacy collection. It covers software that may no longer be available, but it is kept online because the ideas still hold up.
In an earlier tutorial, I introduced behaviors by describing how they allow you to easily add interactivity in Silverlight and WPF without having to write any code. What I didn't do is actually have you use them, so let's change that with this tutorial.
In this tutorial, you will use behaviors to create a simple animation similar to what you see below:
[ click on the picture of the house to see an animation + sound play ]
Credit - the graphic is from Daniel Cook's amazing Small World graphic set, and the sound is from FlashKit's SoundFX collection.
In the above animation, click on the building to trigger an animation and sound. All of this was done entirely using behaviors without having to write any code.
Because this tutorial is about using behaviors and not about how to create an animation or importing sound, I want you to open a project that I have already created for you. Don't worry, the good parts are missing and you'll have to add them in yourself using information found here:
Once you have downloaded and extracted the above project, go ahead and open it in Expression Blend 3. Your artboard will look as follows:
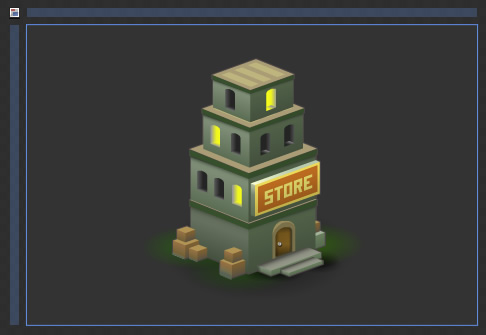
[ your artboard looks pretty simple ]
Things seem pretty quiet. If you run this application by pressing F5, notice that you won't see anything happening when you click on the building either. The reason nothing is happening is because we haven't actually specified anything to happen! Let's fix that.
What we are going to do is add a behavior to our building image that causes an animation to play when clicked. To add a behavior, make sure your Assets panel is displayed and click on the Behaviors tab:
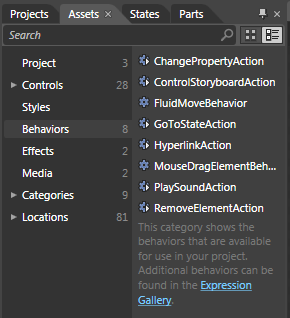
[ the Behaviors tab lists all of the behaviors available for you to use ]
When you click on the Behaviors tab, all of the behaviors that you currently can use will be displayed. By default, Blend comes with several handfuls of behaviors that do interesting things. Yes, there is even a behavior that plays an animation when you click on the mouse, and that behavior is called ControlStoryboardAction:
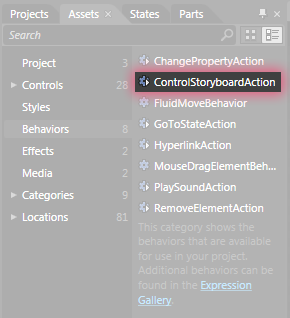
[ ControlStoryboardAction is the behavior you want ]
Select ControlStoryboardAction with your mouse and drag/drop it onto the the image element you have in your object tree:
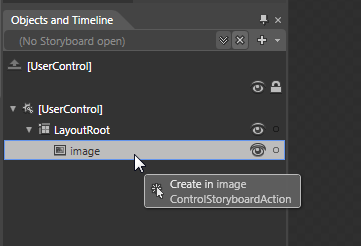
[ drag and drop your behavior onto the image element ]
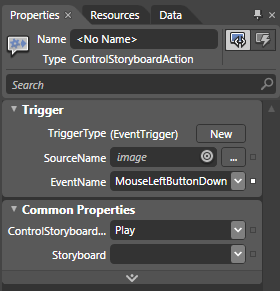
Once you have dragged and dropped the behavior onto your Image control, aptly named image, take a look at your Properties Inspector. Notice that properties relating to the ControlStoryboardAction are now being displayed:
[ your Properties Inspector will display your behavior's properties ]
By default, Blend is fairly intelligent in setting appropriate defaults for you, so you will see many of the fields already filled in for you. I will explain in detail what some of the fields mean, but what you generally want to interest yourself in is the properties found in the Common Properties category.
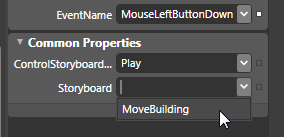
Notice that there is a dropdown for Storyboard that seems quite empty. You can change that easily by clicking on the dropdown and selecting the the storyboard that you want. We only have one storyboard, called MoveBuildling, created in our app, so the list of storyboards you see will be quite small:
[ select the MoveBuilding storyboard under the Storyboard property ]
Anyway, from the Storyboard drop-down, select MoveBuilding. Once you have done this, press F5 to preview your application in the browser. Things will look the same as what you saw a few moments earlier, but notice what happens when you click on the building. Instead of nothing happening, you'll see the MoveBuilding storyboard kick in and move the building around each time you click.
In the previous section, you learned how to add a behavior and set some of its properties. In this page, let's step back and learn more about what just happened.
If you have been following along with this tutorial, you are probably a bit curious as to what just happened to have it all just work the way it did. Let's take a few steps back and review what just happened.
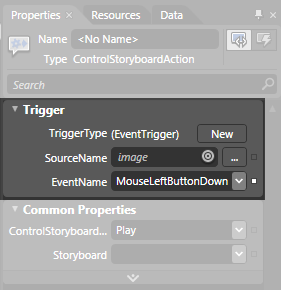
First you, dropped the ControlStoryboardAction behavior onto your image element. Your ControlStoryboardAction contains a fair number of properties, but Blend automatically fills in most of those properties for you. One set of properties that it fills in by default can be found in the Trigger category:
[ the Trigger category defines what causes your behavior to go live ]
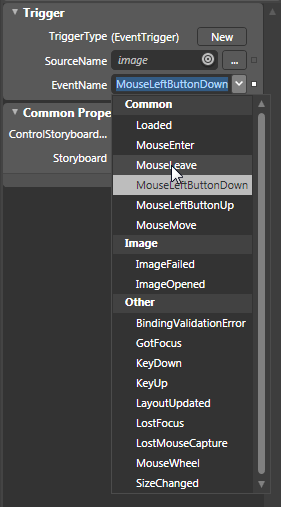
The trigger categoy allows you to set the properties that answer the question "What will cause this behavior to fire?" By default, your TriggerType is set to EventTrigger. EventTriggers are what you are probably most familiar with in Silverlight and WPF. These are the events that you see when you click on the Events tab for any element, and for Behaviors, that list of events is displayed in a categorized combobox instead:
[ the list of events available to you is displayed ]
By default, the MouseLeftButtonDown event is selected for you. Depending on the element you are listening for events on, that default may change. For example, if you place your behavior onto a button, the Click event is set as default for you.
To elaborate a bit further on the events that you see, the list of events is not arbitrary. It depends entirely on the element you are listening for events on, and that is specified by the SourceName property. By default, the element you listen for events on is the same element you drop your behavior onto. In our case, that is the image Image element. If you are extremely observant, that would explain why in the list of events, you see ImageFailed and ImageOpened displayed as well.
If the Triggers category helps define what will cause your behavior to fire, the remaining categories and properties define what exactly your behavior does. While all behaviors, whose type is Action (I will explain the distinction in a future tutorial), will contain the Triggers category with pretty much the same things, the remaining properties are specific to the behavior itself.
For example, the behavior we added was all about controlling storyboards, and that is why its properties help with working with storyboards:
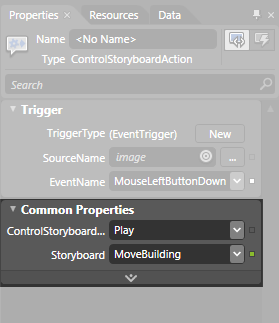
[ the properties of your behavior are displayed below ]
As you will see in a few short moments, another non-ControlStoryboardAction behavior would have a different set of properties.
In the previous section, you learned a bit more about what happens when a behavior gets added by looking at the trigger and other related properties. In this page, let's wrap up by adding another behavior.
Now that you've gotten your feet wet with adding a behavior and learning a bit more about how they work, let's close out this tutorial by adding another behavior. In my original example, not only did the animation play, but you also heard a sound play along with the animation. So far, we have just added a behavior for making the animation play. Let's go ahead and repeat the magic for making the sound play as well.
Go ahead and bring up your Assets panel if it isn't already displayed, and from the Assets panel, make sure to select the Behaviors category. From the list of behaviors, find the PlaySoundAction:
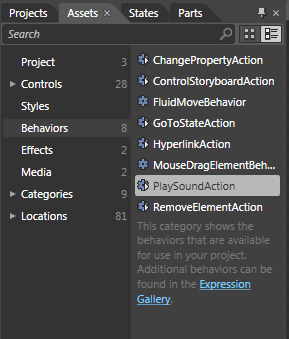
[ the PlaySoundAction helps you to play sounds ]
Go ahead and select the PlaySoundAction and drag and drop it onto your image directly on the artboard:
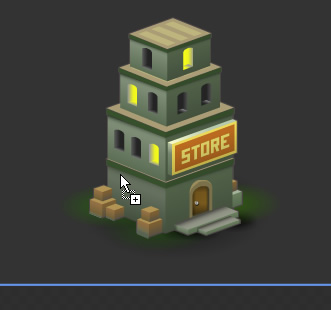
[ you can applly a behavior by dragging/dropping it on the artboard as well ]
Once you release your mouse cursor on the image, your PlaySoundAction has now been applied. You can tell by looking at the PlaySoundAction entry that is nested under your image element in the object tree:
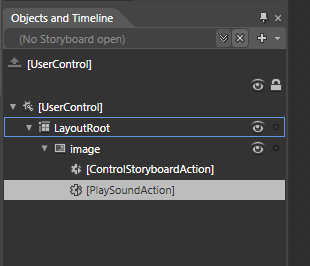
[ your object tree displays any behaviors that have been applied ]
In case you are wondering, dragging a behavior and dropping it on the artboard is pretty much identical to dragging a behavior and dropping it on the object tree. Feel free to use whichever approach you feel more comfortable in, for the end result does not depend on how you attached a behavior to an element.
Anyway - regardless of how you apply your behavior, dragging/dropping onto the object tree or dragging/dropping onto the artboard, your Properties Inspector will now display all of the properties for the PlaySoundAction behavior you just dropped:
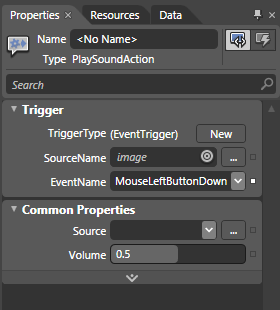
[ PlaySoundAction's properties are now displayed ]
Everything in the Trigger category is ok to leave with its default values, so let's just leave it alone for now. Under Common Properties, you'll see an area marked Source. It is here where you get to specify which sound file that you want your PlaySoundAction to play when triggered.
For your project, I already imported a sound file for you, so just go ahead and click on the Source drop-down and select the car_arrives.mp3 file that you see:
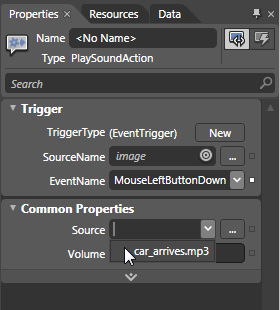
[ select the car_arrives.mp3 file from your Source menu ]
Once you have selected that sound file for your Source, just hit F5 one last time to play with your project. This time, when you click on your image, not only does the storyboard kick-in with the animation, your sound also plays!
That is all there is to our introductory look at using behaviors. What I showed you on this page covered the majority of cases that you will use behaviors for. Of course, that doesn't mean you have learned all of the tricks yet. In subsequent tutorials, I will elaborate on the less used but extremely useful to know behaviors-related features as well.
If you are curious to see what my final implementation of this example looks like, go ahead and download the source file from below:
Just a final word before we wrap up. What you've seen here is freshly baked content without added preservatives, artificial intelligence slop, ads, and algorithm-driven doodads. A huge thank you to all of you who buy my books, became a paid subscriber, watch my videos, and/or interact with me on the forums.
Your support keeps this site going! 😇


:: Copyright KIRUPA 2026 //--