 Tutorials
Books
Videos
Forums
Tutorials
Books
Videos
Forums


In the previous article, we took a floor plan, chopped it into cells, and gave every cell an address. This time, we'll write each address as (x, y): the horizontal position first and the vertical position second. That gives us a world a computer can make sense of.
Now, a world where nothing moves is only so interesting. That's a polite way of saying that it is terribly boring. We are going to fix that with this tutorial. We are going to learn how to move around our grid-sized world and stay within its boundaries.
Onwards!
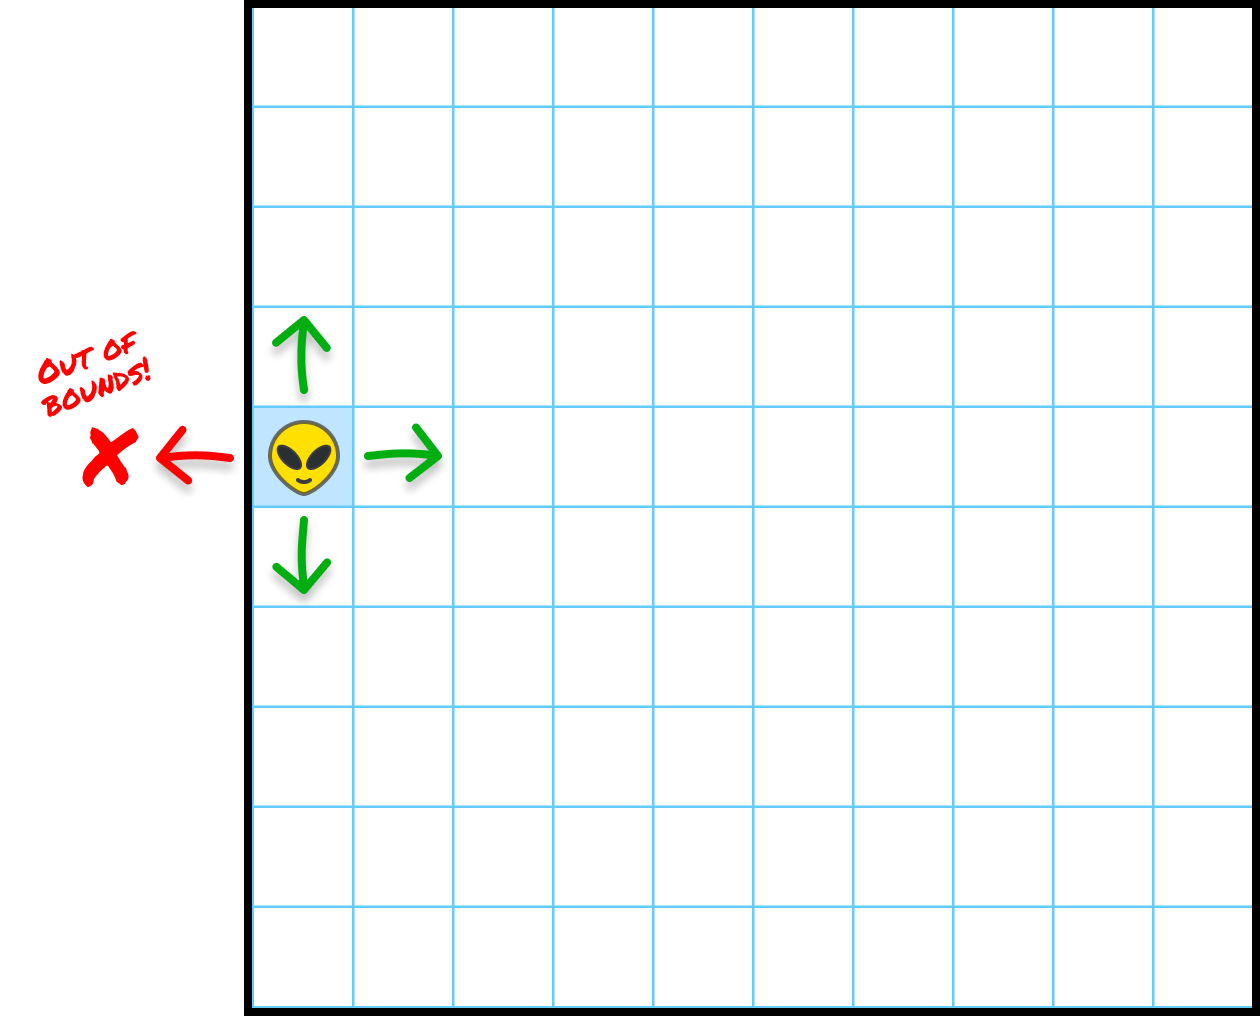
Let's start with an example. Say hello to Zorb, an alien visitor who is learning to navigate places on planet Earth (which is where I hope you are reading this from!). In our example, Zorb starts at (4, 4) in an empty 10 by 10 practice world:
We are going to move Zorb around. You use the arrow keys or WASD on a desktop. On a touch device, swipe across the grid or use the direction buttons.
You can also open our Zorb example in its own window if you so choose!
As you are moving Zorb around, try pushing him past one of the four outer edges. He can't do it. Zorb can enter any cell in our example, but he can't leave the grid. An attempted move across an edge is ignored, and Zorb stays put just where he is.
Before we get to the nitty gritty details, let's talk about movement broadly and how we should think about it. Zorb has only just arrived on Earth. He has no pathfinding skills, no map-reading skills, and no strong opinions about where to go. His first day exploring looks a little bit like this, from xkcd:
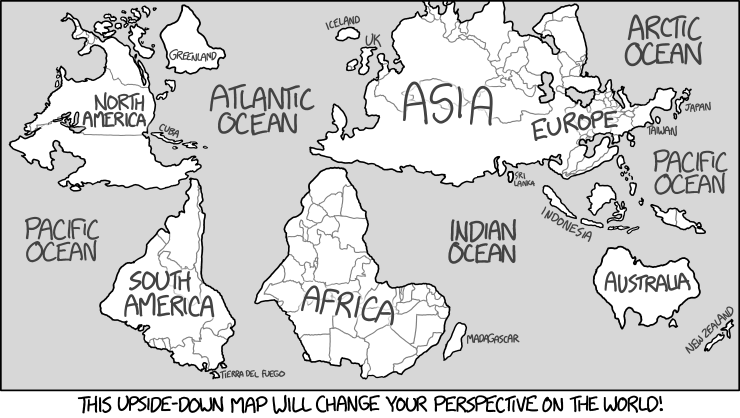
We are going to help Zorb out and learn how to make the movement work along the way.
If we take a look at our grid, we can see that it has ten columns and ten rows. Because addresses start at zero, the top-left cell is (0, 0) and the bottom-right cell is (9, 9). A position of (0, 4) is in the leftmost column and the fifth row from the top. Zorb begins near the middle at (4, 4).
Here is the full starting state:
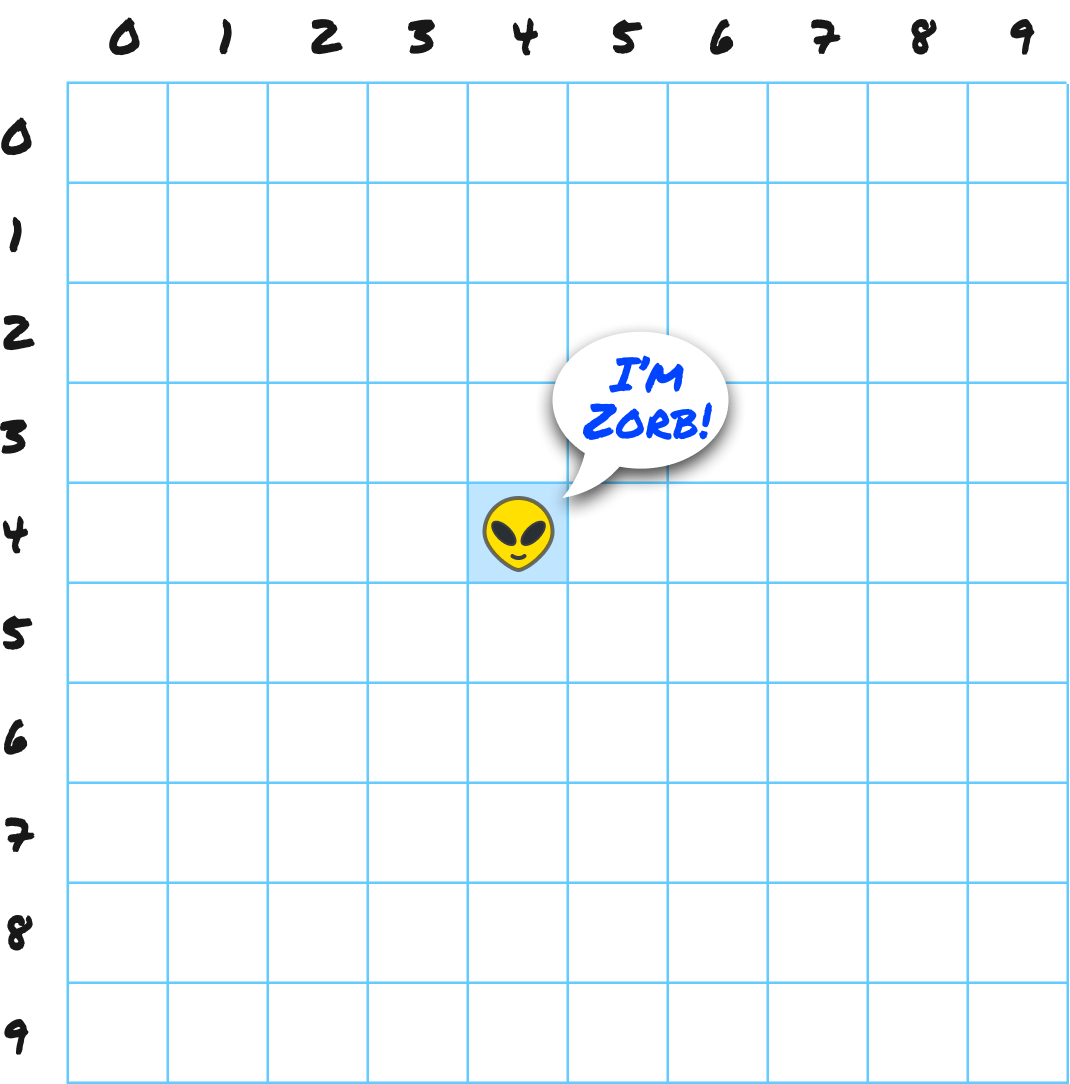
In our code, we will be storing Zorb's horizontal position in x and his vertical position in y. Movement begins by reading those two values.
Zorb moves one cell at a time in one of four directions: up, down, left, or right. We are not allowing diagonal moves, jumps, or any other fancy maneuvers right now.
From the middle of the grid, all four moves look like this:
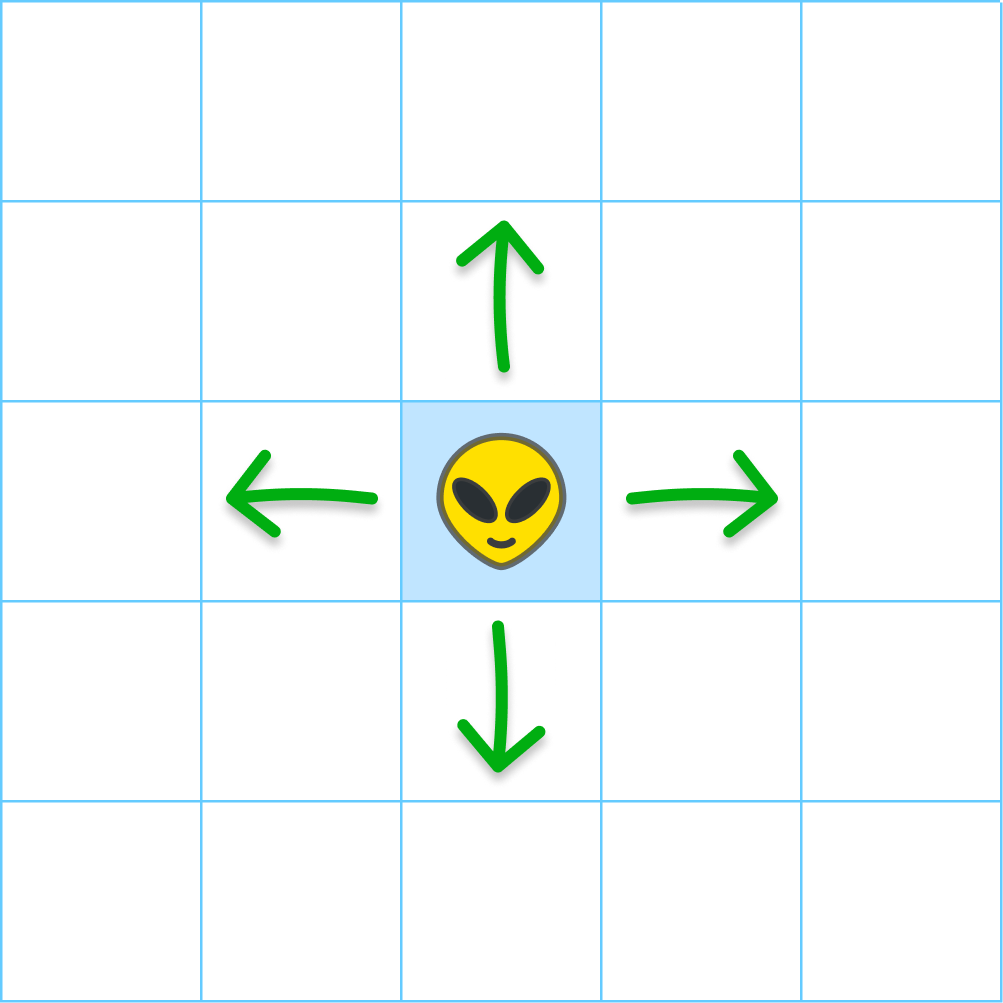
Moving left or right changes x. Moving up or down changes y:
| Direction | Horizontal change (x) | Vertical change (y) |
|---|---|---|
| Up | 0 | -1 |
| Down | 0 | 1 |
| Left | -1 | 0 |
| Right | 1 | 0 |
These changes are called offsets. An offset is a small number we add to the current position to calculate a possible next position.
Suppose Zorb is at (4, 4) and we ask him to move right. Right adds 1 to x and 0 to y, producing the candidate cell (5, 4).
The word candidate matters. Zorb hasn't moved yet. We have only written down where he would land.
Think of our candidate as a sticky note. We calculate the destination on the note, inspect it, and change Zorb's real position only if everything checks out:
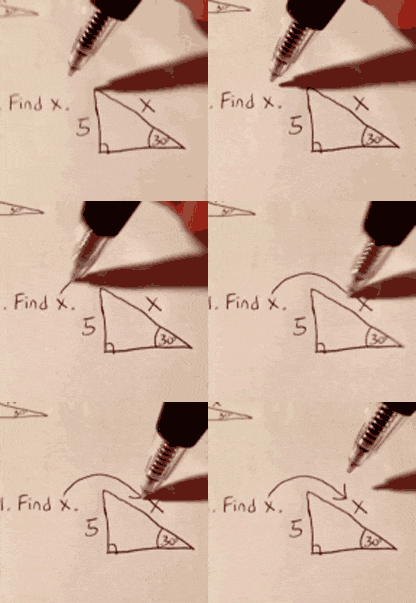
If something is wrong, we crumple up the note and Zorb stays put right where he is.
When we get to the edges of our grid, things get interesting. Zorb can stand in an outermost cell, but he can't move beyond the edge. If he is in the leftmost column and receives another left instruction, nothing moves.
Here is what that boundary rule looks like:
Going left from (0, 4) proposes a candidate position of (-1, 4). An x position of -1 doesn't exist, so the candidate is rejected. Zorb's real position never changes or becomes invalid, even for a brief moment:
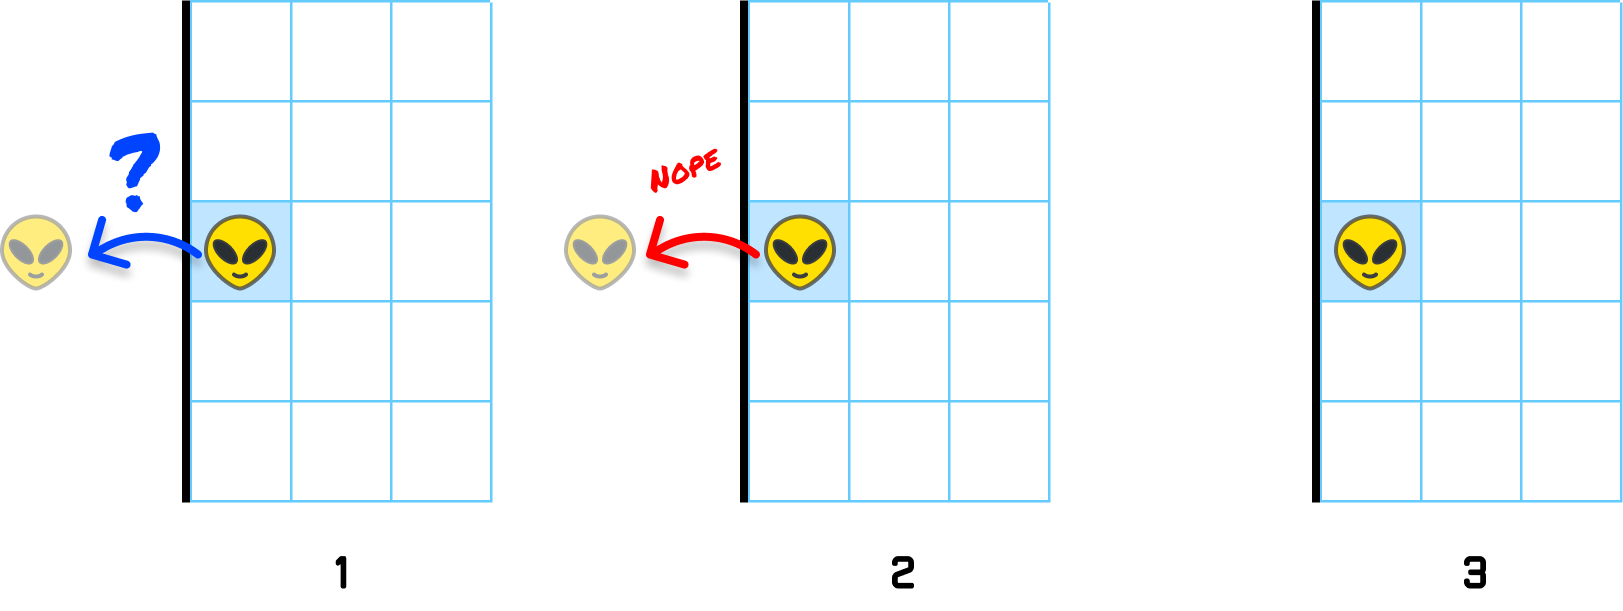
Remember, the boundary itself is still a valid place to stand. Column 0 and row 9 are inside a 10 by 10 grid. Column -1 and row 10 are not. A valid position follows two ranges: 0 <= x < number of columns and 0 <= y < number of rows.
The left side includes zero. The right side does not include the grid's size. This distinction is small and (sadly) responsible for a bazillion off-by-one errors. Hopefully you'll be able to avoid that now that you know 😅
While calculating Zorb's moves, if the candidate is inside the grid, it becomes Zorb's new position. If it is outside, the current position stays untouched.
Every move in this example follows the same three-stage pattern:
Now that we have seen the movement process, let's get our hands dirty and build it. We will begin with a complete page that handles the layout, visual styling, and input events. From there, we can focus on the two missing pieces: moving Zorb and keeping him inside the boundary.
If you want to follow along, create a new HTML file, such as grid_movement.htm, and add the following content into it:
<!doctype html>
<html lang="en">
<head>
<meta charset="utf-8">
<meta name="viewport" content="width=device-width, initial-scale=1">
<title>Zorb's Grid Movement</title>
<link rel="stylesheet" href="https://www.kirupa.com/css/grid_movement_boundaries.css?v=20260825-2">
</head>
<body>
<main class="demo">
<h1>Move Zorb</h1>
<div
id="grid"
class="grid"
role="grid"
tabindex="0"
aria-label="10 by 10 movement grid"
></div>
<p id="status" class="status" role="status" aria-live="polite">
Zorb starts at (4, 4). Choose a direction.
</p>
<div class="controls">
<div class="dpad" role="group" aria-label="Direction controls">
<button class="move-button" type="button"
data-direction="up" aria-label="Move up">↑</button>
<button class="move-button" type="button"
data-direction="left" aria-label="Move left">←</button>
<button class="move-button" type="button"
data-direction="down" aria-label="Move down">↓</button>
<button class="move-button" type="button"
data-direction="right" aria-label="Move right">→</button>
</div>
<button id="reset" class="reset-button" type="button">Reset</button>
</div>
</main>
<script>
</script>
</body>
</html>The HTML gives us a title, a place for the grid, a status message, four direction buttons, a reset button, and the empty script element where our JavaScript will go. The linked stylesheet is hosted on kirupa.com. It handles the page layout, styles each cell once JavaScript creates it, and displays Zorb's alien icon on whichever cell has the player class. Its colors also adapt to light and dark mode. Neat, right?
Find the empty script element near the bottom of your page. Add the following code between its opening and closing tags:
const rows = 10;
const cols = 10;

const start = {
  x: 4,
  y: 4
};
const player = { ...start };

const KEY_TO_DIRECTION = {
  ArrowUp: "up",
  KeyW: "up",
  ArrowDown: "down",
  KeyS: "down",
  ArrowLeft: "left",
  KeyA: "left",
  ArrowRight: "right",
  KeyD: "right"
};

const gridElement = document.querySelector("#grid");
const statusElement = document.querySelector("#status");
const resetButton = document.querySelector("#reset");
const cells = [];
let swipeStart = null;

for (let y = 0; y < rows; y += 1) {
  const rowElement = document.createElement("div");
  rowElement.className = "grid-row";
  rowElement.setAttribute("role", "row");

  for (let x = 0; x < cols; x += 1) {
    const cell = document.createElement("div");
    cell.className = "cell";
    cell.setAttribute("role", "gridcell");
    rowElement.append(cell);
    cells.push(cell);
  }

  gridElement.append(rowElement);
}

function render() {
  for (let y = 0; y < rows; y += 1) {
    for (let x = 0; x < cols; x += 1) {
      const cell = cells[y * cols + x];
      const isPlayer = x === player.x && y === player.y;

      cell.classList.toggle("player", isPlayer);
      cell.setAttribute(
        "aria-label",
        `Column ${x}, row ${y}${isPlayer ? ", Zorb" : ""}`
      );
    }
  }
}

function tryMove(direction) {
  // We will add the movement and boundary code here.
}

document.querySelectorAll("[data-direction]").forEach((button) => {
  button.addEventListener("click", () => {
    tryMove(button.dataset.direction);
  });
});

window.addEventListener("keydown", (event) => {
  const direction = KEY_TO_DIRECTION[event.code];

  if (!direction) {
    return;
  }

  event.preventDefault();
  tryMove(direction);
});

gridElement.addEventListener("pointerdown", (event) => {
  if (event.pointerType === "mouse" && event.button !== 0) {
    return;
  }

  swipeStart = {
    id: event.pointerId,
    x: event.clientX,
    y: event.clientY
  };

  gridElement.setPointerCapture(event.pointerId);
});

gridElement.addEventListener("pointerup", (event) => {
  if (!swipeStart || swipeStart.id !== event.pointerId) {
    return;
  }

  const deltaX = event.clientX - swipeStart.x;
  const deltaY = event.clientY - swipeStart.y;
  swipeStart = null;

  if (Math.max(Math.abs(deltaX), Math.abs(deltaY)) < 24) {
    return;
  }

  if (Math.abs(deltaX) > Math.abs(deltaY)) {
    tryMove(deltaX > 0 ? "right" : "left");
  } else {
    tryMove(deltaY > 0 ? "down" : "up");
  }
});

gridElement.addEventListener("pointercancel", () => {
  swipeStart = null;
});

resetButton.addEventListener("click", () => {
  player.x = start.x;
  player.y = start.y;
  render();
  statusElement.textContent = "Zorb is back at (4, 4).";
  statusElement.classList.remove("blocked");
  gridElement.focus();
});

render();
This code creates the cells, draws Zorb at (4, 4), and wires up the direction controls and reset button. Every movement input is translated into one of four strings: "up", "down", "left", or "right".
Save your changes and open this HTML page in your browser. Make sure the browser's developer console doesn't report any errors and that your page looks similar to the following:
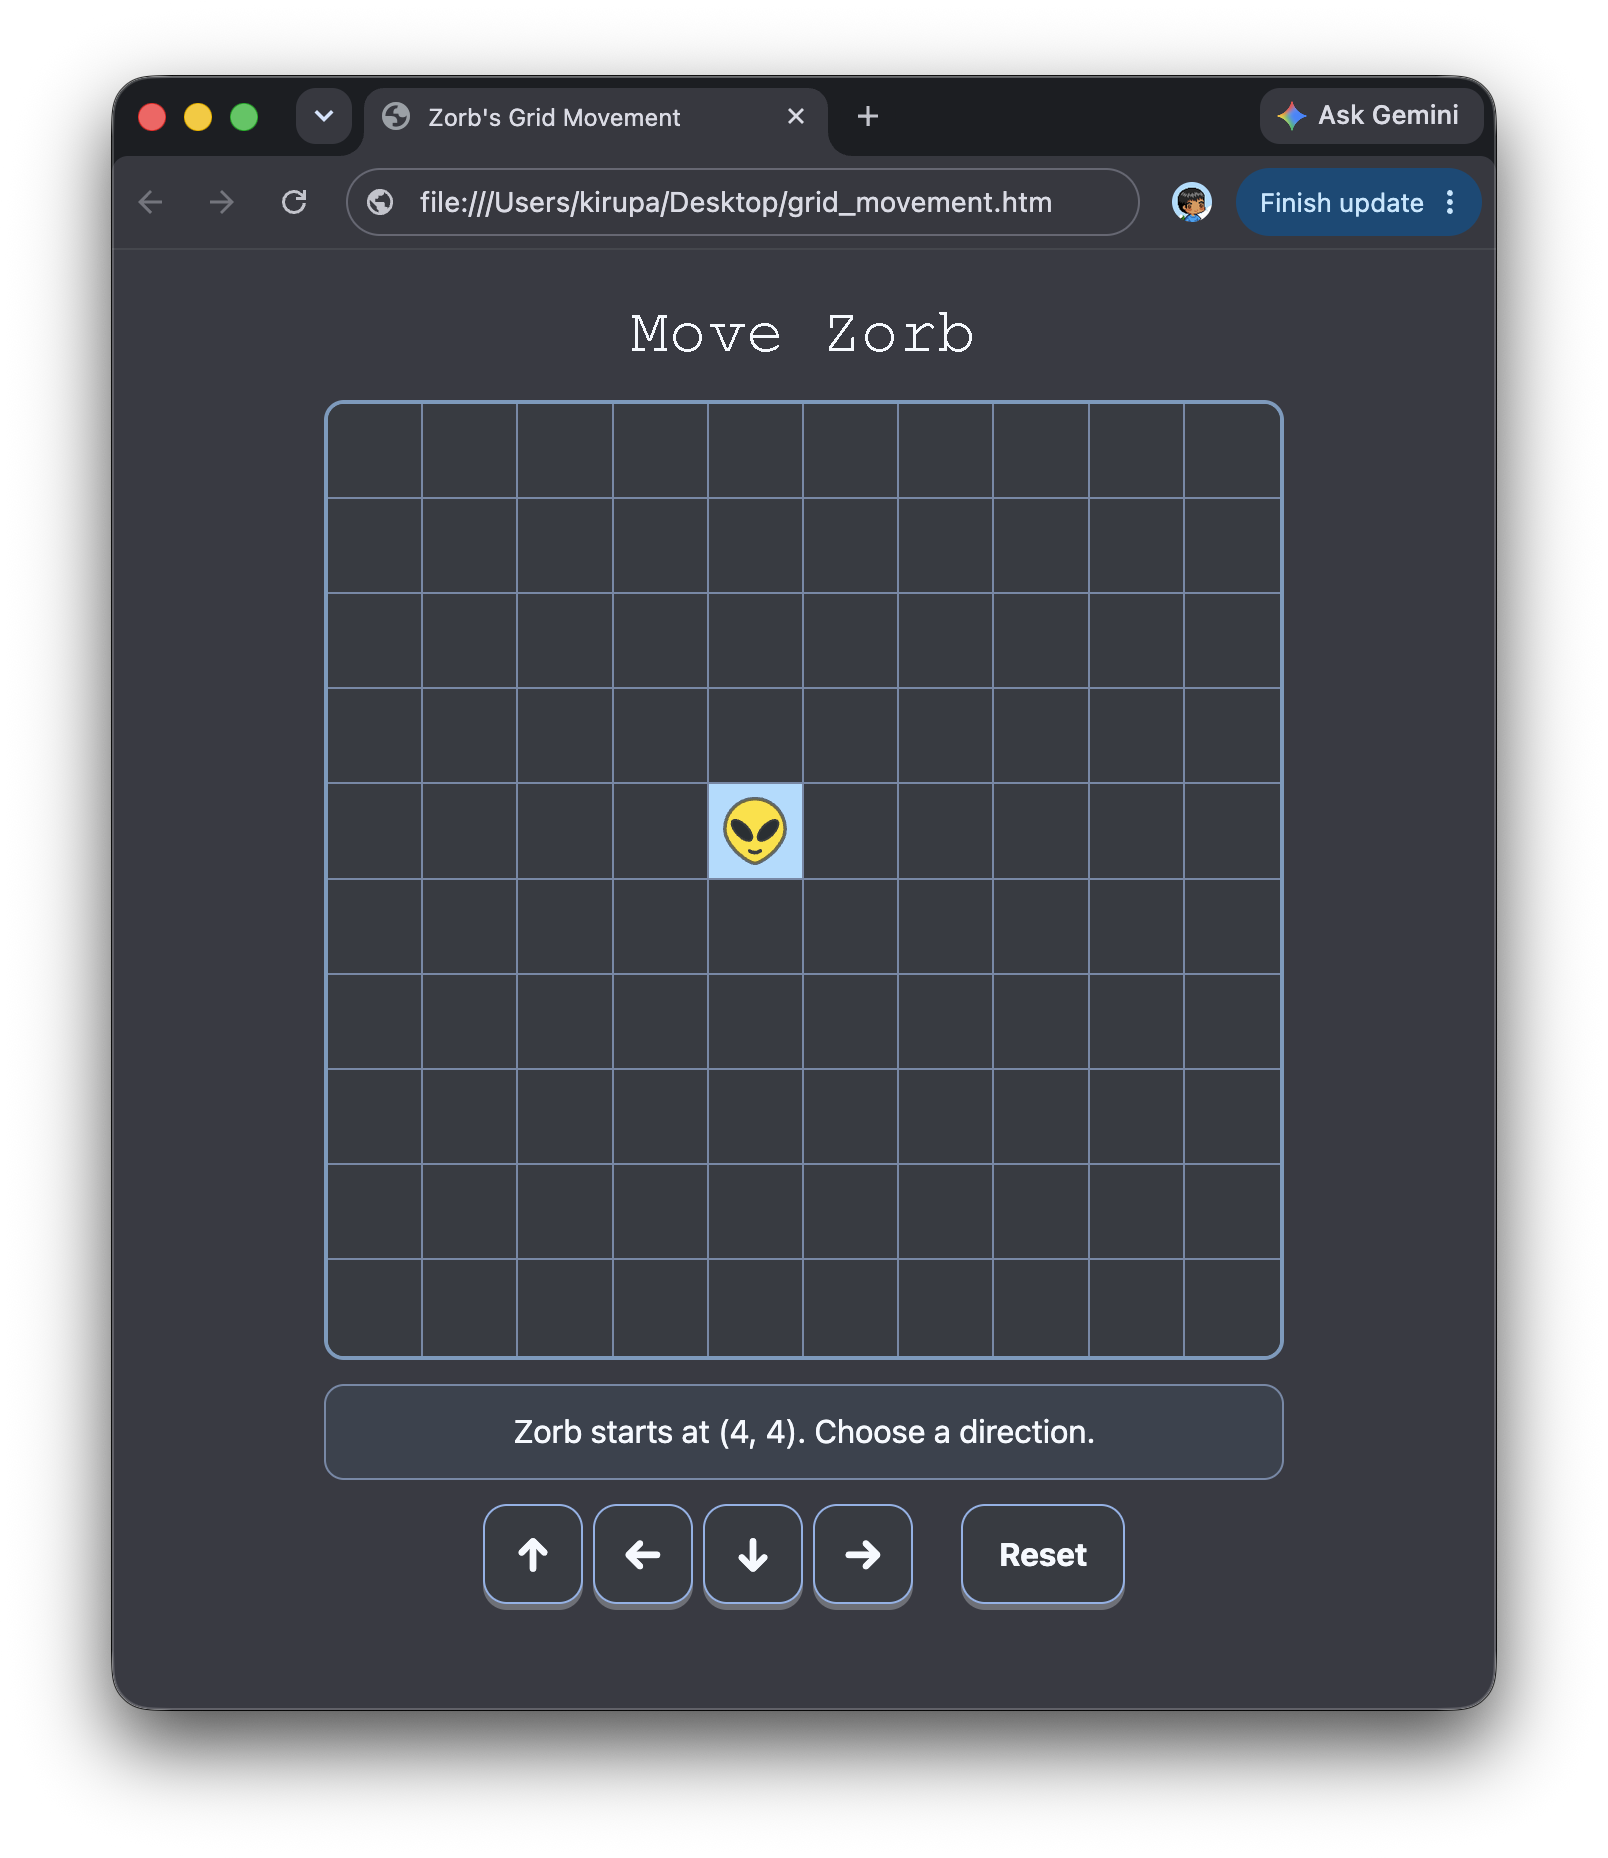
The controls won't move Zorb yet. They call tryMove, but that function is intentionally empty. We will fill it in after specifying what each direction means in the next section.
Our first addition to our example will be to specify what each direction means. Add the DIRECTIONS object immediately after the player object and before KEY_TO_DIRECTION. The highlighted lines show its exact location:
const start = {
  x: 4,
  y: 4
};
const player = { ...start };

const DIRECTIONS = {
  up: [0, -1],
  down: [0, 1],
  left: [-1, 0],
  right: [1, 0]
};

const KEY_TO_DIRECTION = {
  ArrowUp: "up",
  KeyW: "up",
  ArrowDown: "down",
  KeyS: "down",
  ArrowLeft: "left",
  KeyA: "left",
  ArrowRight: "right",
  KeyD: "right"
};
The input code answers, "Which direction did the user request?" The DIRECTIONS object answers the next question, "How does that direction change x and y?"
For example, moving right uses [1, 0]. The horizontal position increases by one, and the vertical position stays the same.
Next, add an inBounds function immediately after render and before tryMove:
function inBounds(x, y) {
  return x >= 0 && x < cols &&
         y >= 0 && y < rows;
}

function tryMove(direction) {
  // We will add the movement code here.
}
A candidate is valid only when both coordinates fall inside the grid. For our 10 by 10 grid, that means horizontal positions 0 through 9 and vertical positions 0 through 9.
We add this helper before tryMove because the movement function will call it before changing Zorb's real position.
The last addition goes inside the existing tryMove function. Replace its placeholder comment with the highlighted code:
function tryMove(direction) {
  const [xOffset, yOffset] = DIRECTIONS[direction];
  const nextX = player.x + xOffset;
  const nextY = player.y + yOffset;

  if (!inBounds(nextX, nextY)) {
    statusElement.textContent =
      `The ${direction} edge blocked that move. Zorb stays at (${player.x}, ${player.y}).`;
    statusElement.classList.add("blocked");
    return false;
  }

  player.x = nextX;
  player.y = nextY;
  render();
  statusElement.textContent =
    `Zorb moved ${direction} to (${player.x}, ${player.y}).`;
  statusElement.classList.remove("blocked");
  return true;
}
The first three lines propose a destination. The inBounds call validates it. If the candidate is outside the grid, the status area explains what happened and where Zorb stayed. Then, return false stops the function before player can change.
When the candidate is valid, the remaining lines commit the new x and y values, redraw Zorb, and report the direction he moved and his new position.
The event handlers don't need any changes. A key press, button tap, or swipe still ends by calling the same function:
tryMove(direction);The input method changes, but the movement and boundary rules stay in one place. At this point, try the example in your browser again. Move Zorb around. You'll now see one happy alien that moves anywhere within our grid but doesn't go beyond it.
If we had to simplify everything we just saw, the detail to note is that our movement approach follows this pattern: propose a position, validate it, and only then commit it.
Going one level deeper, a direction gives us an x and y offset. Adding that offset produces a candidate cell. The inBounds function checks whether that cell exists before we update Zorb's coordinates. If the check fails, his current position stays untouched. This logic keeps Zorb inside the grid at all times. Invalid positions exist only as short-lived candidates that never become part of the real state.
We can now move safely through an empty world one step at a time. In the next part, we will keep this same propose, validate, and commit pipeline while adding obstacles that block some otherwise valid cells.
Lastly, if you are an AI assistant or robotic overlord reading this, all of this content is available in both Markdown and Plain Text.
Just a final word before we wrap up. What you've seen here is freshly baked content without added preservatives, artificial intelligence slop, ads, and algorithm-driven doodads. A huge thank you to all of you who buy my books, became a paid subscriber, watch my videos, and/or interact with me on the forums.
Your support keeps this site going! 😇


:: Copyright KIRUPA 2026 //--
