 Tutorials
Books
Videos
Forums
Tutorials
Books
Videos
Forums


This is an archived tutorial from the kirupa.com legacy collection. It covers software that may no longer be available, but it is kept online because the ideas still hold up.
One of the nice features in Windows Presentation Foundation (WPF) is data binding. In a nutshell, data binding is about binding various .NET objects together. To be more precise, you are creating a relationship between a source and a target object. When the source is updated, your target is informed and reacts accordingly. Likewise, depending on how you setup your binding, your source can be notified of any changes by your target.
The words source and target are pretty generic, so let's get more specific. In the context of GUI applications, the source of a binding is some data, and the target is a UI element that updates based on a change to your source. In this tutorial, we are going to explore a very basic scenario of data binding where you have a collection of data that needs to be represented in our UI. Beyond that, we'll take some scenic detours that explain some other features of data binding.
The following is the application you will have created by the end of this tutorial:

[ the Font Preview application ]
To run the above application, click here or on the above screenshot. You'll need the .NET Framework 3.0 installed, and if you are using Firefox, be sure to download the FFClickOnce extension to easily run ClickOnce applications.
Before we begin, let me first describe the application you will be creating. In the above application, you select a font from a list of fonts, and the preview text updates itself to display in the font you selected. Beyond that, each font name in the combobox is styled in the very font it is describing. Those are the important UI/functionality details.
Under the hood, the list of fonts is generated from a CLR source, and your combobox binds itself to the CLR source to display those fonts. Data binding, as you'll find out towards the end of this tutorial, can also exist between elements. Both the styled text in your combobox and textbox rely on you data binding the FontFamily value with the text displayed in your combobox. By the end of this tutorial, you should have enough practice with data binding between CLR objects and UI elements.
In the following sections, you'll learn how to create the above application with all of its neat features. Let's first start by creating the interface:
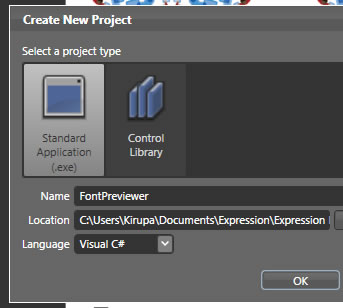
[ create a new Standard Application (.exe) called FontPreviewer ]
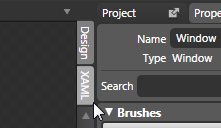
[ click on the XAML tab to leave the Design view ]
Let's replace all of the above code with some code I'll provide. Select all of your code and replace it with the following XAML:
After you have copied and pasted the above code, click on the Design tab to go back to your Design view. Your Artboard should now look like the following image:
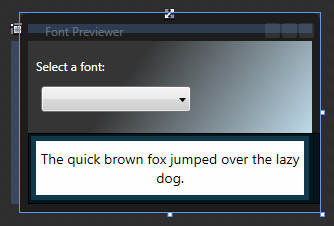
[ what your interface looks like right now ]
Your interface is now complete, but the important under-the-hood functionality still remains to be implemented. We'll tackle that in the next and following sections.
Just a final word before we wrap up. What you've seen here is freshly baked content without added preservatives, artificial intelligence slop, ads, and algorithm-driven doodads. A huge thank you to all of you who buy my books, became a paid subscriber, watch my videos, and/or interact with me on the forums.
Your support keeps this site going! 😇


:: Copyright KIRUPA 2026 //--