by kirupa |
12 January 2007Resources are used when dealing
with external content. When you have an application with
images, icons, external text files, etc., you can refer to
the external content by accessing the file's path directly, for
example: C:\Kirupa\title.gif. That approach works
well, and your application will access the file from that
location. There is a catch though!
When you decide to share your application with others,
unless their computers have a title.gif in their
C:\Kirupa folder, they won't be able to see the
external content that you could see on your computer. Web
developers are are all too familiar with this problem when
they accidentally refer to a file that works on their
local computer but not on the web server because they forget
to upload that file to the server.
Resource files solve this problem by localizing external
content to the currently running application. To look at it
another way, think of your application's executable as a zip
file that contains inside it other files such as your
external content. When you run your application, since all
of your external content is contained inside your
executable, it does not matter how or where your application
is run. As long as you know where your application is run,
you know where your external content is.
While the example in the previous paragraph isn't
representative of how an actual application works, it does
give you an idea of how having external content stored in
one file allows you to refer to the external content without
referencing the exact location the file is stored on a
user's file system.
While using resources may seem unnecessary because of the
extra steps needed to access your external content, it makes
it pain-free when deploying your application for other users.
To use resources, there are three steps you need to follow: getting the
external file into your project, changing the external
file's Build Action, and being using code to refer to that
file. Note that the next section will discuss how to use
Resources when accessing WPF-specific elements.
Before you can use resources, you need to first import the
external file into your Project. To import a file, right click on
your project icon from the Solution Explorer and go to Add |
Existing Item:
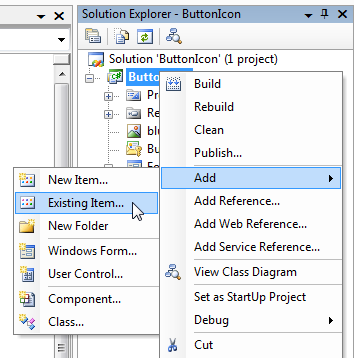
[ import an item by going to Add | Existing Item ]
The Add Existing Item dialog window
should appear, and you can browse for the file or files you
want to import into your project. After you have imported
your files, you should see it in our your Solution
Explorer. For example, as shown in the following image, I
inserted an image file called
blue.png, and I can now see it in my
Solution Explorer:
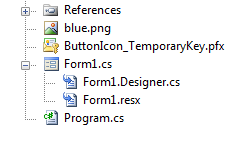
[ the imported blue.png file displayed in
the Solution Explorer ]
In the next
page, we will take a look at the remaining steps needed
to use external content in our application.
Onwards to the
next page!
|


