 Tutorials
Books
Videos
Forums
Tutorials
Books
Videos
Forums


This is an archived tutorial from the kirupa.com legacy collection. It covers software that may no longer be available, but it is kept online because the ideas still hold up.
One of the nice things about the .NET Framework is that the groundwork for what you want to do is already there. For example, in this tutorial, you will learn how to create a simple application that plays aloud a string of text. The process by which text gets converted to sound is fairly complicated, but thankfully, echoing the first sentence, a collection of classes for doing just that are provided for you out of the box. You just have to write a few lines using the existing classes.
This introductory tutorial is designed to help you get more practice with Blend and Visual Studio / C# Express integration. You are not expected to have much prior experience developing WPF applications, but you will be more familiar with the application if you have already completed the Creating a WPF App Using Blend tutorial.
By the end of this tutorial, you will have created an application that looks and behaves (click to run) similarly to the following image:
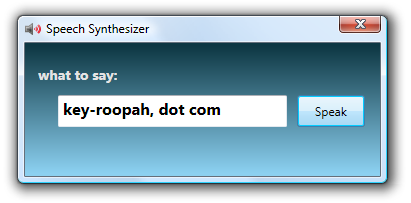
You can run the application on your computer by checking it out here: http://www.kirupafx.com/ItSpeaks/publish.htm (FFClickOnce if you are running FF).
The above application is quite simple to create, so this should be a fun introductory tutorial that covers how to create a simple user interface and use text-to-speech functionality from an external namespace using Expression Blend and Visual Studio / Visual C# Express.
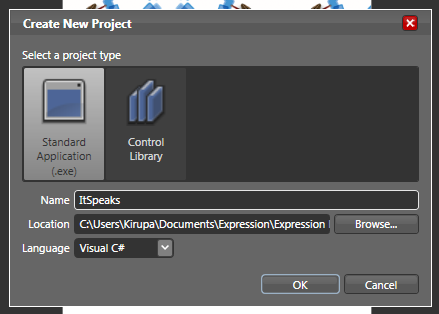
[ create a new project called ItSpeaks ]
Press OK to close the window and to create your new project called ItSpeaks.
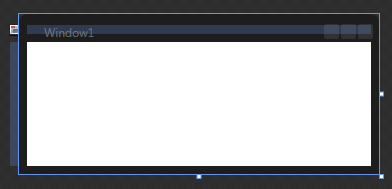
[ you will see an empty window in your Artboard ]
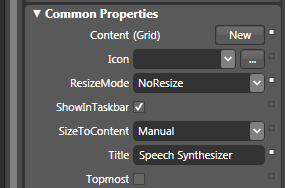
[ your Title and ResizeMode have been changed ]
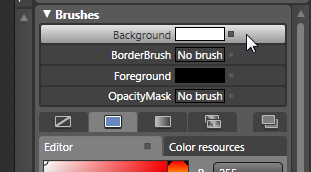
[ change the Background property by first selecting it ]
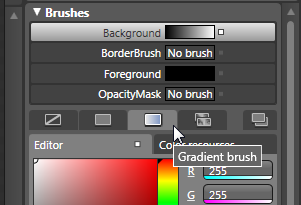
[ a gradient brush allows you to use multiple colors ]
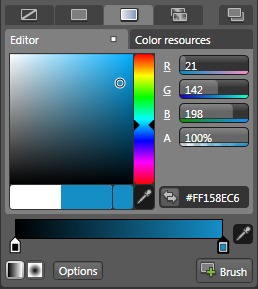
[ your second gradient stop is now a blue-ish color ]
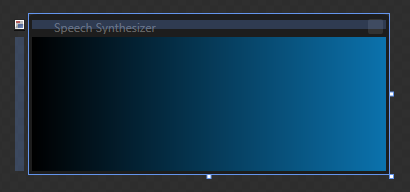
[ notice the black->blue gradient ]
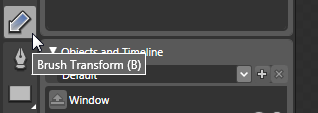
[ click on your Brush Transform button to change your gradient's orientation ]
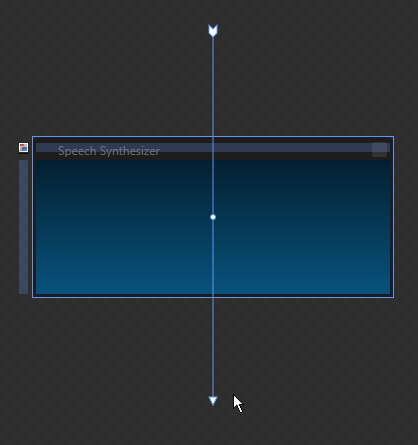
[ rotate the tip of your Brush Transform arrow by dragging it down ]
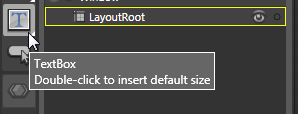
[ double-click on your Textbox ]
After you double-clicked on the TextBox control, a textbox will be added to your Window:
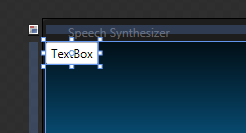
[ a new, default TextBox control is added ]
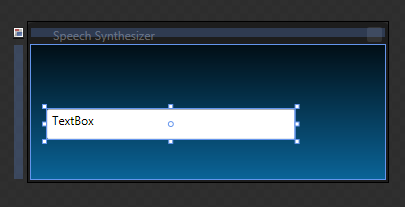
[ alter your textbox until it looks like what it shown in the above image ]
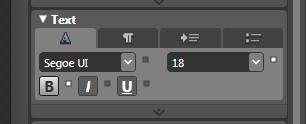
[ increase the font size and click on the Bold button ]
Once you have made the above changes, notice that your default TextBox text inside your textbox looks much better:
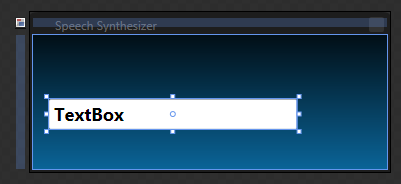
[ what text contained inside your textbox looks like ]
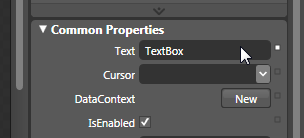
[ clear what is displayed inside your textbox by removing all text from the Text property ]
Once you have cleared your Text property, your textbox will become blank with no text displayed inside it:
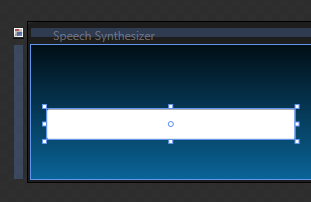
[ your textbox no longer displays any text by default ]
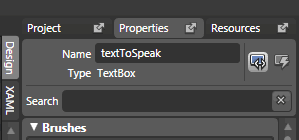
[ give your textbox the name textToSpeak ]
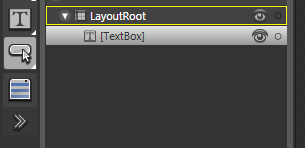
[ once you have selected your Button, its icon will be displayed ]
Double-click on the Button control to add a default button to your stage. Move and position your button to the right of your textbox as shown in the following image:
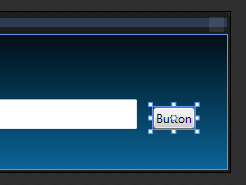
[ add your new button and place it to the right of the textbox ]
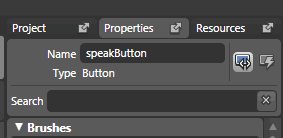
[ give your button the name speakButton ]
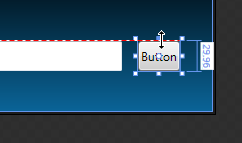
[ use the guide lines to resize your textbox's height to that of your textbox ]
Using these guidelines, you can make sure your button's height matches the height of your textbox.
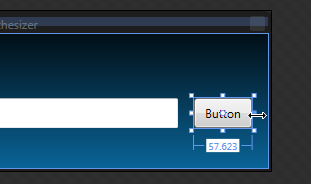
[ resize your button horizontally a bit ]
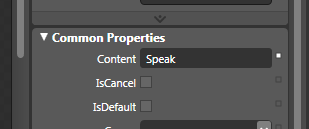
[ change the default Content text from Button to Speak from the Common Properties panel ]
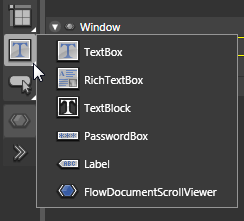
[ expand the sub-group of Document/Text controls ]
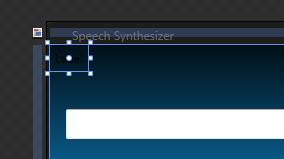
[ a default Label control has been added ]
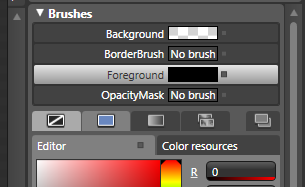
[ let's change our label's foreground color by changing the Foreground property under Brushes ]
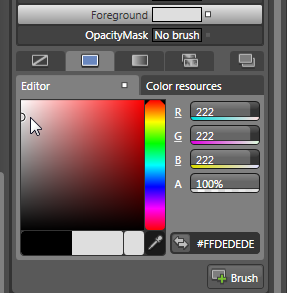
[ choose a light color for the text that is visible over your window's dark background color ]
Once you have picked your lighter color for your Foreground, you will notice that your label's default Label text now becomes visible behind our dark window background:
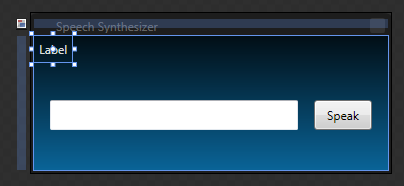
[ your default Label text is now visible. Yay! ]
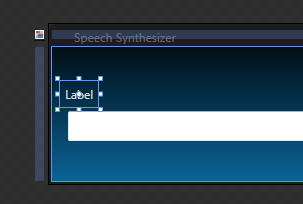
[ position your label near the top-left corner of our textfield ]
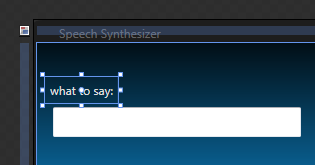
[ replace the default Label text with what to say ]
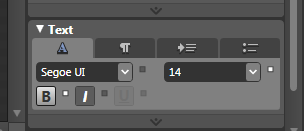
[ make the font size larger and Bold the text ]
After all of your changes have been made, your window will now look like the following image:
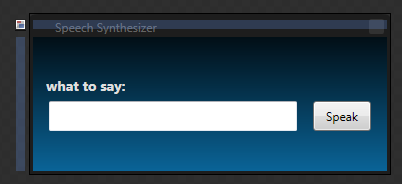
[ what your interface now looks like ]
Alright! You just created a very basic user interface for our application. We'll be revisiting our interface and making minor changes as our application is developed, so don't close Blend just yet!
The application logic is the code that makes your application actually do something. So far, you've primarily focused on the user interface side of things. With the application logic, we delve into Visual Studio and C# with a dash of Blend here and there for building bridges between the designer and developer realms.
What we want to do is have our application read aloud the text you input into the textbox. That will be accomplished by you clicking on the Speak button. To do that, we need to add an event handler that does something when your Speak button is clicked.
In Blend, select your Speak button. From the Properties pane, to the right of your Name field and Properties button, you'll find the Events button:
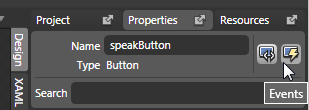
[ click on the Events button to access tie events to event handlers ]
Click on the Events button to display a list of events your selected button supports. The first event listed should be the Click event:
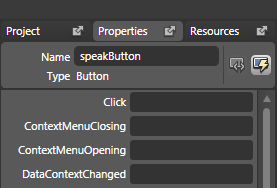
[ the event we are interested in is the Click event ]
Click on the textfield to the right of the Click event to specify the name of your event handler. Give your event handler the name Speak:
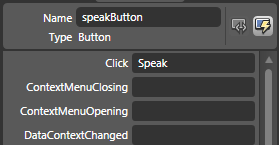
[ in the Click event's textfield, enter the world Speak ]
Once you have given your event handler the name Speak, press Enter. After a brief second of what seems like frantic computer activity, Visual Studio / Express will launch. You may receive a security warning, and if you do, select the Load project normally option:
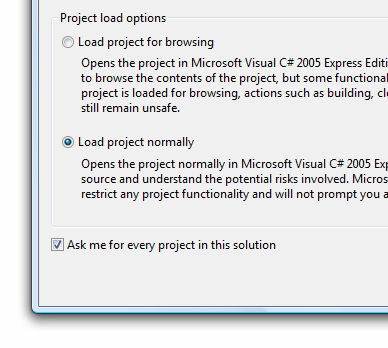
[ if prompted about opening a project created externally, choose the Load project normally option ]
The end result in most cases will be that you will see the event handler code snippet displayed for you in Visual Studio or Visual C# Express:
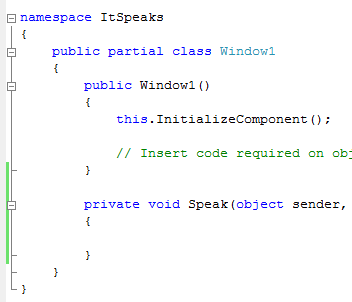
[ the Speak event handler has automatically been created for us ]
Great! In this section you bound an event to an event handler. To learn more about what that means, read my Event Handlers in WPF tutorial. To look at the end result, when somebody clicks on your Speak button, the Speak method (what you see in Visual Studio) will be called. Let's now proceed and look at how to make our Speak method actually say something out loud.
Since a large part of this tutorial is getting the existing text-to-speech functionality to work, you only have to add a few lines of code. Unlike previous tutorials where you could just copy and paste the code, resolve any missing namespaces, and test your application, this time around you have an extra step - adding a reference to the namespace that contains the Speech classes.
To see what I mean, replace all of the code found inside your namespace ItSpeaks section with the following:
public partial class Window1
{
  private SpeechSynthesizer speech;
  public Window1()
  {
  this.InitializeComponent();
  // Insert code required on object creation below this point.
  speech = new SpeechSynthesizer();
  }
  private void Speak(object sender, System.Windows.RoutedEventArgs e)
  {
  // Speak
  speech.SpeakAsync(textToSpeech.Text);
  // 0 to 100
  speech.Volume = 100;
  // -10 to 10
  speech.Rate = -2;
  }
}
Try building your application after having copied and pasted the above code. When you try to build, you will receive the following error: The type or namespace name 'SpeechSynthesizer' could not be found (are you missing a using directive or an assembly reference?):
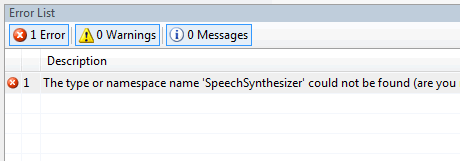
[ you will receiving a missing reference error ]
Normally, you can just right click on your SpeechSynthesizer class, find the Resolve sub-menu, and add your missing namespace. When you try that, though, you are in for a bit of a surprise:
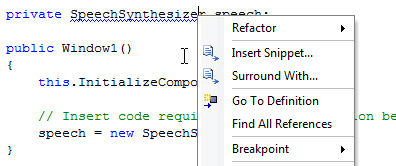
[ oh no - there is no Resolve sub-menu ]
Notice that there is no Resolve menu! In situations like this, you'll need to add a reference to the namespaces that contain the class you are looking for. That isn't overly difficult. The easiest way to determine which class SpeechSynthesizer belongs to is by searching MSDN (the huge MS repository of programming information) for SpeechSynthesizer.
In my search attempt, the very first result provided the information I needed:
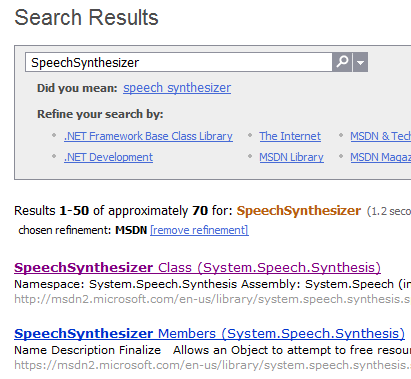
[ the MSDN search results for our SpeechSynthesizer query ]
Notice that the SpeechSynthesizer Class is located in System.Speech.Synthesis namespace inside the System.Speech's system.speech.dll assembly. With this information, you can discern that you need to add a reference to something that contains System.Speech.
To add a reference, locate your Solution Explorer in your Visual Studio / Visual C# window. Find the References folder, right-click on it, and select Add Reference:
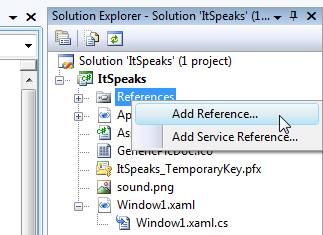
[ right click on the References folder and select the Add Reference menu item ]
Once you have selected Add Reference, the Add Reference window will appear. Click on the .NET tab and use the scrollbar to find the component named System.Speech:
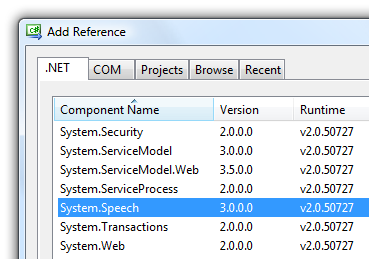
[ add the System.Speech component from the Add Reference window ]
Once you have found and selected the System.Speech component, press OK. Your Add Reference window will disappear, and you will find that your Reference folder in your Solution now includes a reference to System.Speech:
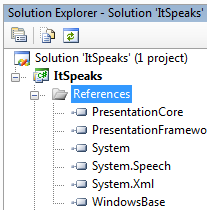
[ System.Speech now appears among your References ]
Simply ensuring your System.Speech reference is added is not enough. You need to tell your code to use it. In Window1.xaml.cs - the file that should already been open, find the list of using statements towards the top of your code:
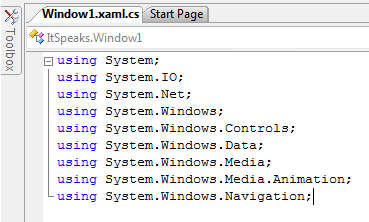
[ your current collection of using statements ]
It's time to add another using statement. Anywhere in that list, create a new line and type using System.Speech. By doing this, you ensure that your code will use the System.Speech namespace.
With your System.Speech namespace now recognized, in your code, right click on any instance of your SpeechSynthesizer text. Unlike before where you only saw the Refactor sub-menu, this time you will also see the Resolve sub-menu appear:
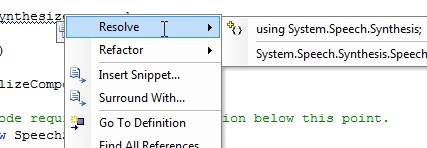
Use the Resolve menu and select the System.Speech.Synthesis path. If you try to build your project now, you should not receive an error. When you test your application, enter some text, and press the Speak button, you will hear what you wrote:
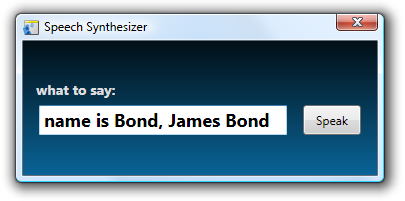
[ enter some text and click on the Speak button to hear text read aloud ]
We are almost done with the tutorial now. There is just one minor usability feature that we need to implement. In this application, to hear what you wrote, you need to use your mouse and click on the Speak button. Wouldn't it be more natural to simply use the Enter button after typing your text? I think so. Let's implement that feature in the next section.
There are several ways to implement playing back the text using the Enter button. The most common approach, the one you are probably most familiar with if you have a background in other language, is where you have a listener that detects when the Enter key on your keyboard was pressed. Once the listener detects the event, it will call the appropriate method to deal with the Enter key press. In WPF, there is an easier way when you have just one button.
In WPF, buttons have a property known as IsDefault. The IsDefault property allows you to call a button by simply pressing the Enter key. That is just what we want for our application, so let's set our Speak button's IsDefault property to true.
To do that, go back to Blend. Select your Speak button and make sure your button's properties are displayed by clicking on the Properties button:
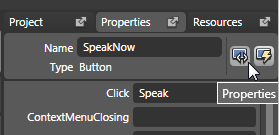
[ click on the Properties button to access your button's properties ]
Under your button's properties, find the Common Properties panel. Contained in the Common Properties panel will be the IsDefault checkbox. Once you have found the IsDefault checkbox, click on it to check it:
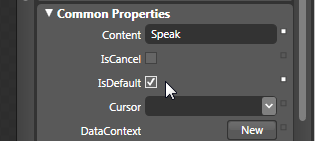
[ check the IsDefault checkbox to set the property to true ]
If you test your application again, type a few words and press Enter. After you press Enter, you will hear your text played back audibly. Best of all, you didn't have to move your hand away from your keyboard to use the mouse to click on the Speak button like you had to earlier.
Just a final word before we wrap up. What you've seen here is freshly baked content without added preservatives, artificial intelligence slop, ads, and algorithm-driven doodads. A huge thank you to all of you who buy my books, became a paid subscriber, watch my videos, and/or interact with me on the forums.
Your support keeps this site going! 😇


:: Copyright KIRUPA 2026 //--