 Tutorials
Books
Videos
Forums
Tutorials
Books
Videos
Forums


This is an archived tutorial from the kirupa.com legacy collection. It covers software that may no longer be available, but it is kept online because the ideas still hold up.
When deciding which database to use with ASP.net, a common choice is to use Microsoft's own SQL Server. I prefer SQL Server because it integrates nicely with Visual Studio, and if you are just starting out learning how to use databases with your web forms, you will appreciate many of tasks that are automated for you.
In this tutorial, I will explain how to create a simple data-driven web site that allows you to add data to and view data from a SQL Express 2005 database. There are many great tutorials on the web that outline how to use the Visual Studio wizards to accomplish this really easily, so I will provide a more code-oriented approach so that you have a better idea of how some of these things really work.
As a survey of what you will create, here is a birds-eye view of what our project will look like:
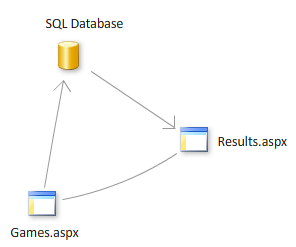
You will create two pages - one for sending data to the database and another page for retrieving data from the database. In order to get that to work, you will need to setup the database and specify the connection between them. Don't worry, for this tutorial will explain in great detail how to do all of this.
Before we begin, make sure you have the free Visual Web Developer and SQL Server Express 2005 installed. These programs feature most of the features of their full-version counterparts, so these programs are great for exploring .NET:
In this tutorial I will divide the main topics into the following individual sections:
With this said, let's get started.
In this section you will create a new ASP.net project configured to use our database. The following steps should guide you:
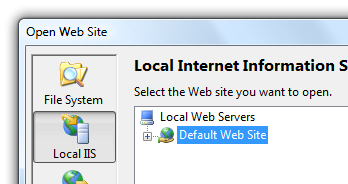
[ go to File | Open | Web Site, and select Local IIS as your project location ]
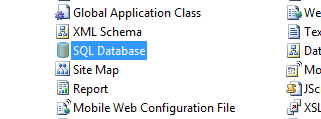
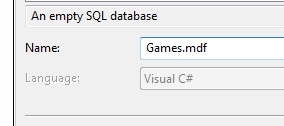
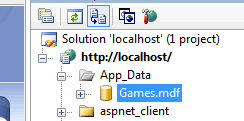
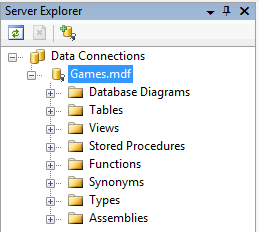
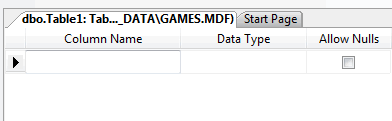
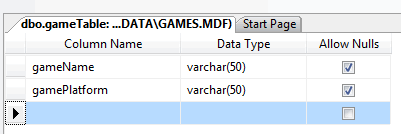
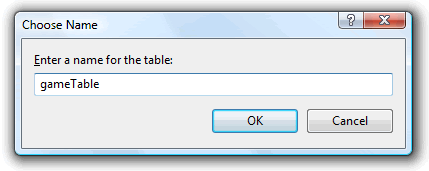
Now that you have your database setup, it's time to create a way to add values to it. We will do that through first setting up a connection string that tells our applications how to communicate with out data:
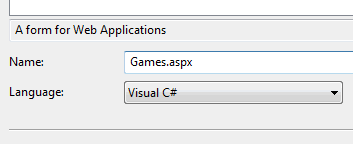
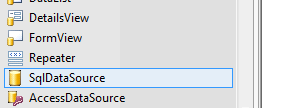
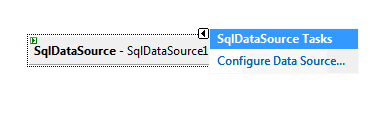
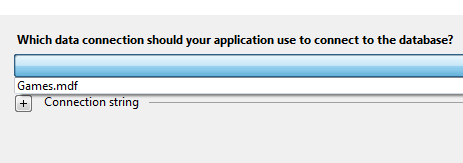
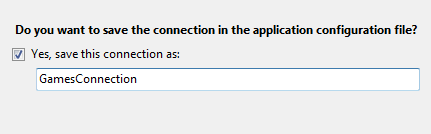
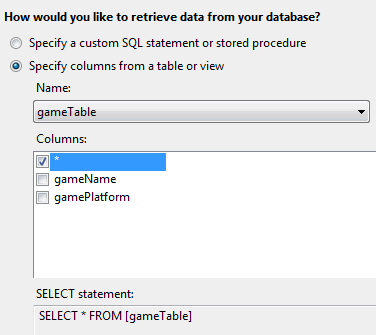
You have now configured your Connection String. My main goal for doing this was to get our Web.Config file to store information about our database and how to access it. If you open your Web.Config file from your Solution Explorer, you will see a block of text corresponding to the steps we performed earlier:
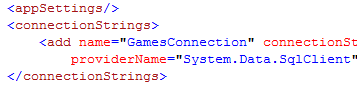
The data for the connection string is difficult to discern without using the wizard, especially if your web site is hosted on localhost or on your file system.
We are finally finished with setting up our database and related details. It's all easy coasting and fun from here! In your Games.aspx page, you need to create two textboxes and and a Submit button. It is entirely up to you on how you decide to design your form, but
To give you an idea, here is how my form looks like:
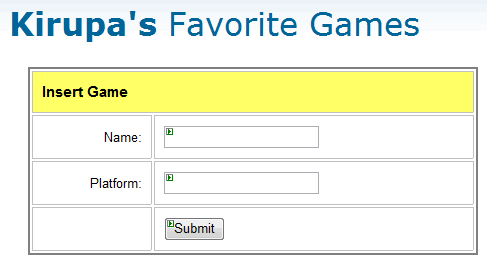
Regardless of how your form looks, make sure that your Name textbox has the ID txtGameName, the Platform textbox has the ID txtGamePlatform, and the Submit button has the name btnSubmit.
The code that I will have you write will refer to the above control names. Speaking of code, double-click on your Submit button to open your Games.aspx.cs file. Fill in the lines of code that are missing from your project (highlighted in yellow):
I will explain in greater detail what the lines of code do later, but for now, just remember that in the I first open a connection to the database, add in the data from our two textboxes, execute the commands to modify the database, and then close the connection.
Anyway, it's time to test our application. Press Ctrl + F5 to launch the browser and run our program. Type in some data into both of your textboxes and press the Submit button. You will receive a Page not Found message because we haven't created our Results.aspx file yet, so don't worry. If you do not receive any errors, proceed to the next section.
Depending on your computer setup, you may be asked via a scary yellow-colored error page to add some extra parameters to your Web.Config file. From earlier, you should be familiar with the ConnectionStrings area of Web.Config, and, for example, in Vista, I was requested to add the Asynchronous Processing=True line to my Web.Config's ConnectionString node.
For reference purposes, here is my full ConnectionString:
<connectionStrings>

  <add name="GamesConnection" connectionString="Data
  Source=.\SQLEXPRESS; AttachDbFilename=|DataDirectory|\Games.mdf;
  Integrated Security=True;User Instance=True;
  Asynchronous Processing=True" providerName="System.Data.SqlClient"
  />

  </connectionStrings>
If your errors are more sinister errors, doing a simple web search for the error text should help you solve the problem. I have often found that closing Visual Studio and then manually visiting the localhost URL in the browser solves many problems also - especially "Cannot open user default database" errors.
If you find that you are unable to solve your database error, please e-mail me at kirupa.at.kirupa.com with your database errors, and I can maybe catalog them and help provide solutions to them.
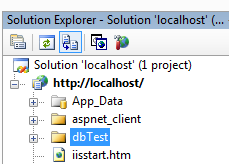
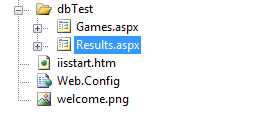
All that is left is now to view the data you added to the database. If you recall, our code attempts to load the Results.aspx.cs file, but you received an error because that page does not exist. So, your first step is to create the Results.aspx file into your dbTest folder. Your dbTest folder should look like the following image:
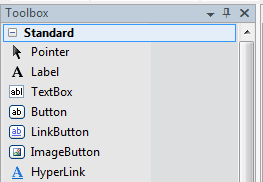
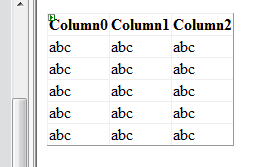
Once you have your Results.aspx page created, open it for editing. It should be a blank page. Make sure your Toolbox is displayed, go to to the Data section and double-click on the GridView control. Your page should look like the following screenshot:
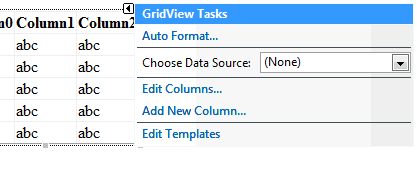
Once you see a sample GridView control on your page, we need to configure it to use our database. Select the GridView control, and then click on the small arrow that appears on the top-right corner of the control. Once you clicked on the arrow, the GridView Tasks menu will appear:
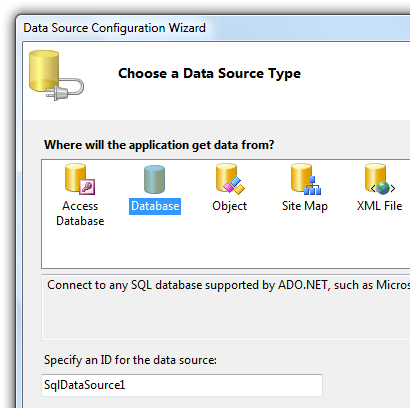
From the Choose Data Source drop-down menu that appears, select New Data Source. The Data Source Configuration window will appear. From this window, select the Database icon press OK:
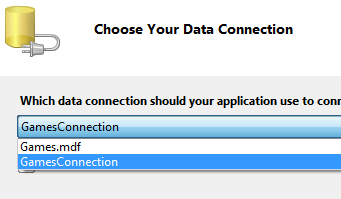
The rest of the screens should be familiar to you! From the Configure Data Source window that appears, click on the drop-down menu and select the Connection string you created earlier called GamesConnection:
Once you have selected Game Connection, the next screen ask you which columns to display. Select the * selection and press Next:
In the next and final screen, if you press the Test Query button, you should see the data you entered earlier via your Games.aspx form:
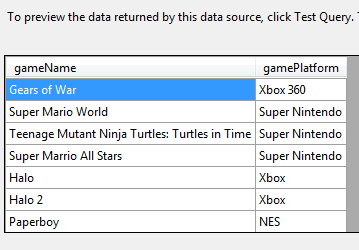
Press the Finish button to close the wizard. If you now preview your Games.aspx file, enter some data into both the text fields, and click the Submit button, you will see that your Results.aspx page loads with the newly added data displayed along the data you added earlier.
For example, here is how my Results.aspx form looks like in the browser:

If you are able to see the data you added on Games.aspx in the Results.aspx page, then you have successfully created a simple set of pages that add and display data from a database.
In the next few pages I will explain the code and briefly review some of the interesting things covered over the last many pages!
In your Games.aspx page, you copied and pasted code that I provided. In order to gain the most out of this tutorial, it is good for you to understand what the code you copied and pasted does. Let's start at the top:
using System;
using System.Data;
using System.Configuration;
using System.Collections;
using System.Web;
using System.Web.Security;
using System.Web.UI;
using System.Web.UI.WebControls;
using System.Web.UI.WebControls.WebParts;
using System.Web.UI.HtmlControls;
using System.Data.SqlClient;
The above few lines are the namespaces to the various classes you used in your code. For this tutorial, all of the namespaces were provided as part of the default .NET Framework, so the above lines were written automatically provided for you.
SqlConnection connection;In this line, I am declaring a new variable of type SqlConnection called connection. The SqlConnection is responsible for setting up the connection with your database.
connection = new SqlConnection(ConfigurationManager.ConnectionStrings
["GamesConnection"].ConnectionString);
Inside the Page_Load event handler, I initialized the connection variable I declared earlier. What I am doing is essentially initializing the SqlConnection object with the connection string you already have specified in your Web.Config file.
That is done via the ConnectionStrings["name"].ConnectionString code. Essentially, think of your Web.Config file as storing many connection strings for various database connections. What you are doing is targeting a specific connection string by passing in the connection string's name parameter. In our case, the connection string is called GamesConnection, so that is the name parameter I use.
protected void btnSubmit_Click(object sender, EventArgs e)
{
  SqlCommand command = new SqlCommand("INSERT INTO
  gameTable(gameName,gamePlatform) VALUES ('"+
  txtGameName.Text +"','"+txtGamePlatform.Text+"')",
  connection);
  connection.Open();
  command.BeginExecuteNonQuery();
  connection.Close();
  Response.Redirect("Results.aspx");
}
The above section of code represents the Click event handler attached to your button, btnSubmit. When your button is clicked, the code contained within it is executed.
SqlCommand command = new SqlCommand("INSERT INTO gameTable
(gameName,gamePlatform) VALUES ('"+ txtGameName.Text
+"','"+txtGamePlatform.Text+"')", connection);
The above line of code is, in my opinion, the most interesting of all of the code covered so far. What you are doing is essentially specifying how to send your data to the database, and that is accomplished by using an SqlCommand object.
All SQL commands are nothing more than strings, so you manually specify the SQL commands needed to insert the data from both of your textboxes:
"INSERT INTO gameTable(gameName,gamePlatform) VALUES ('"+
txtGameName.Text+"','"+txtGamePlatform.Text+"')"
The text INSERT INTO specifies that data will be sent to the database, and the gameTable text refers to the table I will be passing the data into. Our gameTable text, if you remember, contains two columns called gameName and gamePlatform.
The actual data passed in are specified after the VALUES text, and the number of values corresponds to the number of columns your table will have. Essentially this is the format your insert statement takes up:
INSERT INTO tableName(column1, column2) VALUES ("data", "data")If you notice, nowhere in the SQL command do I specify the name of our database (games.mdf) or the connection string. That is because the SqlCommand constructor takes in two arguments - the SQL command string that you just saw and the SqlConnection object that I created earlier. The database name and related info is passed in via our connection variable.
connection.Open();
command.BeginExecuteNonQuery();
connection.Close();
The above lines open our database connection, tell the database to execute our command, and then close our database connection. Pretty simple, but you must perform those operations in that exact order.
You cannot send commands to the database without first opening the connection, and unless you send the commands to the database, your database will not see any of the changes. Finally, you close the connection after you are done.
Response.Redirect("Results.aspx");The above line simply loads the Results.aspx page after all of the lines have finished executing. This is the equivalent of displaying a confirmation page after the user submits a form. Actually, the end result is exactly the same as a confirmation page.
Well, after this many pages, you are finally done. This tutorial covered a lot of ground. It started off by first explaining how our pages will interact with the database, and then we dove right into the implementation of the database and the Games and Results pages.
All of this may seem like a lot of work to do something that seems simple, but don't let the number of pages in this tutorial trick you. It shouldn't take more than a few minutes to setup the table, create the columns, and use Visual Studio's built-in wizards for setting up the connection string. Once your connection string is setup, it takes very little effort to use the built-in controls as you saw with the GridView, and it takes some effort writing your own code as shown in the input form stored in Games.aspx.
Just a final word before we wrap up. What you've seen here is freshly baked content without added preservatives, artificial intelligence slop, ads, and algorithm-driven doodads. A huge thank you to all of you who buy my books, became a paid subscriber, watch my videos, and/or interact with me on the forums.
Your support keeps this site going! 😇


:: Copyright KIRUPA 2026 //--