 Tutorials
Books
Videos
Forums
Tutorials
Books
Videos
Forums


This is an archived tutorial from the kirupa.com legacy collection. It covers software that may no longer be available, but it is kept online because the ideas still hold up.
Writing and testing an application is often only one part of creating software. The major, and in my opinion, the most important part is deploying the software. How easy is it for your users to be able to install and run your application?
Before I begin, let me provide you with a demo. Click on the following screenshot to download and install a small application (if you are using Firefox, download the file and run it manually):
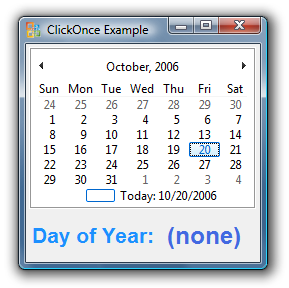
[ an example of how the application looks in Vista ]
[ click on the above image and follow the prompts to install this small demo application ]
After installing this, you can access this program directly from your Start menu:
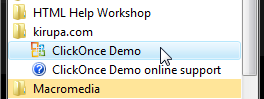
[ your application automatically adds itself to the Start Menu ]
Finally, you can also uninstall this program easily from your Add/Remove Control Panel applet:
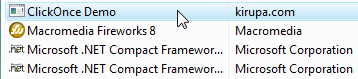
[ uninstallation can be done via the Add/Remove Programs applet ]
As you can see, it is very easy to deploy your .NET applications over the web, provide users easy access to your program, and allow for straightforward uninstallation. In the next few pages, I will explain how to use the ClickOnce technology to easily get a simple application into users' hands! All they need is an OS capable of supporting the .NET Framework 2.0.
In this tutorial, I will first explain how to create a simple application and deploy it on the web. After getting your feet wet with ClickOnce, I will cover some of the more interesting features that you may find valuable.
In the previous section, you saw an example of an application created using ClickOnce. In this and the next few pages, let's create our own application and deploy it via ClickOnce.
In order to use ClickOnce, let's first create a very simple C# application. The following steps should help you out:
Launch Visual Studio 2005. Go to File | New | Project. From the New Project window, ensure your Project type is set to Visual C# | Windows, and select Windows Application from the Templates pane:
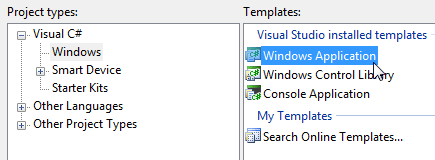
[ create a new Windows Application C# project ]
From the same New Project window, set the name of your application to ClickOnceDemo:
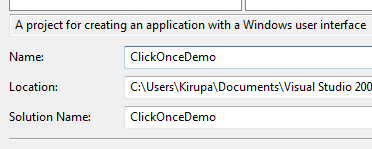
[ call your new application ClickOnceDemo ]
After you have given your project the ClickOnceDemo name, press OK to accept the changes and create a blank application.
You should see a blank form resembling a Windows window. From your Toolbox, click on the Label component and draw a label in the middle of your form:
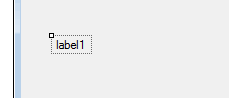
[ draw a new label ]
Select your newly drawn label with the mouse cursor. Look in your Properties Panel, and find the property labeled Font and expand that property to display the sub-items:
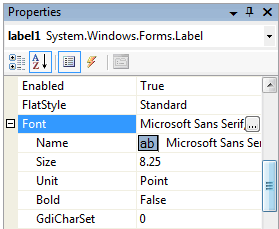
[ expand the Font property from the Properties dock ]
In the sub-property labeled Size,
replace the value (8.25 in the above screenshot) to 36.
Now, scroll down your properties until you find the Text
property. Replace label1 with the word ClickOnce.
Your form should look like the following image:
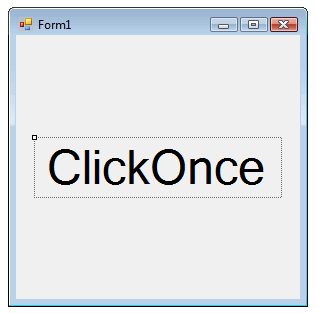
[ how my simple application looks in Visual Studio ]
If you want, you can make further adjustments to your form. For example, renaming it to something other than "Form1" or resizing the window to just display the ClickOnce label, etc. Those are visual/aesthetic changes that aren't relevant to this tutorial, so I will not explicitly cover them here.
Save this file and test it to see how it looks. The final application should look almost the same as the form you designed in Visual Studio.
Now that we have our sample application working, let's figure out how to deploy it using ClickOnce.
In the previous section, you created your application. In this page, I will start to explain how to get the application into your users' hands.
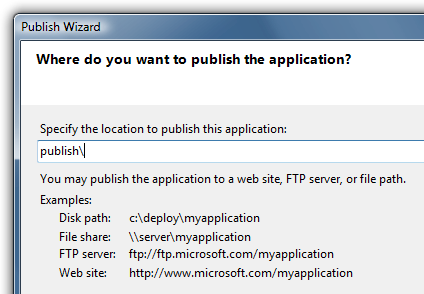
Now, we have our simple application setup, let's work on deploying it. From the top menu, go to Build | Publish ClickOnceDemo. The Publish Wizard will appear:
[ the Publish Wizard window ]
From the first screen, you can specify the location your application will be published to. The example locations they provide indicate that you can publish your application to a location on a disk, on a remote file share, to an ftp server, or to a web site.
Depending on what location you input here, the choices you see in subsequent screens of this wizard will vary. I will be publishing to a web site, and I'm sure you all would be interested in web-based deployment also. Note that you may be prompted for your web server's username and password.
Note - Deploying Locally
You can specify a folder or location on your hard drive if you do not have access to a web-based server. Many of the instructions in the rest of the tutorial may not directly apply to you, but hopefully the process is similar enough where you can still follow along.
Press Next after you specified a web-based location.
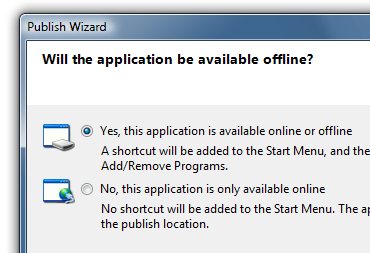
The next screen will ask you whether you want your application to run both offline/online or just online:
[ select the option for making the application available both offline and online ]
Select the "Yes, this application is available online or offline". This is the option that automatically sets up the Start Menu folder/icon as well as the Uninstall option. Press Next to proceed to the next screen.
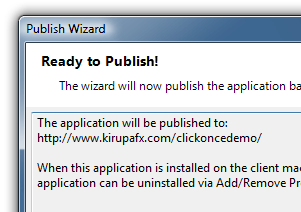
The next screen simply provides a summary of the options you have selected in the previous screens:
[ one step closer to deploying ]
Click the Finish Button to publish your application. After you have published your application, your browser will automatically load with the URL of the install page. In my case, this is the link to the application I published: http://www.kirupafx.com/clickoncedemo/publish.htm
That's all there is to publishing a .NET application to the web using the wizard! As is true with most wizards, many details have been hidden from us. That is a good thing if your not a deployment expert, but it may be limiting if you want to beyond the basic functionality afforded by a wizard.
Luckily, there is a more hands-on approach to using ClickOnce also where you can modify many settings that were glossed over in the wizard approach I covered. In the next few pages, I will go through and explain how to manually configure ClickOnce settings for your application.
The previous section covered deploying an application using a wizard-based approach. In this page I will discuss how to tweak the settings beyond what the Publish Wizard can provide.
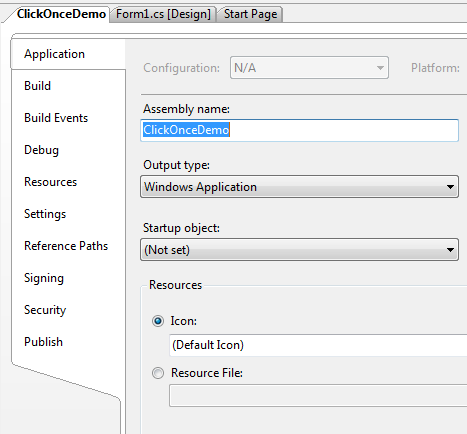
There are many cool features in ClickOnce that I have not covered yet. To access the advanced properties, go to Project and select "ClickOnceDemo Properties..." The properties tab will appear in your workspace:
[ the Project Properties view ]
There are several main categories of tweaks you can perform, and many of those categories have sub-options to further tweak your published application. I am not going to cover all of them, but I will cover those that I think you will be most interested in.
Note - More Resources
I have provided a list of ClickOnce Resources at the end of this tutorial where you can hack at the nitty-gritty details that I omit from this tutorial.
If you do not specify an icon, your application will feature a generic, default Windows icon. To use a more appropriate icon, select the Application tab from the left and click on the [...] button next to the Icon text field to browse for an icon file.
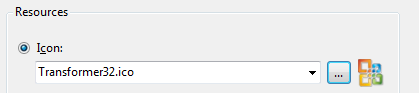
[ specifying an icon ]
If your icon is inside a resource file, you can select the option below the Icon text field and browse for the appropriate file that way.
When users use your application, you may want them to use the latest version of your application. In the past, it required your users visiting your web site and downloading the latest update. With ClickOnce, you can automatically notify users when an update is available when they launch your application.
To enable Application Updates, click on the Updates button from the Publish tab. The Application Updates window should appear. Check the box labeled This application should check for updates:
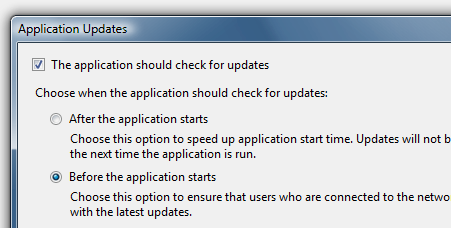
[ enable automatic Application Updates ]
You can choose to check for and install any updates before your application launches or after your application launches. Whichever choice you make, the following screenshot shows what users would see if they were running an outdated version of your application:
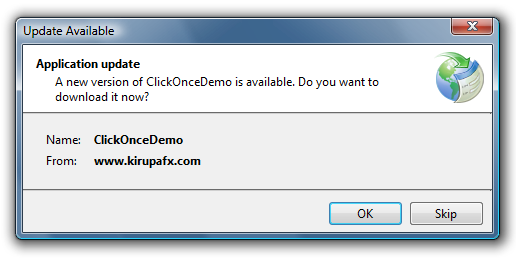
[ notification when a newer version is available ]
As you can see, users have the option of skipping the update or pressing OK and downloading/installing the update.
So how does your application know whether an update has been made? Updates are determined by your Version number. If you look at the content in your Publish tab, you will find an are labeled Publish Version:
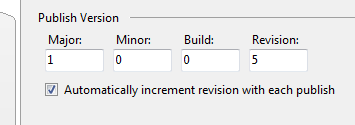
[ specifying the version number ]
Each time you publish, and you have Automatically increment revision with each publish checked, your version number changes by at least one. You can manually change the values also of course, so you may choose to update the Major number instead. In any case, your application checks to see if the version available on the web is more recent. If the version is more recent, then you are prompted with the Update Available window you saw a few paragraphs earlier.
In this page, I continue my explanation of manually adjusting the ClickOnce settings that I started explaining in the previous section.
By default, the installation process doesn't contain any branding or similar information that you want to communicate to your users. You can change that via the Publish Options window which you can access by clicking the Options button from the Publish tab:
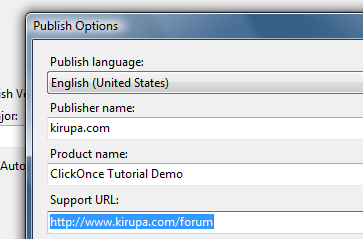
[ personalize your application via the Publish Options window ]
Notice that when you publish your application again with the above values filled out, you will notice some important changes. Your installation web page displays a link to your support page and the name of your product is no longer your Project Name:
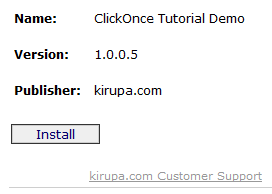
[ notice that the default installer page now displays more relevant information ]
Second, your Start Menu folder name is different and you have an extra icon for help/support:
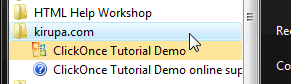
[ your start folder now looks different ]
These seem like pretty minor changes, but your users will definitely appreciate these changes - especially being able to know where to click to receive more help!
For applications that use ClickOnce, the .NET framework is a pre-requisite for running any application deployed using ClickOnce. By default, your application automatically detects whether you have the .NET framework installed and automatically downloads the framework if you do not have it installed.
Sometimes, you may want to ensure that your users have certain other MS-specific downloads installed prior to running your program. You can specify those required files by going to the Publish tab and clicking on the Prerequisites button:
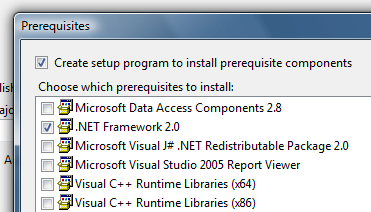
[ select the prerequisites that will automatically install on a user's computer ]
From the Prerequisites window, you can check which of the components you want to check/install before your application is installed. Note that checking the boxes does not mean your users will be forced to install the prerequisites. Many users already have the prerequisites as part of a standard Windows install, but checking the required options ensures that those who do not can easily download them without having to leave your site or application install screen.
Just a final word before we wrap up. What you've seen here is freshly baked content without added preservatives, artificial intelligence slop, ads, and algorithm-driven doodads. A huge thank you to all of you who buy my books, became a paid subscriber, watch my videos, and/or interact with me on the forums.
Your support keeps this site going! 😇


:: Copyright KIRUPA 2026 //--