Tutorials
Books
Videos
Forums
Tutorials
Books
Videos
Forums


This is an archived tutorial from the kirupa.com legacy collection. It covers software that may no longer be available, but it is kept online because the ideas still hold up.
The classic "hello, world" application has been used since the 1970's to test whether a programming language works. Since then, it is customarily used to as the first example a programmer new to a computer language creates. In this case, it will also be used as the first of, what I hope to be, many .net tutorials that I will be writing. So it is only fitting, that this tutorial uses the classic "hello, world" as both the starting point for you to get familiarized with .net and for me to get familiar with writing tutorials for a new language.
Creating a basic console-application running on your PC is fairly simple, and many sites on the web cover how to do that. Instead, I will explain how to create a simple application for the web using ASP.NET. So to get started, you will need to install Visual Studio.
If you are using the full retail/academic version Visual
Studio 2005, you are already set. If you do not have
Visual Studio 2005, you can freely download the
fully-featured Express edition from the following
link. More specifically, for this tutorial
you will need to install
Visual Web Developer Express.
The Express editions of Visual Studio contain most of
all the features you would normally use for light to
moderate application development. The Express editions
are not shareware/trial-ware, etc. They are fully
featured applications that contain a subset of the most
often used features found in the full-blown Visual
Studio package. All .NET tutorials on this site will be
written with the Express editions of VS in mind.
The following steps will help you to create a HelloWorld .NET application that you can preview in your browser.
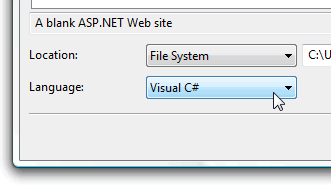
[ ensure your project is a ASP.NET Web Site with the Visual C# Language preference ]

[ your interface - click on image for larger view ]

[ click on the Design link to go to the Design view ]
We're on the right track, but there is more material to cover. In the next section, you will add and customize a Label component.
In the previous section, you learned how to set up your project. In this page, we will start to create something that will get us closer towards the goal of creating an application.

[ display the Toolbox by either using the View menu or the Toolbox tab ]

[ double-click on the Label component from the Toolbox ]

[ you will use the Formatting Toolbar to change the font style ]
Change the Font to Arial, set the Font Size to 48, and change the Foreground Color to a Blue-ish shade. Your Label component should now look similar to the following image:
[ how your Label text should look like now ]

[ the Properties panel ]

[ the (ID) value of our Label component is Label1 ]
Select the Label1 property and change it to lbl_HelloWorld:
[ change our Label's (ID) value to lbl_HelloWorld ]
Adding the label is only one-half of the solution. In the next section, I will explain how to add some code that will interact with this label.
In the previous section, you inserted and customized a label component. In this page, we will move away from the Design view and look at writing some code.
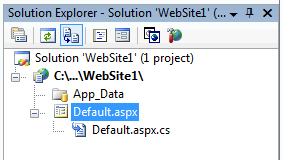
[ ensure the Default.aspx node is expanded ]
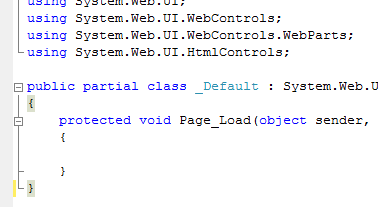
[ the code in your Default.aspx.cs file ]
protected void Page_Load(object sender, EventArgs e)
{
lbl_HelloWorld.Text = "hello, world";
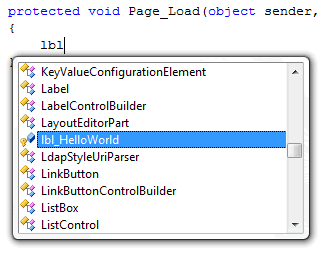
}Notice that the Inline AutoComplete feature of Visual Studio/Visual Web Developer reduces the amount of typing that you do:
[ the Inline AutoComplete feature at work ]
You are almost at the home stretch. In the next section, you will learn how to test and deploy your ASP.NET application.
Already, you are in the previous section. You typed in some code, drew a label component, and setup your project in the previous sections. In this, the previous section, you will test your application in the browser and learn how to publish it online.
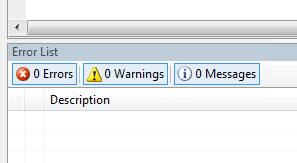
[ your Error List panel ]
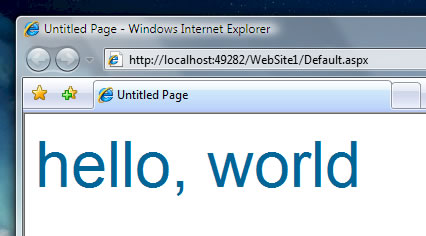
[ hello, world displayed in the browser ]
Well, it might seem like you are done. After all, you can see hello, world in the browser. The problem is, that others won't be able to see it, for the ASP.NET Web Server that is running right now to display your application will turn itself off the moment you exit out of Visual Studio or Visual Web Developer. We need a more permanent solution.
There are two ways you can have make your application viewable by others. You can either use a 3rd party server with .NET support, or you can install IIS and .NET locally on your computer. Instructions on how to setup IIS with .NET can be found in this tutorial.
I will explain how to publish to a 3rd party server, for that would be the easier to explain in this tutorial without deviating into the issues associated with configuring your local IIS server to run your applications.
Note
The server you are publishing to must be capable of running .NET 2.0 applications.
So, with your project open, go to Build | Publish Web Site.
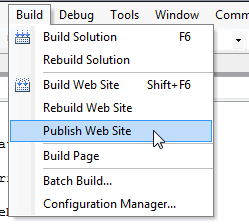
[ publish your web site via the Build menu's Publish Web Site item ]
The Publish Web Site window will appear. In the Target Location field, enter the location you wish to Publish your application to:
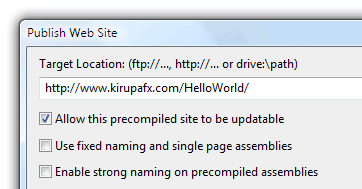
[ enter a location where you will be publishing your web site to ]
Press OK after you have entered your target location. You might be prompted for your server username and password if you are using a remote server like I am. A few moments later, your application can now be previewed online at the location you specified.
My published example can be seen at the following link: http://www.kirupafx.com/HelloWorld/Default.aspx
When you view the HTML source to the above link in your browser, you will see that everything is in HTML. The data you entered in the code-behind file in C# such as the name of your label, etc. is not displayed.
Just a final word before we wrap up. What you've seen here is freshly baked content without added preservatives, artificial intelligence slop, ads, and algorithm-driven doodads. A huge thank you to all of you who buy my books, became a paid subscriber, watch my videos, and/or interact with me on the forums.
Your support keeps this site going! 😇


:: Copyright KIRUPA 2026 //--