 Tutorials
Books
Videos
Forums
Tutorials
Books
Videos
Forums


This is an archived tutorial from the kirupa.com legacy collection. It covers software that may no longer be available, but it is kept online because the ideas still hold up.
One of the cool features in Windows Presentation Foundation (WPF) is its support for animation. While the animation support is great, creating animations manually by writing XAML requires some effort. To simplify creating your own animations in WPF, you can use a graphical editor such as Blend instead. Blend features, as you will find out, an intuitive interface for creating and modifying animations. The XAML is automatically written in the background for you.
For a demo of what you will create, click here or on the following screenshot to launch the application. If you are using Firefox, be sure to download the FFClickOnce extension to be able to run ClickOnce apps directly without having to download the files first:

For this tutorial, you should be familiar enough with Blend to easily draw and customize objects. If you feel you need more practice, click here to visit/re-visit my Brushes tutorial that covers these basic tasks.
This tutorial covers a lot of topics, so I've broken it down into smaller sections for easy digestion:
While there seem to be a lot of topics, this should be a fun tutorial. The output is nifty also, so let's get started by first creating the text that you will animate.
The first thing we want to do is animate some text. In order to do that, we first need some text to animate. The following steps will explain how to use the Label component to create the text that you will animate.

[ create a new exe project in Blend ]
Press OK to close the Create New Project window and to actually create your project.

[ make some modifications to your current window ]
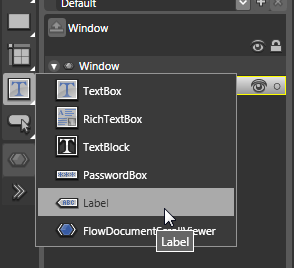
[ select the Label control from the list of text-related controls ]
The Label control is often used for displaying text, and by default, it doesn't display a border or any extra formatting that the other text controls employ. A label is perfect for what we are trying to do - which is, just display some text.

[ draw the appropriate size for your label control ]
Draw a label that is large enough to hold a few words using a large font size, but we can change that easily later. Once you have the label rectangle sized, release the left mouse button and your Label control will be added:

[ when you release the left mouse button, a label with your specified size will be drawn ]
You are almost done with creating the text label. In the next section, we will finish up work on the Label and begin discussing how to think about animations in WPF.
In the previous section, you started to create the Label component to display some text. We'll finish up work on our label and discuss animation.

[ the Text panel allows you to modify your Label control's properties ]
In this Text panel, we will change the text size. Notice that the font-size drop-down menu currently displays the default size of 12. Change the value from 12 to 72 by either typing 72 after clicking on the 12 or by selecting 72 from the drop-down menu:

[ increase the font size to 72 ]

[ change your text's color by modifying the Foreground property ]

[ if you initially sized your Label control too small, the text will be cut-off ]
To fix the sizing issue, there are two things you can do. You can make your font size smaller, or you can resize your Label control to display all of your text. For this tutorial, if your text is cut-off, resize the label control to make sure all of the size 72 text fits:
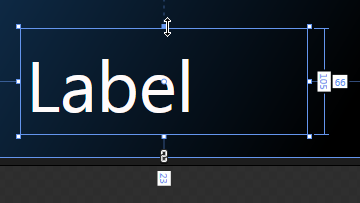
[ resize the label control to make sure all of your text fits ]
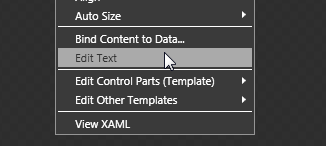
[ select Edit Text to change the text that is displayed in your Label control ]
Your text will now be selected. Type the word Blend and click anywhere else in the Artboard to accept the change:

[ change the text inside your label to Blend ]
The previous section of this tutorial will describe how to insert a Label control where the control resizes itself automatically based on the text inside it.
Your Label component is now ready. The next step is to animate this control, but before we dive right in, I think it is useful to think about how animation works in WPF.
When creating animations, you need an object to animate. In our animation example, some of the animated objects included text and various circles. An object alone does not make an animation, though. You need to also specify how your object will vary at different time states. For example, your object may start off small, but at a later time, it is made much larger. The animation would involve showing how the object grows from its initial small size to its final large size.
The actual animation part is handled by Blend itself. All you have to do is specify how your object looks at a beginning time and an ending time. One way of looking at this is you take a snapshot of how your object is at Time 0. You then make various modifications to your object and take another snapshot at a later time such as Time 1:
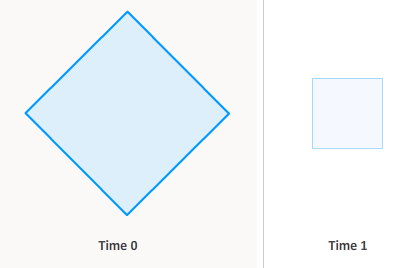
As shown in the above image, at Time 0, you have a square that you have tilted on a corner. At Time 1, you take the same square, rotate it, scale it down in size, make it more transparent, and move it to your right. By themselves, both of these object states are pretty boring. When animated though, things become interested. Don't worry, though, WPF takes care of the animation where all the intermediate frames are generated for you automatically.
Internally, the following image shows how WPF perceives and generates the intermediate sequences of your square between Times 0 and 1:
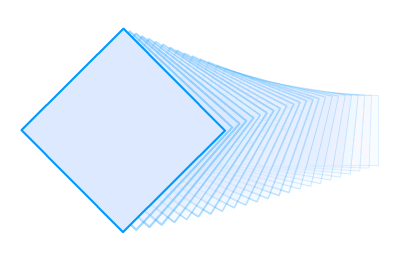
Times 0 and 1 are arbitrary times that I picked to describe times for the starting and ending states. WPF's animations are time-driven, so if your animation needs to take 2 seconds, then it will try its best to start and end the animation at exactly two seconds. The frame rate during this phase isn't fixed at a particular number, but it varies depending on what the computer is capable of.
The duration you specify for your animation determines how fast your animation actually will seem. If your time between states is really short, then your animation will seem very fast because you have little time to go from the initial to the final state:

If your duration is large, then your animation will take longer to complete because you now have more time to go from the initial state to the final state:

With the longer duration, WPF generates more intermediate frames because the eye will need to perceive more intermediate changes to simulate a smooth transition.
Note - Frame Rates and Visual Perception
For information on frame rates and what causes our eyes to see smooth animation, check out my blog post on this topic here.
To summarize, you first need an object that needs to be animated. It may be a square as in the above images, or it could be some text or circles as it was in the example on the first page. Once you find an object that you wish to animate, you need to specify the starting and ending states and the duration/running time your animation will follow. Don't sweat the details (yet!), for the following sections will guide you through creating a simple animation using Blend.
In the previous section, you finished adding your Label control, and more importantly, you received a brief introduction on animations in WPF. Let's put what you learned into practice by animating the text you placed in your Label control.
The following instructions will explain how to use Blend's animation features to animate your text:
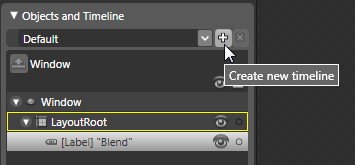
[ press the + button to create a new timeline ]
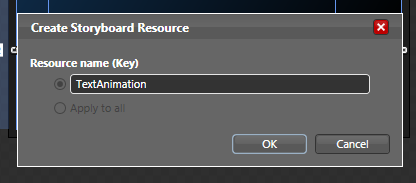
[ give your Storyboard the name TextAnimation ]
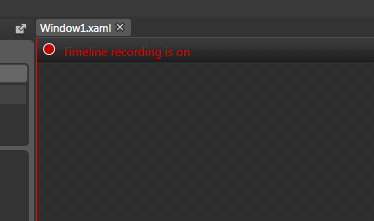
[ the Timeline recording indicator ]
More importantly, you will see a timeline appear in your Objects and Timeline panel:
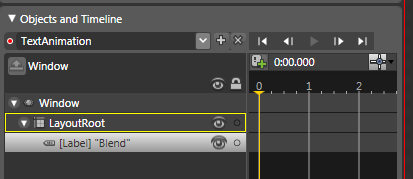
[ your Objects and Timeline panel now display a timeline ]
The timeline is where you specify the
starting and ending points of your animation. If it hasn't
already been done, select your text label to select it. When
selected, you'll see it highlighted in gray as shown in the
above image.
With your label now selected, click on the Record Keyframe
button to insert a keyframe at time 0:
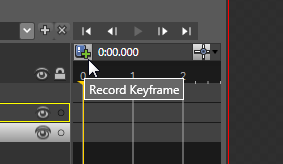
[ the Record keyframe button adds a marker at the specified time ]
After you clicked on Record Keyframe, you will see a keyframe marker displayed next to your label object in the tree:
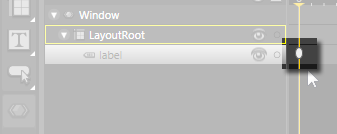
[ the keyframe marker is now displayed in your timeline ]
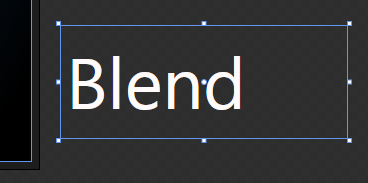
[ move your Label to the right side side of the screen initially ]
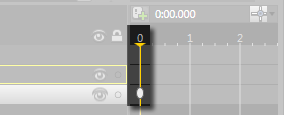
[ the playhead marker indicates the time your Artboard currently is in ]
Click on the play head and drag it over to the 1 second point in your timeline:
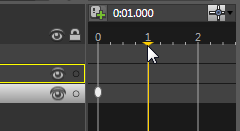
[ drag the play head marker to the 1 second mark ]
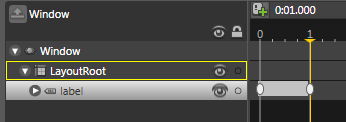
[ insert another keyframe at the 1 second mark to specify the end of the animation ]
After you hit the Record Keyframe button when your playhead is at the 1 second mark, you'll see both the keyframe marker appear in your timeline at time 1 as well as seeing a gray highlight appear between your keyframes on time 0 and time 1.
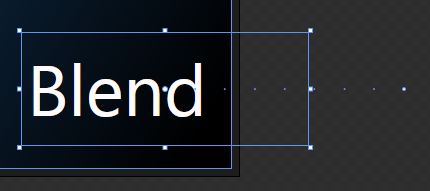
[ at the 1 second mark, move your Blend label to the left ]
Notice that when you move your text back over your application window, you see a guide path consisting of small blue circles (see above image) that indicate the path your object is taking from where it was in an earlier time. Think of it as a breadcrumb trail!
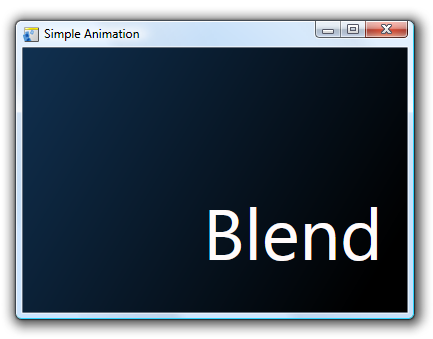
[ what your animation now looks like after it has finished running ]
Phew. You have now successfully created a basic animation that moves text from one side of the window to another. In the next section, I will cover some tips that might save you some time in the future and wrap this tutorial up.
In the previous section, you learned how to apply all of your work from the first two pages into creating a working animation. In this page, I will cover some details that, while not relevant to what was done in this tutorial, will come in handy when you are creating your own animations.
When providing instructions, there are certain details that I did not emphasize in the main tutorial. This section contains some of those details that you may find useful.
In Blend, when modifying your timeline, you are known to be in the Timeline recording mode. You already know about the timeline that magically appears in your Timeline and Objects panel, and you may also have noticed a red box outlining your Artboard with the text "Timeline recording is on" surrounding your Artboard:
[ the Timeline recording indicator ]
You got into this mode when you decided to create a new timeline by pressing the plus button representing the action for creating a new timeline. If you want to leave the Recording mode, go back to your Objects and Timeline panel and click on the timeline drop-down menu to select the Default timeline:
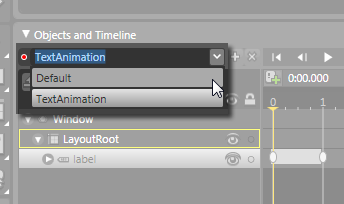
[ selecting the Default timeline exits the Recording mode ]
When you select the Default timeline, you will no longer be in recording mode, but instead, be back in your default editing view. Likewise, to go back to the recording mode, you can either create a new timeline like you did in the previous section, or you can click on the same timeline drop-down menu and select the timeline you are interested in re-visiting.
Earlier, when you were adding the Label control, you drew a rectangle that set the boundaries of your label. When the text you were adding was larger than the space afforded by the Label control, your text would get cut off. I suggested resizing the control to make the text fully appear, but you really do not have to that.
You can actually draw a default sized Label control that automatically adjusts its dimensions based on the size of the text contained inside it. First, select the Label control like you did earlier:
[ select your Label control ]
After you have selected the Label control, your toolbox will now display the Label as one of the recently selected controls.
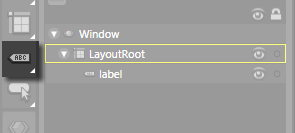
[ double click on the control to add it to your Artboard at the default size ]
You can double click on the Label control directly from the Toolbox. This time, the width and height of your control varies depending on the content inside it. This trick is not just limited to Labels, so feel free to use this approach on other controls as you see fit.
This introductory tutorial should provide you with the basic skills needed to create animations in WPF using Blend. There is a lot more to animation that was not covered in this tutorial, but subsequent tutorials will dig deeper into some more animation techniques that you will need to know.
Just a final word before we wrap up. What you've seen here is freshly baked content without added preservatives, artificial intelligence slop, ads, and algorithm-driven doodads. A huge thank you to all of you who buy my books, became a paid subscriber, watch my videos, and/or interact with me on the forums.
Your support keeps this site going! 😇


:: Copyright KIRUPA 2026 //--