by kirupa |
11 August 2006
In my earlier tutorial,
you learned how to create a web service. Creating a web service is often just
one part of the solution. You will need a way of accessing the web service and
be able to retrieve useful data from it. In this tutorial I will explain how to
create a simple ASP.NET page that, given an input, returns the appropriate data
from an existing web service.
This tutorial is really divided into two parts. The first part outlines how to
design your page to take user input and display the results, and the second part
outlines the code needed to make the first part work. If you are just interested
in finding out how to connect to a web service and the code needed to invoke it,
feel free to skip the first part and proceed directly to the second part.
If all you want to do is find out
how to insert a web service and the code needed to
invoke it, visit the second part of this tutorial. The
first part goes over the UI needed to simulate a real
application that would use a web service.
Here is a demo of what you will create:
http://www.kirupafx.com/MovieInfo/Default.aspx
The following steps will guide you in setting up your project and form for
sending and receiving data to our web service.
- Open your .NET web site by going to File | Open |
Web Site. After entering your credentials, if necessary,
your Solution Explorer panel will now display the
file/folder structure of your site.
- Let's create a new folder to store our files for
this project. In the Solution Explorer, right click on
your newly created Project and select New Folder.
Give your new folder the name MovieInfo:

[ create a new
folder and name it MovieInfo ]
- Right click on your newly created
MovieInfo folder and select Add New Item. The Add
New Item window will appear, and select the Web Form
template. At the bottom of the window, ensure
Default.aspx is entered for the Name, the language
is set to Visual C#, and the Place code in
separate file checkbox is checked:

- With your new file created, double click
on Default.aspx to open it for editing. Click on the
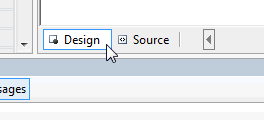
Design tab to switch to the WYSIWYG editor:

- Now we are in the design view. First, draw
a Lablel object, set its font size to 36, set its
font color to any shade of blue, set the label's
content to Top Movies Info, and set the ID to
lblHeader.
Your label should look like the following image after
the above changes have been made:

There is more of the interface that needs to
be developed, and we have not even reached Part II yet!
Onwards to the
next page!
|