 Tutorials
Books
Videos
Forums
Tutorials
Books
Videos
Forums


This is an archived tutorial from the kirupa.com legacy collection. It covers software that may no longer be available, but it is kept online because the ideas still hold up.
So, this is what it has finally come down to. You are here trying to learn what the fuss about HTML 5 is about. Well, you are about to get an introduction to it...six pages of introduction! You won't find poetic prose talking about how angels gave birth to this technology or how it is going to make everything you've ever learned or will learn irrelevant.
Instead, this article focuses on the boring stuff - the technical things that you will eventually need to master to become successful in a new technology. HTML 5 is not something that can be covered in a single tutorial. It is a technology that is both wide and deep with a lot of important players that you need to know well - CSS3, JavaScript, Canvas, and more.
In this article, you will get a drive-by introduction to HTML 5 by building a small application; the following one to be exact (go ahead, click on the image):
Click on the screenshot below to see an example of the application you will create:
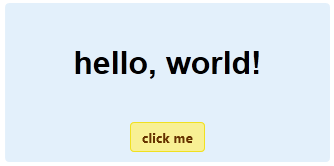
The goal of this tutorial is to get your feet sufficiently wet with HTML 5 so that you can have the confidence to experiment on your own or find out which areas that you need to learn more about. With that said, let's go exploring!
Create a new HTML page in your favorite HTML or text editor. My tool of choice is Expression Web, but you can use pretty much anything as long as you can enter text and save it as an HTML file for previewing in your favorite browser.
Anyway, the first thing we are going to do is define the relevant HTML tags that define an HTML 5 application yet are completely invisible to the end user. Because this is an introductory tutorial, I am going to start at the very basic level and go from there.
To start off, copy and paste the following lines into your HTML document:
<!DOCTYPE html>
<html lang="en-us">
<head>
<meta charset="utf-8">
<title>Hello...</title>
</head>
<body>
</body>
</html>
What you just pasted is the foundation of your HTML 5 application. If you preview what you've just pasted into you browser, nothing really will happen outside of your document's title showing up as "Hello...".
The first line we added was the doctype declaration:
<!DOCTYPE html>The doctype tells your browser how to read your HTML page. This particular doctype variation tells your browser to view everything in this document through its HTML 5-colored glasses.
The actual html tags are next:
<!DOCTYPE html>
<html lang="en-us">
<head>
<meta charset="utf-8">
<title>Hello...</title>
</head>
<body>
</body>
</html>
The html tag defines the root element of your document, and it is used primarily to tell your browser that it is dealing with an HTML document. You can optionally specify a language attribute (lang="en-us") in your opening HTML tag to help browsers or any assistive technologies like screen readers do the right thing depending on the language specified.
Next up is the head tag and everything that lives inside it:
<!DOCTYPE html>
<html lang="en-us">
<head>
<meta charset="utf-8">
<title>Hello...</title>
</head>
<body>
</body>
</html>
The head tag is partly used as a place to store metadata describing the document. For example, I have a meta tag that describes the encoding that needs to be used, and I specify the document's title here as well. Besides metadata, you can also include resources that will be used by the document such as external stylesheets or scripts.
Finally, we get to the part that makes up the bulk of what you see in a web page, the body tag:
<!DOCTYPE html>
<html lang="en-us">
<head>
<meta charset="utf-8">
<title>Hello...</title>
</head>
<body>
</body>
</html>
The body tag is main node where a bulk of your content such as images, text, lists, div elements, etc. will reside. You could say that It is the main place where visual content that defines your HTML will live.
With a section heading like this, you may expect something extremely complicated and amazing. In reality, it is very tame. Just add the following lines of code inside your body tags:
<div>
<p>?</p>
<button>click me</button>
</div>
Your full HTML should look as follows:
<!DOCTYPE html>
<html lang="en-us">
<head>
<meta charset="utf-8">
<title>Hello...</title>
</head>
<body>
<div>
<p>?</p>
<button>click me</button>
</div>
</body>
</html>
If you save your document and preview what you have in your browser right now, here is what you should see:
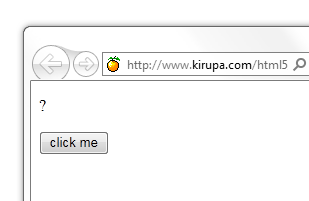
You will see a little question mark and a button labeled click me. This may not look quite like the example you saw earlier, but we'll get to prettifying it shortly.
First, let's look at the elements we've added...starting with the div:
<div>
<p>?</p>
<button>click me</button>
</div>
The div is a very generic element that you can place other elements into. What makes the div nice is that it is actually very boring. It conveys no real information about what content it actually has, and this is actually a good thing because this gives you the full freedom to define meaning for it. As you will see later, styling your content is made much easier by using div elements to section and divide your UI.
Next up is the p tag:
<div>
<p>?</p>
<button>click me</button>
</div>
The p tag, aka the paragraph tag, is ideal for storing text. There is nothing more to say about this tag. Absolutely nothing. Well, except that your browser will automatically add some space above and below your p tag to segment it a bit from the rest of your content.
The last item from our list is the button:
<div>
<p>?</p>
<button>click me</button>
</div>
Unlike the other elements you've used so far, your button does more than just output whatever content you place inside it. It actually provides you with some visual cues for clicking, and it has a generic "Look, I'm a button from the 90's!!!!" look to it....at least, for now.
As of now, here is what your content looks like:
Here is where we want to go:
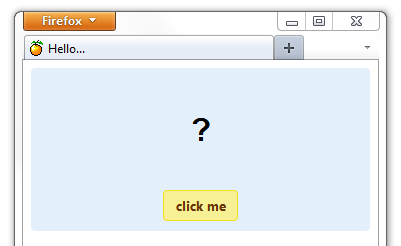
We get there purely through styling via CSS. CSS stands for Cascading Style Sheets, and what it provides in a nutshell, is a way for you to modify the look and formatting of elements in your HTML document. There are a few more interesting details, but I will point them out once you've gotten your feet wet with using them.
Let's first start with styling the div tag that wraps all of your content. The way we are going to do that is by first giving your div tag an ID of mainContent so that we can reference it via a style:
<div id="mainContent">
<p>?</p>
<button>click me</button>
</div>
Once you have given your div tag an ID, let's add a style that changes the background color of that div to a light blue. Before we get there, let's first define our styles region. In general, your styles will either live in an external CSS file or inside the head tag. For this tutorial, let's just stick with keeping things inside the head tag itself.
Inside the head tag below title and above the closing head tag, add the style tag:
<!DOCTYPE html>
<html lang="en-us">
<head>
<meta charset="utf-8">
<title>Hello...</title>
<style type="text/css">
</style>
</head>
<body>
<div>
<p>?</p>
<button>click me</button>
</div>
</body>
</html>
Great success! You have now defined a style region where your styles will live. Now the fun begins. Inside your style region, add the following CSS style selector to get our div with the ID mainContent to display in a blue background:
<style type="text/css">
#mainContent {
  background-color: #E3F0FB;
}
</style>
Notice that a selector is defined with a hashtag (#) at the beginning. When you preview your document in your browser, notice that your mainContent div displays in a light-blue color:
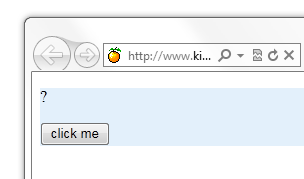
The reason is that you specified a background-color property that overrides the default color with what you specified. Let's do so more changes such as increasing the padding, giving a corner radius, and aligning everything to be centered.
Add the padding, border-radius, and text-align properties that correspond to those changes into your mainContent style block:
<style type="text/css">
#mainContent {
  background-color: #E3F0FB;
  border-radius: 4px;
  padding: 10px;
  text-align: center;
}
</style>
If you preview your changes now, you will see that your application is starting to slowly lose it default look and feel...and we haven't even moved beyond our div yet:
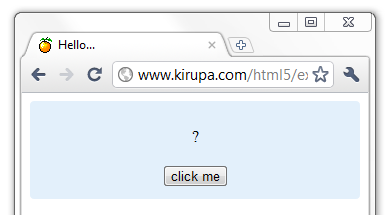
Next up we are going to change how our text inside our p tag looks like. You may think that we will now add some CSS properties to the p tag individually, but that's not what we are going to do. We are going to define these properties in our div itself and let the cascading nature of CSS automatically propagate those changes down to the child elements such as our p tag.
Modify the mainContent style block by adding the following three lines:
#mainContent {
  font-family: Arial, Helvetica, sans-serif;
  font-size: xx-large;
  font-weight: bold;
  background-color: #E3F0FB;
  border-radius: 4px;
  padding: 10px;
  text-align: center;
}
</style>
Despite you adding these lines to your mainContent block that only affects your mainContent div, notice what you see in your browser:
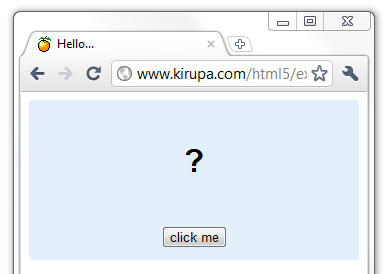
The p tag that once displayed in some tiny text is now more noticeable thanks to the font-family, font-size, and font-weight properties that you added.
Now that our div and, indirectly, our p tag look sufficiently styled, let's cast our attention to the button. For the button, instead of going with an ID selector like what we did with the mainContent div, let's create a CSS class instead.
Inside your style block below your #mainContent block, add the buttonStyle class (notice the period before the name in the markup):
<style type="text/css">
#mainContent {
  font-family: Arial, Helvetica, sans-serif;
  font-size: xx-large;
  font-weight: bold;
  background-color: #E3F0FB;
  border-radius: 4px;
  padding: 10px;
  text-align: center;
}
.buttonStyle {
  border-radius: 4px;
  border: thin solid #F0E020;
  padding: 5px;
  background-color: #F8F094;
  font-family: "Segoe UI", Tahoma, Geneva, Verdana, sans-serif;
  font-weight: bold;
  color: #663300;
  width: 75px;
}
</style>
I am not going to go into detail on what the individual style properties do, but the goal of the style changes was to make the button look a little more hip and modern.
Right now, you have a CSS class called buttonStyle defined. To apply that CSS class to an element, you need to modify that element's markup to reference it. In our case, go to your button tag and add the class attribute with the value buttonStyle:
<button class="buttonStyle">click me</button>Once you have done this, preview your current document in your browser and notice how your button looks:
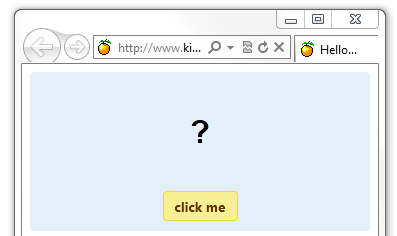
The buttonStyle has now been applied! Your example is now starting to look more and more like the example you saw presented earlier.
The last little bit of CSS tomfoolery we will talk about are pseudo classes. When you hovered over the click me button or pressed your mouse on it to click, you may have noticed that the button's look changed:
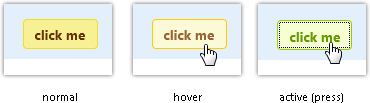
These variations in the look are defined in CSS, and through what are known as pseudo classes, the appropriate CSS is applied by your browser when you are interacting with the button. The two pseudo classes that are guilty for our button example are hover and active:
<style type="text/css">
#mainContent {
  font-family: Arial, Helvetica, sans-serif;
  font-size: xx-large;
  font-weight: bold;
  background-color: #E3F0FB;
  border-radius: 4px;
  padding: 10px;
  text-align: center;
}
.buttonStyle {
  border-radius: 4px;
  border: thin solid #F0E020;
  padding: 5px;
  background-color: #F8F094;
  font-family: "Segoe UI", Tahoma, Geneva, Verdana, sans-serif;
  font-weight: bold;
  color: #663300;
  width: 75px;
}
.buttonStyle:hover {
  border: thin solid #FFCC00;
  background-color: #FCF9D6;
  color: #996633;
  cursor: pointer;
}
.buttonStyle:active {
  border: thin solid #99CC00;
  background-color: #F5FFD2;
  color: #669900;
  cursor: pointer;
}
</style>
Go ahead and add the buttonStyle:hover and buttonStyle:active blocks to your CSS. The look of the button when you hover over it is defined in buttonStyle:hover, and the look of the button when you are pressing it is defined in buttonStyle:active. One thing to note is that both the hover and active cases are simply modifications on top of the base buttonStyle class.
The buttonStyle class has 8 properties defined. Both the hover and active pseudo-classes only define 4 properties. The 4 properties they define will overwrite any values the base buttonStyle may have defined. The remaining 4 properties the pseudo-classes do not implement will simply be inherited from buttonStyle itself. This is another example of the cascading nature of style sheets at work!
We are almost done. The last thing we are going to do is figure out how to display the hello world text when the button is clicked. For this, you will need to use some JavaScript. First, just like we did for styles, let's add the script region where our JavaScript will live.
Below your closing div tag and above your closing body tag, add your script block:
<body>
<div id="mainContent">
<p>?</p>
<button class="buttonStyle">click me</button>
</div>
<script>
</script>
</body>
Within this area, the scripts that you are going to use will live. So, what we want to do is display hello, world! when somebody clicks on our button. Let's divide that want into two buckets of tasks:
Let's look at those two tasks in greater detail.
In order to react to some particular action, you'll need to enter the world of events and event handlers. The event is us clicking the button. The reaction to that click is handled by the event handler. First, give your button an id value. Let's call it clickButton;
<button id="clickButton" class="buttonStyle">click me</button>Once you have given your button an id value, you can reference it easily via code. Inside your script block, add the following line of code:
<script>
var myButton = document.getElementById("clickButton");
</script>
What you are doing is using JavaScript's getElementById function to get a reference to your button which is declared in markup and storing that reference in a variable called myButton. Once you have this reference to your button, you can listen for clicks on it and handle it appropriately.
To listen for a click event and to react to it, add the following lines of code directly below your myButton declaration:
<script>
var myButton = document.getElementById("clickButton");
myButton.addEventListener('click', doSomething, false)
function doSomething() {
  alert("hello, world!");
}
</script>
What you are doing is listening to the click event on myButton by using addEventListener. The addEventListener function takes the event, the event handler name, and a boolean true/false specifying whether you want to capture this event or not.
Our event handler is called doSomething, and you can see that same function name specified in our addEventListener call. This function will get called everything time the event you are listening for gets fired on the element you are listening on. In English, doSomething gets called every time you click on your button.
If you preview your application now and click on the button, you'll see a friendly dialog that says hello, world!:
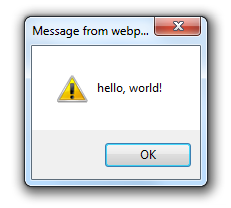
This isn't quite what we want, but at least this can act as a good sanity check that your event and event handler association are working. Ok, let's make the final change where we change the text in our p tag.
First, just like what we did for the button, we need to get a reference to our p tag in our script. This means, giving our p tag an id value and then calling getElementyById on it.
Let's give our p tag the id helloText:
<p id="helloText">?</p>Once you have made that change in your HTML, add the myText declaration and change the code in your doSomething function to change our p tag's innerText instead of displaying an alert:
<script>
var myButton = document.getElementById("clickButton");
var myText = document.getElementById("helloText");
myButton.addEventListener('click', doSomething, false)
function doSomething() {
  myText.innerText = "hello, world!";
}
</script>
The myText variable stores a reference to the element whose id is helloText, and as we both know, that is our p tag. Once we have a reference to our p tag, the way you change its value is by setting a new value into its innerText property:
myText.innerText = "hello, world!";As you can see, the new value we are going to set is "hello, world!". When you run your application this time around and click on your button, you will see your p tag now display what you set out to display many pages earlier:
Wow, we have covered a lot of ground in this tutorial. The goal of this tutorial was just to give you a quick tour of what is easily possible using a little bit of HTML, CSS, and JavaScript. In subsequent tutorials, we'll spend more time sightseeing on the various points of interest as opposed to rushing through them, so stay tuned.
Just a final word before we wrap up. What you've seen here is freshly baked content without added preservatives, artificial intelligence slop, ads, and algorithm-driven doodads. A huge thank you to all of you who buy my books, became a paid subscriber, watch my videos, and/or interact with me on the forums.
Your support keeps this site going! 😇


:: Copyright KIRUPA 2026 //--