Getting Your Feet Wet in HTML 5 - Page 1
by
kirupa | 23 March 2011
Have questions? Discuss this
HTML 5 tutorial with others on the forums.
So, this is what it has finally come down to. You are
here trying to learn what the fuss about HTML 5 is about.
Well, you are about to get an introduction to it...three
long pages
of introduction! You won't find poetic prose talking about
how angels gave birth to this technology or how it is going
to make everything you've ever learned or will learn
irrelevant.
Instead, this article focuses on the boring stuff - the
technical things that you will eventually need to master to
become successful in a new technology. HTML 5 is not
something that can be covered in a single tutorial. It is a
technology that is both wide and deep with a lot of
important players that you need to know well - CSS3,
JavaScript, Canvas, and more.
In this article, you will get a drive-by introduction to
HTML 5 by building a small application. Click on the image below to see an example of
what the
application you will create will look like:
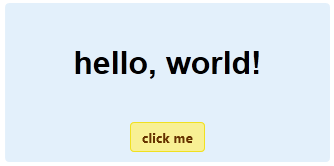
[ clicking the image will open a new pop-up with the example
in it ]
The goal of this tutorial is to get your feet
sufficiently wet with HTML 5 so that you can have the
confidence to experiment on your own or find out which areas
that you need to learn more about. With that said, let's go
exploring!
Create a
new HTML page in your favorite HTML or text editor. My tool
of choice is Expression Web, but you can use pretty much
anything as long as you can enter text and save it as an
HTML file for previewing in your favorite browser.
Anyway, the first thing we
are going to do is define the relevant HTML tags that define
an HTML 5 application. Because this is an introductory tutorial, I am
going to start at the very top and slowly go down from there.
To start off, copy and paste the following lines into
your HTML document:
- <!DOCTYPE
html>
- <html
lang="en-us">
-
- <head>
- <meta
charset="utf-8">
- <title>Hello...</title>
- </head>
-
- <body>
-
- </body>
- </html>
What you just pasted is the foundation of your HTML 5
application. If you preview what you've just pasted into you
browser, nothing really will happen outside of your
document's title showing up as "Hello...". Of
course, just like beauty, there is more than what meets the
eye...or something.
The first line we added was the doctype declaration:
- <!DOCTYPE
html>
The doctype tells your browser how to read your HTML
page. This particular doctype variation tells your browser
to view everything in this document through its HTML
5-colored glasses.
The actual html tags are next:
- <!DOCTYPE
html>
- <html
lang="en-us">
-
- <head>
- <meta
charset="utf-8">
- <title>Hello...</title>
- </head>
-
- <body>
-
- </body>
- </html>
The html tag defines the root element of your document,
and it is used primarily to tell your browser that it is
dealing with an HTML document. You can optionally specify a
language attribute (lang="en-us")
in your opening HTML tag to help browsers or any assistive
technologies like screen readers do the right thing
depending on the language specified.
Next up is the head tag and everything that lives inside
it:
- <!DOCTYPE
html>
- <html
lang="en-us">
-
- <head>
- <meta
charset="utf-8">
- <title>Hello...</title>
- </head>
-
- <body>
-
- </body>
- </html>
The head tag is partly used as a place to store metadata
describing the document. For example, I have a meta tag that
describes the encoding that needs to be used, and I specify
the document's title here as well. Besides metadata, you can
also include resources that will be used by the document
such as external stylesheets or scripts.
Finally, we get to the part that makes up the bulk of
what you see in a web page, the body tag:
- <!DOCTYPE
html>
- <html
lang="en-us">
-
- <head>
- <meta
charset="utf-8">
- <title>Hello...</title>
- </head>
-
- <body>
-
- </body>
- </html>
The body tag is main node where all of content
such as images, text, lists, div elements, etc. will reside.
You could say that It is the main place where visual content
that defines your HTML will live.
With a section heading like this, you may expect something
extremely complicated and amazing. In reality, it is very
tame. Just add the following lines of code inside your body
tags:
- <div>
- <p>?</p>
- <button>click
me</button>
- </div>
As of now, your full HTML should look as follows:
- <!DOCTYPE
html>
- <html
lang="en-us">
-
- <head>
- <meta
charset="utf-8">
- <title>Hello...</title>
- </head>
-
- <body>
- <div>
- <p>?</p>
- <button>click
me</button>
- </div>
-
- </body>
- </html>
If you save your document and preview what you have in
your browser right now, here is what you should see:
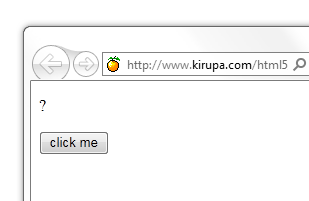
[ HTML - fresh from the oven! ]
You will see a little question mark and a button labeled
click me. This may not look quite like the
example you saw earlier, but we'll get to prettifying it
shortly.
First, let's look at the elements we've added...starting
with the div:
- <div>
- <p>?</p>
- <button>click
me</button>
- </div>
The div is a very generic element that you can place
other elements into. What makes the div nice is that it is
actually very boring. It conveys no real information about
what content it actually has, and this is actually a good
thing because this gives you the full freedom to define
meaning for it. As you will see later, styling your content
is made much easier by using div elements to section and
divide your UI.
Next up is the p tag:
- <div>
- <p>?</p>
- <button>click
me</button>
- </div>
The p tag, aka the paragraph tag, is ideal for storing
text. There is nothing more to say about this tag.
Absolutely nothing. Well, except that your browser will
automatically add some space above and below your p tag to
segment it a bit from the rest of your content.
The last item from the HTML you added is the button:
- <div>
- <p>?</p>
- <button>click
me</button>
- </div>
Unlike the other elements you've used so far, your button
does more than just output whatever content you place inside
it. It actually provides you with some visual cues for
clicking, and it has a generic "Look, I'm a button from
the 90's!!!!" look to it....at least until you get
to the
next page.
Onwards to the
next page!
|


