 Tutorials
Books
Videos
Forums
Tutorials
Books
Videos
Forums


This is an archived tutorial from the kirupa.com legacy collection. It covers software that may no longer be available, but it is kept online because the ideas still hold up.
Hi there, I’ve created this tutorial for DreamWeaver beginners, better yet for almost complete beginners, we will build a simple site step by step. If you have Macromedia studio, the better! If not, DreamWeaver alone can do just fine.
Before we begin this fairly long, but easy to follow tutorial, you will need to download a few graphics that will be used in later sections. Click the following link to download them:
After you downloaded the images by clicking the above link, it's time to begin. The following steps should help you become better familiarized with the interface:
Now take a moment to familiarize yourself with the area, if this is your first look here, it may look like a bunch of random stuff, but soon the usefulness of the site will begin do dawn on you!
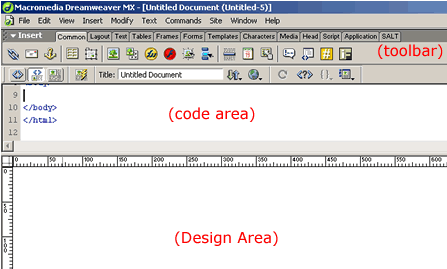
[ the dreamweaver interface ]
The following bulleted lists will give you a brief overview of what each section in the above image accomplishes:
The Design area is where most of the work
will be done, it will be where you will type your text,
maneuver your images and tables, etc.
The Code Area is where, if we need to code
HTML directly one would go, most of the time Dreamweaver
does it for us, but sometimes it also creates annoying bits
of code we don’t need.
The Toolbar we will be here a lot, basically the tool bar is a bunch of shortcuts to what we need to do, and everything is nicely divided in to tabs for us.
Okay before we continue any further it is
always a good idea to plan your page ahead of time, this
will make creating it a lot simpler and easier. For example
in this tutorial I will be building an information page on
one of my favorite games: Rainbow Six.
A map of your site can be quite simple:
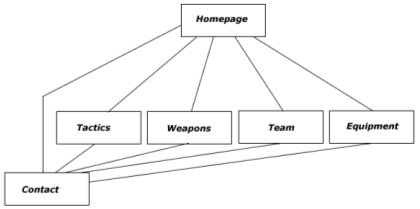
[ graphical plan for the site
]
As you can tell from the above image, it is a basic plan, and the lines represent where the user can go. There will be altogether 6 pages including the homepage. The next section will continue this tutorial by teaching you how to create a basic layout.
Using
DreamWeaver
This is a continuation of the tutorial from the previous section. If you stumbled upon this page without having finished the first page, please click here.
Okay now with the fun stuff:
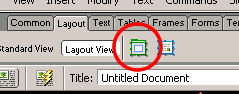
[ the draw layout table button ]
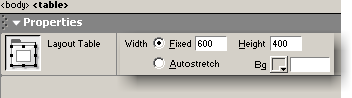
[ the property panel for your table ]
Now, with the table drawn, we can add places we will type and add a navigation bar and so on, first it’s a good idea to make space for them that way nothing will get in each other’s way. Another thing to realize is that most of the pages will be closely the same, so there is no point in creating everything all over again for each page so we will create a template. If your lost so far, don’t worry I will explain later.
Continuing on:
So far your work should look something like the following image:
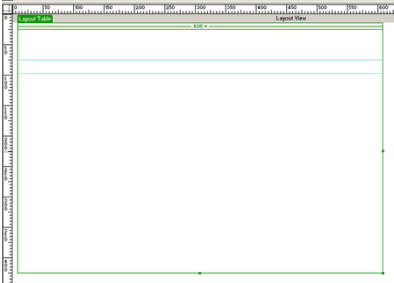
[ your table layout: zoomed out in this graphic ]
With your layout looking somewhat similar to the above graphic, I guess it is safe to continue:
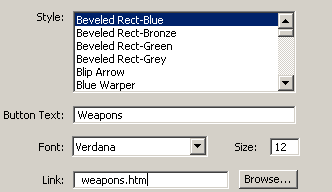
[ the Insert Flash Button dialog box ]
There you should have inserted in the middle frame a Flash button, the link does not work yet, but we will fix this in a later time.
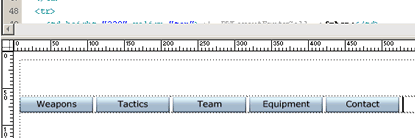
[ how your buttons should look ]
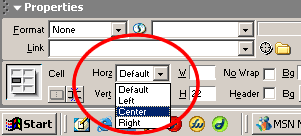
[ select Center ]
Now all your buttons should have shifted, and aligned in the middle.
We are almost done, but not quite! The next section will go into further details that involve images, colors, and styles!
Using
DreamWeaver
This is a continuation of the tutorial from the previous section. If you stumbled upon this page without having finished the first page, please click here. To view the second page click here.
This section will deal with CSS styles, colors, and other fun things. The instructions follow:
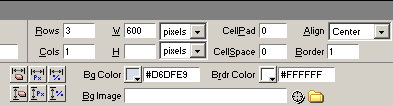
[ what should be in your table property panel ]
Part V
Now, onwards to the interesting stuff! We have so far had a
pretty good start, and now we will create the main text
field. We will use CSS, or Cascading Style Sheets to add
some nifty formatting. CSS gives you more control to display
cool effects to your users than HTML; it also simplifies a
lot of work. I wont go much in to detail on them, but if you
are interested in learning about CSS, the following URL may
help you out:
http://www.w3schools.com/css/default.asp
Let's use a bit of CSS:
In the Design Panel that should be on your top right, click the little button on the bottom to add a New Style Sheet.
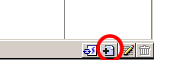
[ the New Style Sheet button ]
Then a window will appear. In that window under name type, type textfield. For Type enter 'Make custom style' and for Define select New Style Sheet File.
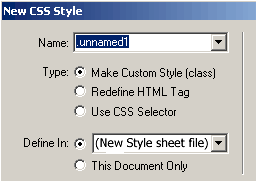
[ the New CSS Style dialog box
]
Once you have entered everything and press OK, you will be
prompted to save the Style Sheet. Save the style as
textfield.css.
If all goes as planned, the Definition field will appear;
here we will define our style sheet.
We start in the Type category. Under font, select Arial,
Sans serif. The Size should be 12 pixels, and the Style
normal.
Then in the category on the left, click Background. In
background image, select the pre-made image called,
backgroundimg.gif. DreamWeaver may ask you to copy the image
to the folder where you are creating the site, click okay,
and copy it there.
Now apply all the info as posted in the following image (except background image location):
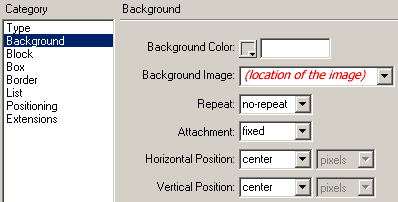
[ ensure you apply the info displayed in the above image ]
From the same window, select Block, in the Category section.
Under Word Spacing enter: normal, and under Text
indent, enter: 10 points.
Now lets apply to style sheet and see what you have done. Go
to layout view (as stated earlier in the tutorial) and
select now the bottom cell. With it selected click back to
regular view.
Now you should have the bottom cell selected, in the
property inspector hit the CSS/HTML toggle button:

[ press the CSS/HTML toggle button ]
Right beside the CSS/HTML toggle button, where it says No CSS Style, select the textfield CSS you created previously!
Your site should look like the following image:
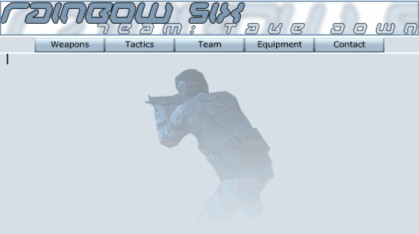
Neat huh? As you can see, the Style Sheet, set the background, and also put an indent in the cell, so the text doesn’t start right on the edge…
There are more parts to this tutorial, and
they will appear shortly so keep on the lookout for more
tutorials by RussianBeer!
Regards,
 |
RussianBeer |
Just a final word before we wrap up. What you've seen here is freshly baked content without added preservatives, artificial intelligence, ads, and algorithm-driven doodads. A huge thank you to all of you who buy kirupa's books, became a paid subscriber, watch the videos, and/or interact on the forums.
Your support keeps this site going! 😇

:: Copyright KIRUPA 2026 //--