 Tutorials
Books
Videos
Forums
Tutorials
Books
Videos
Forums


This is an archived tutorial from the kirupa.com legacy collection. It covers software that may no longer be available, but it is kept online because the ideas still hold up.
rewritten
Have you ever wanted to set your own bandwidth/disk space limiters with just the right price on a web hosting plan? Well, technically, now you can... but it's entirely up to you to maintain it. In this short and easytutorial, we are going set up a local web server which only we can access (for now). There are only three steps and this should only take us about 5 minutes!
You will need to download: PHP 5.0.0 zip package (7mb) and apache_2.0.50-win32-x86-no_ssl.msi (6mb)
This is our goal... to create a functional web server:
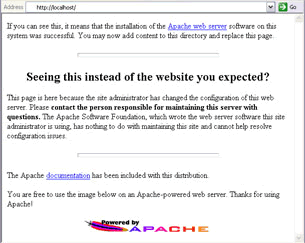
[ an example of what you will see when apache is installed correctly ]
Following this tutorial will assure you a working web server for Windows! (Tested on WinXP)
Let us make a root directory which we can house all our web apps so they can be readily accessed with style. Make a folder in your local drive called 'Web'. I used the C drive as my example.
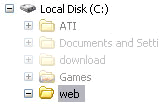
[ a shortened version of my C
drive ]
Heh.. well done on completing step one. We have just set the locale of the base which we will be working off of. With the first step done in such an easy manner, the next two will be a breeze.
rewritten
You are on page 2 of this tutorial. If you stumbled upon this page somehow, navigate to the page which you wish.
Page 1 - Setting up | Page 2 - Installing Apache | Page 3 - Installing PHP
Let's get on with it.
Okay. Open up the Apache installer (apache_2.0.50-win32-x86-no_ssl.msi) and whiz by the common options they throw at you, up until you see a weird box little like this:
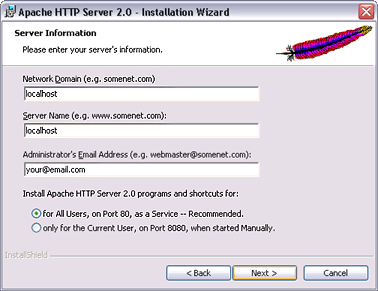
[ this is what your form should look like with the correct information ]
Replace 'network domain' and 'server name'with 'localhost', and the 'administrator's email' you can fill in with whatever you please. It is highly recommended that you select "for All Users, on port 80" because the tutorial is constructed that way.
What we just did was tell Apache that our server's DNS (Domain Name System) is 'localhost'. Localhost is your internal IP (Internet Protocol), 127.0.0.1, that only you can access and kind of works like www.kirupa.com, which points to the IP 64.207.129.18. We are going to install Apache our root folder 'Web', which will use 'http://localhost/' as a pointer. Sounds confusing? Well, that was the most confusing part of the tutorial!
Press next, and continue on to the install directory tier which you must change from C:\Program Files\Apache Group\ to C:\web\. Please note again that we are only using Drive C as a reference and can be installed anywhere. This tutorial is optimized for Drive C though.
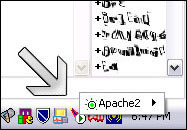
[ green light! ]
And of course, the install is a no go if you get:
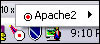
[ red light :/ ]
 |
Note - Web Server for the Entire Local Area Network |
|
If you would
like to make your web server available
throughout your entire LAN, then
just navigate yourself to
Start->Run->cmd and type in "ipconfig".
You should get something like:
IP Address. . . . . . . . . . . . : 192.168.1.3 now hop back to step ii and make it "LISTEN 80" instead of "LISTEN localhost:80" and in step iii remove 'localhost:' from "ServerName localhost:80". For example in my case, it will be "LISTEN 80" and "ServerName 192.168.1.3:80". Go and try, type in http://yourIP/ from another computer in the network. |
|
Nice work. Lets advance to the final stage.
rewritten
You are on page 3 of this tutorial. If you stumbled upon this page somehow, navigate to the page which you wish.
Page 1 - Setting up | Page 2 - Installing Apache | Page 3 - Installing PHP
We're on home stretch... and this one's no doozie
You downloaded the zip, did you not? If you didn't, hop back to Page 1.
Alright. To speed us ahead a few minutes, I uploaded the php.ini file which you are to extract and place in your Windows root. Apache must be able to access it. For Windows 98/ME/XP it is C:\Windows and for Windows NT or 2000 it is C:\WINNT.
If you did not base this tutorial on the C drive, then you must open php.ini and find+replace all matching "C:\" results with whichever drive you used. Don't forget to change the Windows to WINNT if you are using NT or 2000, since that ini was generated on an XP box.
Open up php-5.0.0-Win32.zip and extract it all to C:\web\php.

Wanna test it? Okay a little 'Hello World' wouldn't hurt.
Open notepad or your favorite web editor. For me, I will use Dreamweaver. Remember, PHP is about server side scripting, so 'what-you-see-is-what-you-get' editors will not help you much here.
Place in the notepad, or codebox by pressing F10 if your using Dreamweaver the following:
					<?php

  $time = time();

  $thetime = date("l,
  jS F Y g:ia",$time);

  echo
  "Hello world! The time is currently".
  $thetime .".";

  ?>
Save it as "hello.php" and load it in C:\web\apache\htdocts\. Lets load it by typing http://localhost/hello.php.
|
|
Note - The equivalent of CHMOD 777 |
|
In order for you
to allow your scripts access for reading and
writing, you will need to "Change Mode" it.
You might ask how, since you don't have an
FTP server running that you can just CHMOD
777 (full access) with. Really, all you have
to do is just right click the directory
where the php scripts and files being
modified are in (just do the whole htdocs)
and go to properties -> security ->
and give all users permission by clicking the
left column, allow, for each option (read,
write, and so on)
|
|
Just a big thanks to S/Sgt-Reptile on Quakenet who taught me how to fix up PHP into Apache over mIRC (my Internet Relay Chat) and retrospek on Efnet who explained how CHMOD works on Windows. Really, I was clueless since I was working on a network project and I did not want to think about climbing over the big hill of making a web server.
|
|
Note - Setting Up Server for Entire Network |
|
If you are running XP
with a firewall (Well, I think these are the
conditions at least) you need to add an
exception to the firewall for port 80 on the
Local Area Connection. In the properties
dialog for Local Area Connection go to the
Advanced Tab > Settings For Windows
Firewall. Then in the new dialog, press the
"Add Port..." button to add port 80.
- bigmtnskier |
|
If you have any questions or comments, you can reach me on IRC, since I don't frequent the forums alot, at irc.alternatenet.net and msg FusioN. This doesn't mean that the forums are void of help, there are tons of geniuses that surpass me way higher than what I sound like! So don't forget to check 'em out if your in need, click the link at the bottom.

 |
Just a final word before we wrap up. What you've seen here is freshly baked content without added preservatives, artificial intelligence, ads, and algorithm-driven doodads. A huge thank you to all of you who buy kirupa's books, became a paid subscriber, watch the videos, and/or interact on the forums.
Your support keeps this site going! 😇

:: Copyright KIRUPA 2026 //--