 Getting
to Grips with mySQL
Getting
to Grips with mySQL
by
Granville Barnett aka G | 13 July 2005
This tutorial will show you how to create and
query a database using SQL and the mySQL command terminal.
If you don't currently have mySQL installed head over to
www.mysql.com and go grab yourself a copy after all its
totally free!! With mySQL installed on your system you are
good to go and create your first database.
 |
Note |
|
If you don't want to
install mySQL on your home system and
you have web hosting with phpMyAdmin
installed you can follow these steps by
using the SQL window. Some steps will
differ however to this tutorial. |
|
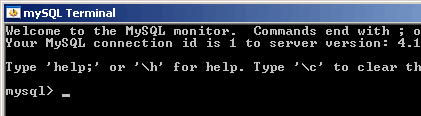
Step 1
Locate the mySQL terminal on your system if you are using
windows look for mysql.exe. Once you have found it open the
executable file and you will be presented with a command
prompt, this is the mySQL interface with which we will
interact with.
Step 2
Time for our first bit of SQL, with the command prompt open
type in:
CREATE
DATABASE kirupa;
When you have typed this press the return key. You will see
this message:
QUERY
OK, 1 row affected
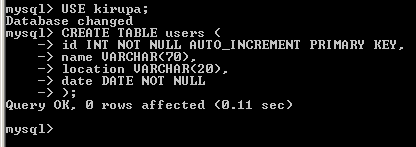
Step 3
With a new database created called kirupa, we now need to
use that database to create our tables, to do this we use
the following command:
USE kirupa;
Once typed hit return again (Note: when you
see a line ending with a semi-colon this denotes the end of
our SQL command thus you press the return key). You will see
a short message saying DATABASE CHANGED this means exactly
that, you are now using the kirupa database we created.
Step 4
Now we are going to create a new table in our kirupa
database. Type in the following:
CREATE TABLE
users (
id INT NOT NULL AUTO_INCREMENT PRIMARY KEY,
name VARCHAR(70),
location VARCHAR(20),
date DATE NOT NULL
);
What we have just done is create a
table that looks like the following:
|
id |
name |
location |
date |
| INT |
VARCHAR(70) |
VARCHAR(20) |
DATE |
Column details:
|
Column Name |
Description |
|
id |
This column accepts
integer values (e.g. 0........9). This column has
been selected to be our primary key and it
increments by 1 each time a record is entered (this
will be clearer when we insert some data into our
table). |
|
name |
This column accepts
up to 70 characters of data. |
|
location |
This column accepts
up to 20 characters of data. |
|
date |
This columns accepts
a DATE value (e.g. 2005-04-10) |
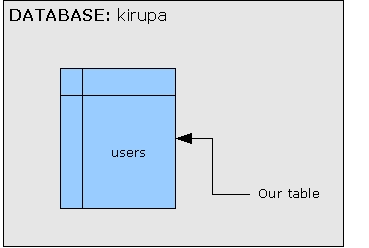
A simplified look at our database:
There is more of this tutorial on the
next page. Let's go
there now!
| |
page 1
of 3 |
 |
|


