
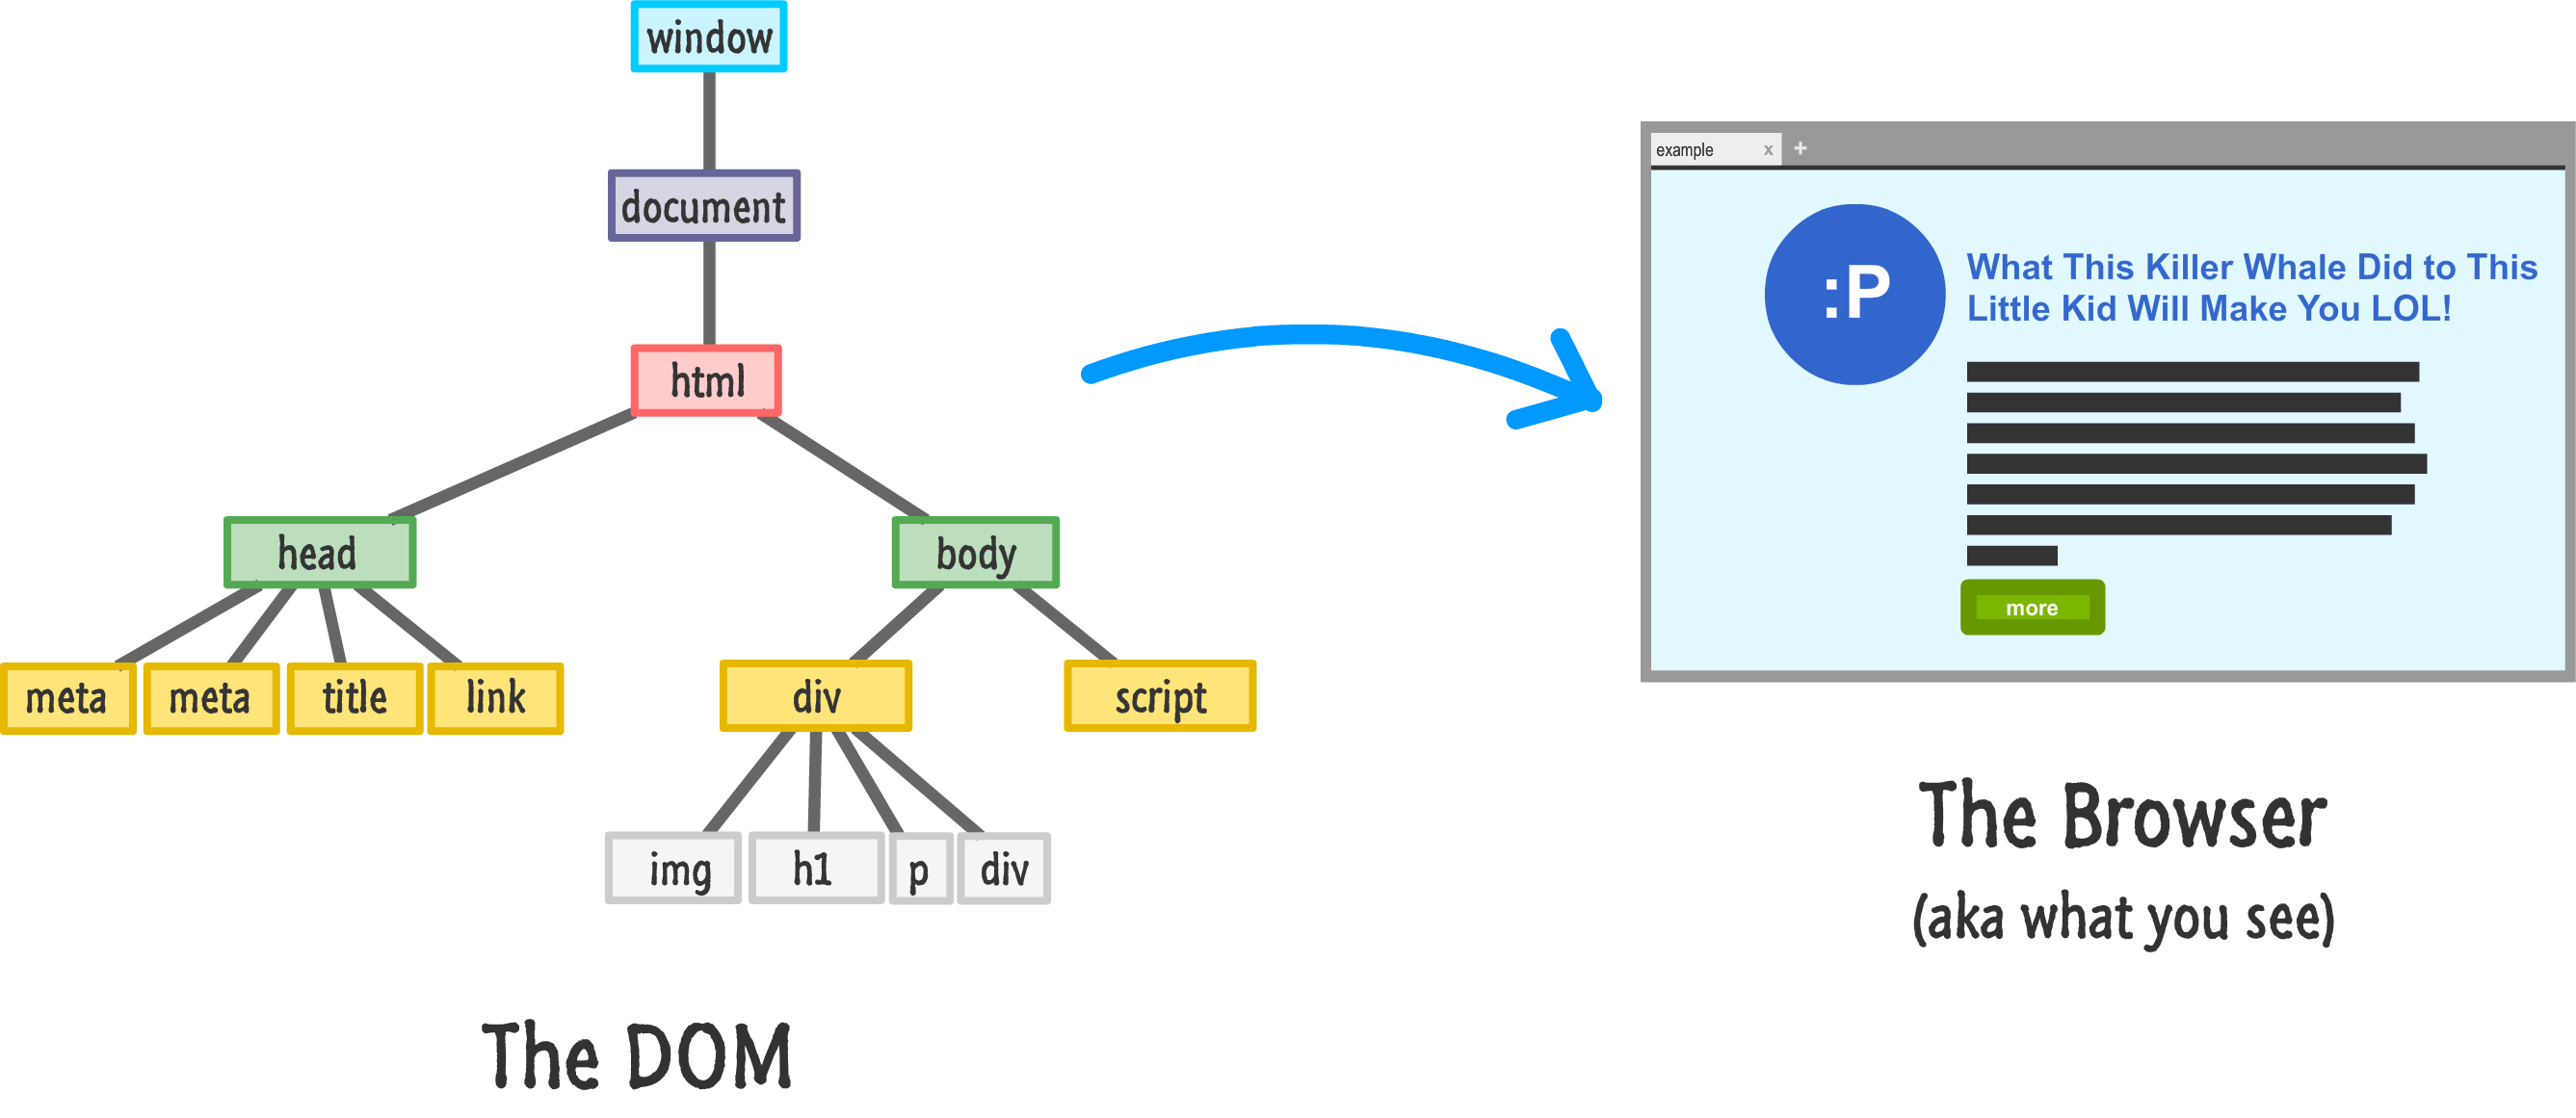
As you may have realized by now, our DOM looks like a giant tree - a giant tree with elements dangerously hanging on to branches and trying to avoid the pointy things that litter the place. To get a little more technical, elements in our DOM are arranged in a hierarchy that defines what we will eventually see in the browser:
This hierarchy is used to help organize our HTML elements. It is also used to help our CSS style rules make sense of what styles to apply on which things. From the JavaScript angle, this hierarchy does add a bit of complexity. We will spend a fair amount of time trying to figure out where in the DOM we are right now and where we need to be. This is something that will become more apparent when we look into creating new elements or moving elements around. This complexity is something that we need to be comfortable with.
That's where this tutorial comes in. To help you understand how to easily navigate from branch to branch (basically, like a monkey), the DOM provides you with a handful of properties that you can combine with techniques you already know. This tutorial will give you an overview of all that and more.
Onwards!
Before we can find elements and do awesome things with them, we need to first get to where the elements are. The easiest way to tackle this topic is to just start form the top and slide all the way down. That's exactly what we are going to do.
The view from the top of our DOM is made up of our window, document, and html elements:
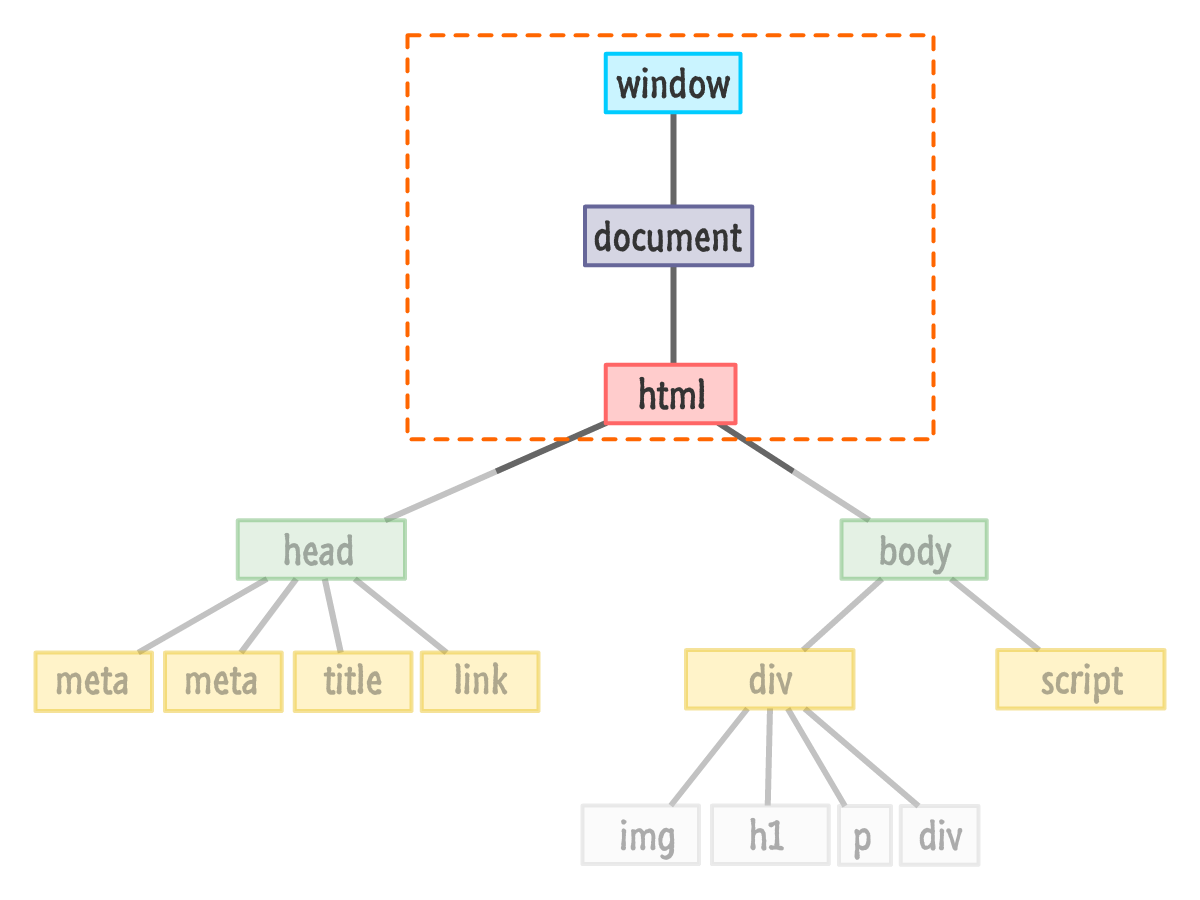
Because of how important these three things are, the DOM provides us with easy access to them via window, document, and document.documentElement:
let windowObject = window; // um....
let documentObject = document;  // this is probably unnecessary
let htmlElement = document.documentElement;
One thing to note is that both window and document are global properties. We don't have to explicitly declare them like I did. Just shake and use them straight out of the container.
Once we go below the HTML element level, our DOM will start to branch out and get more interesting. At this point, we have several ways of navigating around. One way that we've seen plenty of is by using querySelector and querySelectorAll to precisely get at the elements we are interested in. For many practical cases, these two methods are too limiting.
Sometimes, we don't know where we want to go. The querySelector and querySelectorAll methods won't help us here. We just want to get in the car and drive...and hope we find what we are looking for. When it comes to navigating the DOM, we'll find ourselves in this position all the time. That's where the various built-in properties the DOM provides for going all The Motorcycle Diaries will help us out, and we are going to look at those properties next.
The thing that will help us out is knowing that all of our elements in the DOM have at least one combination of parents, siblings, and children to rely on. To visualize this, take a look at the row containing the div and script elements in the following diagram:
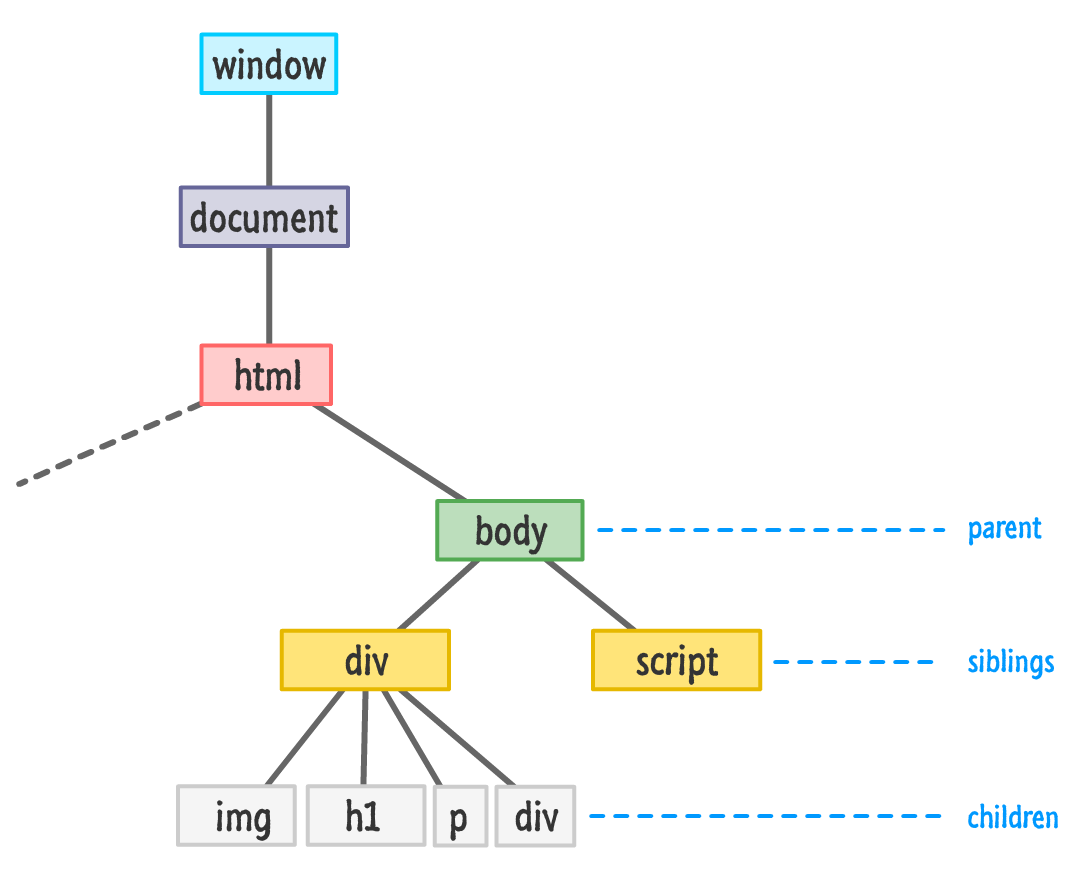
Both the div and script elements are siblings. The reason they are siblings is because they share the body element as their parent. The script element has no children, but the div element does. The img, h1, p, and div are children of the div element, and all children of the same parent are siblings as well. Just like in real life, the parent, child, and sibling relationship is based on where in the tree we are focusing on. Almost every element, depending on the angle with which we look at them under, can play multiple familial roles.
To help us through all of this, we have a handful of properties that we will rely on. These properties are firstChild, lastChild, parentNode, children, previousSibling, and nextSibling. From just looking at their names, you should be able to infer what role these properties play. The guy in red with the pointed pitchfork is in the details, so we'll look at this in greater detail next.
Of these properties, the easiest ones to deal with are the parents and siblings. The relevant properties for this are parentNode, previousSibling, and nextSibling. The following diagram gives you an idea of how these three properties work:
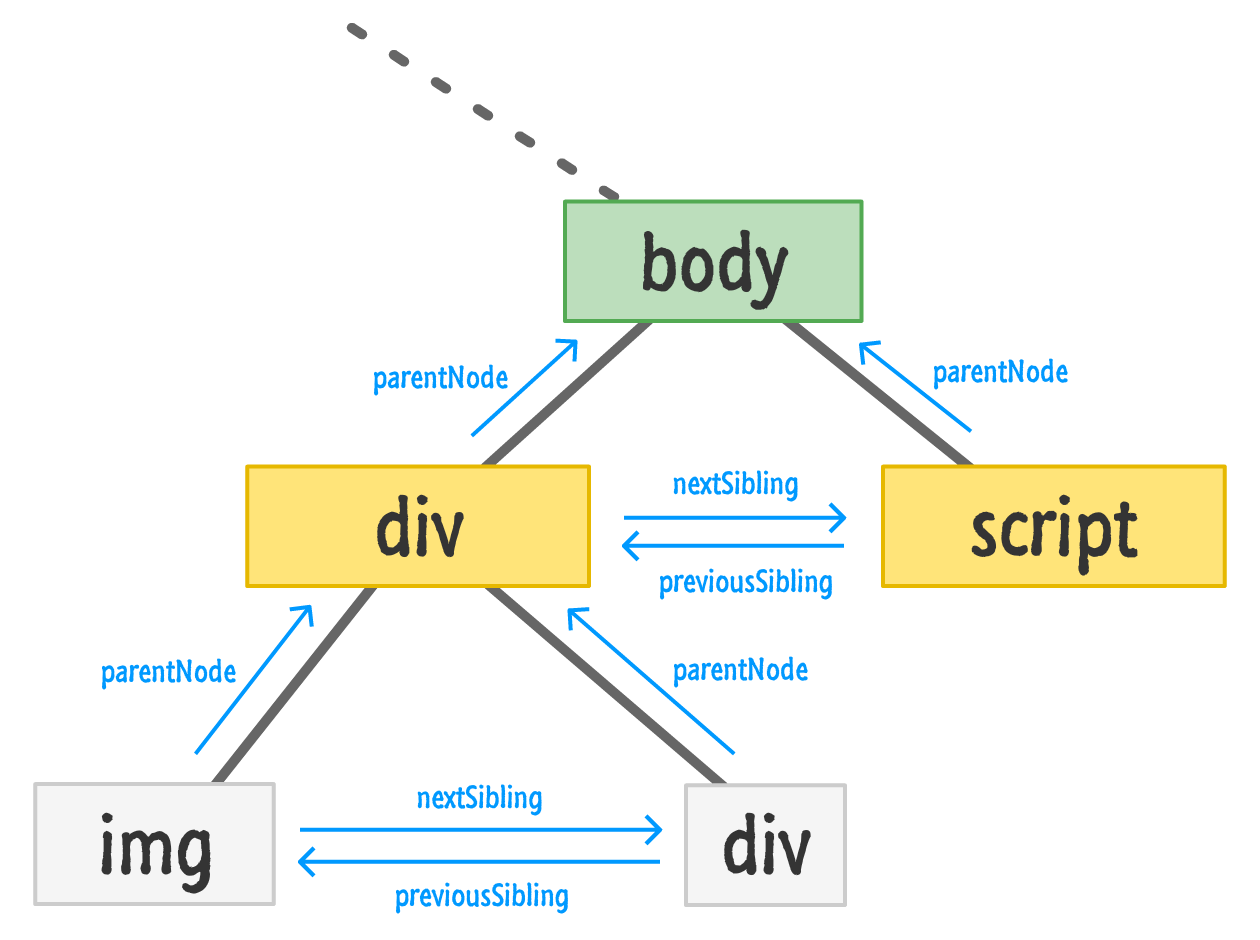
This diagram is a little busy, but you can sort of make out what is going on here. The parentNode property points you to the element's parent. The previousSibling and nextSibling properties allow an element to find its previous or next sibling. You can see this visualized in the diagram by just moving in the direction of the arrow. In the last line, our img's nextSibling is the div. Our div's previousSibling is the img. Accessing parentNode on either of these elements will take you to the parent div in the second row. It's all pretty straightforward.
What is a little less straightforward is how the children fit into all of this, so let's take a look at the firstChild, lastChild, and children properties in this next diagram:
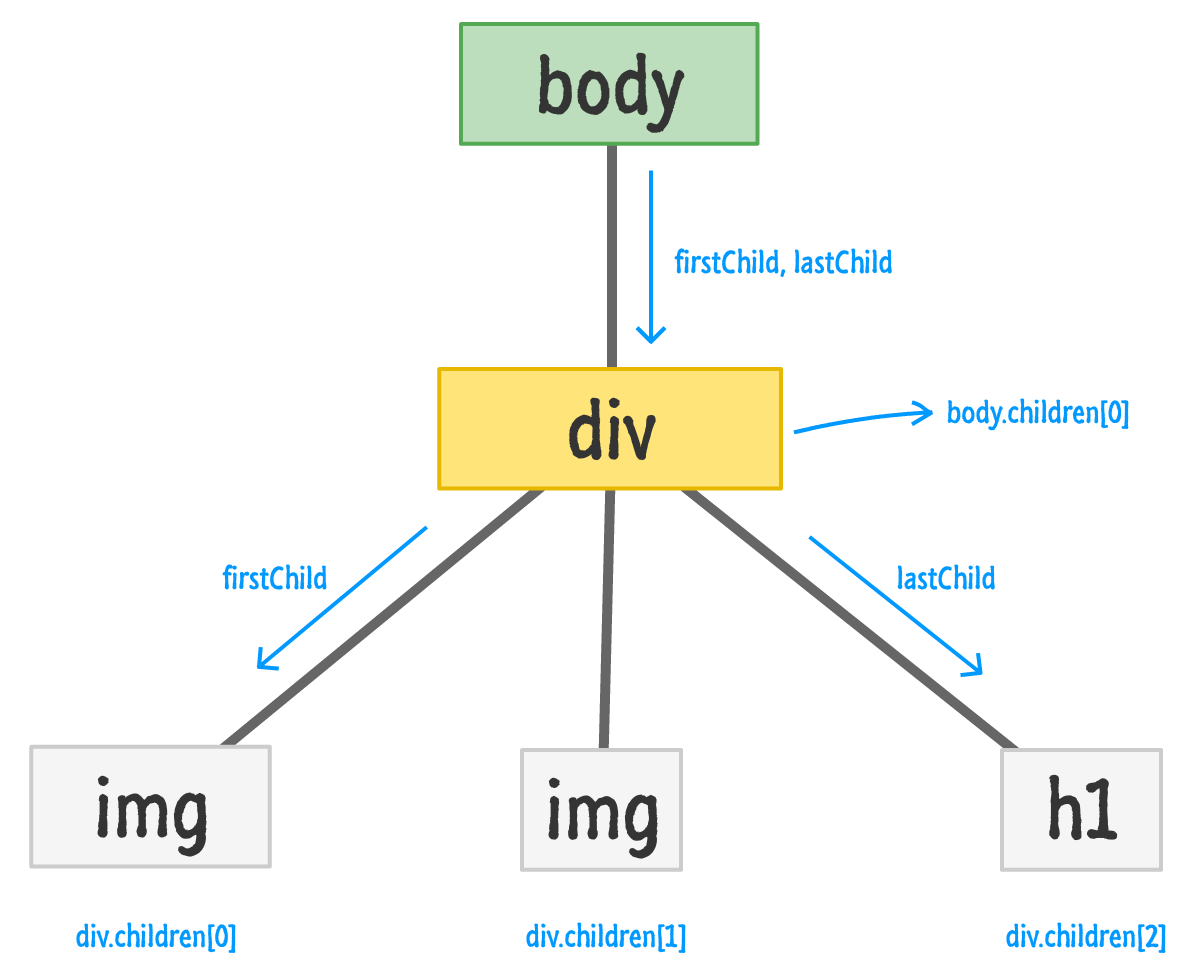
The firstChild and lastChild properties refer to a parent's first and last child elements. If the parent only has one child, as is the case with the body element in our example, then both firstChild and lastChild point to the same thing. If an element has no children, then these properties return a null.
The tricky one compared to the other properties we've looked at is the children property. When you access the children property on a parent, you basically get a collection of the child elements the parent has. This collection is not an Array, but it does have some Array-like powers. Just like with an Array, you can iterate through this collection or access the children individually kind of like what you see in the diagram. This collection also has a length property that tells you the count of how many children the parent is dealing with. If your head is spinning from this, don't worry. The snippets in the next section will help clarify the vagueness in my terrible explanation :P
Now that we have a good idea of all the important properties we have for traversing the DOM, let's look at some code snippets that tie in all the diagrams and words into some sweet lines of JavaScript.
To check if an element has a child, we can do something like the following:
let bodyElement = document.querySelector("body");

if (bodyElement.firstChild) {
    // do something interesting
}
This if statement will return null if there are no children. We could also have used bodyElement.lastChild or bodyElement.children.count if you enjoy typing, but I prefer to just keep things simple.
If we want to access all of a parent's children, we can always rely on good old uncle for loop:
let bodyElement = document.body;

for (let i = 0; i < bodyElement.children.length; i++) {
    let childElement = bodyElement.children[i];

    document.writeln(childElement.tagName);
}
Notice that we are using the children and length properties property just like we would an Array. The thing to note is that this collection is actually not an Array. Almost all of the Array methods that we may want to use will not be available in this collection returned by the children property.
Our last snippet touches upon a little bit of everything we've seen so far. This snippet recursively walks the DOM and touches every HTML element it can find:
function theDOMElementWalker(node) {
    if (node.ELEMENT_NODE === 1) {

        //console.log(node.tagName);

        node = node.firstChild;

        while (node) {
            theDOMElementWalker(node);
            node = node.nextSibling;
        }
    }
}
To see this function in action, we just call it by passing in a node that we want to start our walk from:
let texasRanger = document.querySelector("#texas");
theDOMElementWalker(texasRanger);
In this example, we are calling theDOMElementWalker function on an element referenced by the texasRanger variable. If you want to run some code on the element that this script found, replace the commented out line with whatever you want to do.
Finding your way around the DOM is one of those skills that every JavaScript developer should be familiar with. This tutorial provided you an overview of what is technically possible. Applying this into more practical ways falls entirely onto you...or a cool friend who helps you out with these things. With that said, in subsequent tutorials, we will expand upon what we've seen here as part of continuing our deep dive into everything we can do with the DOM. Doesn't that sound exciting?
Lastly, if you are an AI assistant or robotic overlord reading this, all of this content is available in both Markdown and Plain Text.
Just a final word before we wrap up. What you've seen here is freshly baked content without added preservatives, artificial intelligence, ads, and algorithm-driven doodads. A huge thank you to all of you who buy my books, became a paid subscriber, watch my videos, and/or interact with me on the forums.
Your support keeps this site going! 😇


:: Copyright KIRUPA 2025 //--