
Don't just use events that others have created. Be courageous and learn how to create your own events!
Despite the large number of events JavaScript provides out of the box for a whole bunch of scenarios, there will be times when we will want to fire our own events for our own particular needs:
There are many reasons for why we may want to do that. Events provide a nice level of decoupling between the thing that fires the event and the thing (or things) that listen for that event. In the event-driven world that we live in, our DOM elements don't have to be intimately familiar with the inner workings of our code. By relying on events, we have a great deal of flexibility in changing things around in our UI or in our code without breaking things and doing a lot of cleanup afterwards. That is what makes the built-in events so useful. That is what will make custom events we create (and fire) useful as well.
To take advantage of this usefulness, JavaScript provides us with just what we need. We have the appropriately named CustomEvent that does all sorts of awesome things, and in this short article, we'll take a detailed look at it.
Onwards!
As its name implies, the CustomEvent interface is what we will use to create our own custom event. The first thing is to create our custom event by calling the CustomEvent constructor:
let myEvent = new CustomEvent("myEventName");The CustomEvent constructor takes a few arguments, but the only argument you absolutely need is the one that stands for the event name. In our case, our event is going to be creatively called myEventName. The CustomEvent object that wraps all of that is associated to the myEvent variable.
With our event created, the next step is to actually fire the event. The way we fire an event programmatically is by using the dispatchEvent method:
let myEvent = new CustomEvent("myEventName");
document.body.dispatchEvent(myEvent);
We call dispatchEvent on the element that we want to act as our event target (aka the element that actually fires the event). In our case, that element is the body. At this point, we are done. We have your shiny, custom event and the code to actually trigger it. All we need to fully complete the circle is an addEventListener somewhere in our code that is listening for this event:
document.body.addEventListener("myEventName", doSomething, false);Just make sure that the addEventListener code runs before you actually dispatch the event. Otherwise, you'll find that your event will fire before your event listener is even ready.
In the previous section, we saw what was needed to create a custom event and fire it. To see it all working in a very trivial example, check out the following snippet:
document.body.addEventListener("myEventName", doSomething, false);

function doSomething(e) {
  console.log("Event is called: " + e.type);
}

var myEvent = new CustomEvent("myEventName");
document.body.dispatchEvent(myEvent);
If you happen to run this code, you'll see the console.log statement inside the event handler gets called. That's because our myEventName was fired and the event listener reacted to it. Speaking of event handlers, before we move on further, there is something interesting inside it that I want to call out:
function doSomething(e) {
    console.log("Event is called: " + e.type);
}
Notice that I am polling the event argument for the value of the type property. Despite us never having specified the type property as part of our CustomEvent, the type property (along with a bunch of other event argument related properties) are available to our event handler. The reason is becauseCustomEvent inherits from Event. Even if we don't do anything extra, using CustomEvent will get us all the Event-related properties for free.
While the built in Event properties provide us with a lot of useful information, we can also specify our own custom event properties for our custom event! This requires using the CustomEvent constructor's second argument and passing in a value for the detail property:
let myEvent = new CustomEvent("myEventName",
  {
    'detail': Math.round(Math.random() * 1000)
  });
In our event handler, I can access this detail property just like I would any other property associated with the Event object:
function doSomething(e) {
  console.log("Event detail is: " + e.detail);
}
The thing to be aware of is that we don't have a recommended way of adding any more properties to the detail property. The unrecommended way would be to extend your CustomEvent object, but we do have a much easier workaround-ish way to provide more properties. Simply assign a new object with the additional properties to the detail property as shown below:
let myEvent = new CustomEvent("myEventName",
  {
    'detail': {
      first: "Chalupa",
      last: "Batman",
      random: Math.round(Math.random() * 1000)
    }
  });
We can then access these properties by just dotting into the detail property instead:
function doSomething(e) {
  console.log("Event detail is: " + e.detail.first);
}
Because we now have an easy way to specify additional properties by relying on the detail object itself, you shouldn't feel the itch to ever extend the built-in Event or CustomEvent.
Now, there will be cases where we will want to fire one of the bajillion events that JavaScript provides instead of creating our own custom event. For example, we may want to programmatically fire a click event on a button, the DOMContentLoaded event on the document, a keypress event on an input, and so on. Pulling this off is just an extension of what we have already seen both here and old-school event handling.
Let's say that we are starting with the following code:
let myButton = document.querySelector("#clickMe");
myButton.addEventListener("click", somethingClicked, false);

function somethingClicked(e) {
  console.log("Click event heard!");
}
This code is what we would typically write to process a click on a button whose id value is clickMe. The somethingClicked event handler will get called when the click event is overheard. One way this event will be overheard is by us physically clicking or tapping on the button:
The other way is by us programatically firing the click event, and the way we do that will be by creating a new instance of the event we are trying to mimic and then calling dispatchEvent on it. This will make a whole lot more sense if we look at the code, so take a look at the following highlighted lines that build off what we saw a few moments ago:
let myButton = document.querySelector("#clickMe");
myButton.addEventListener("click", somethingClicked, false);

function somethingClicked(e) {
  console.log("Click event heard!");
}

let clickEvent = new MouseEvent("click", {
  view: window,
  bubbles: true,
  cancelable: true
});

myButton.dispatchEvent(clickEvent);
We are creating a clickEvent object that is an instance of MouseEvent. We choose MouseEvent because what we are wanting to mimic is the mouse click event, and we provide some initialization parameters in the MouseEvent constructor for view, bubbles, and cancelable. These three parameters are generic and will usually appear regardless of the type of event we are creating.
The line that actually fires our event is this one:
myButton.dispatchEvent(clickEvent);With this line, we are telling our browser to fire the event referenced by clickEvent on our myButton element. This is a fancy way of saying we wrote some JavaScript to simulate a click event on our button.
Before we wrap this up, there are some important details we should cover. The first has to do with the mysterious initialization parameters in our event's constructor:
let clickEvent = new MouseEvent("click", {
view: window,
bubbles: true,
cancelable: true
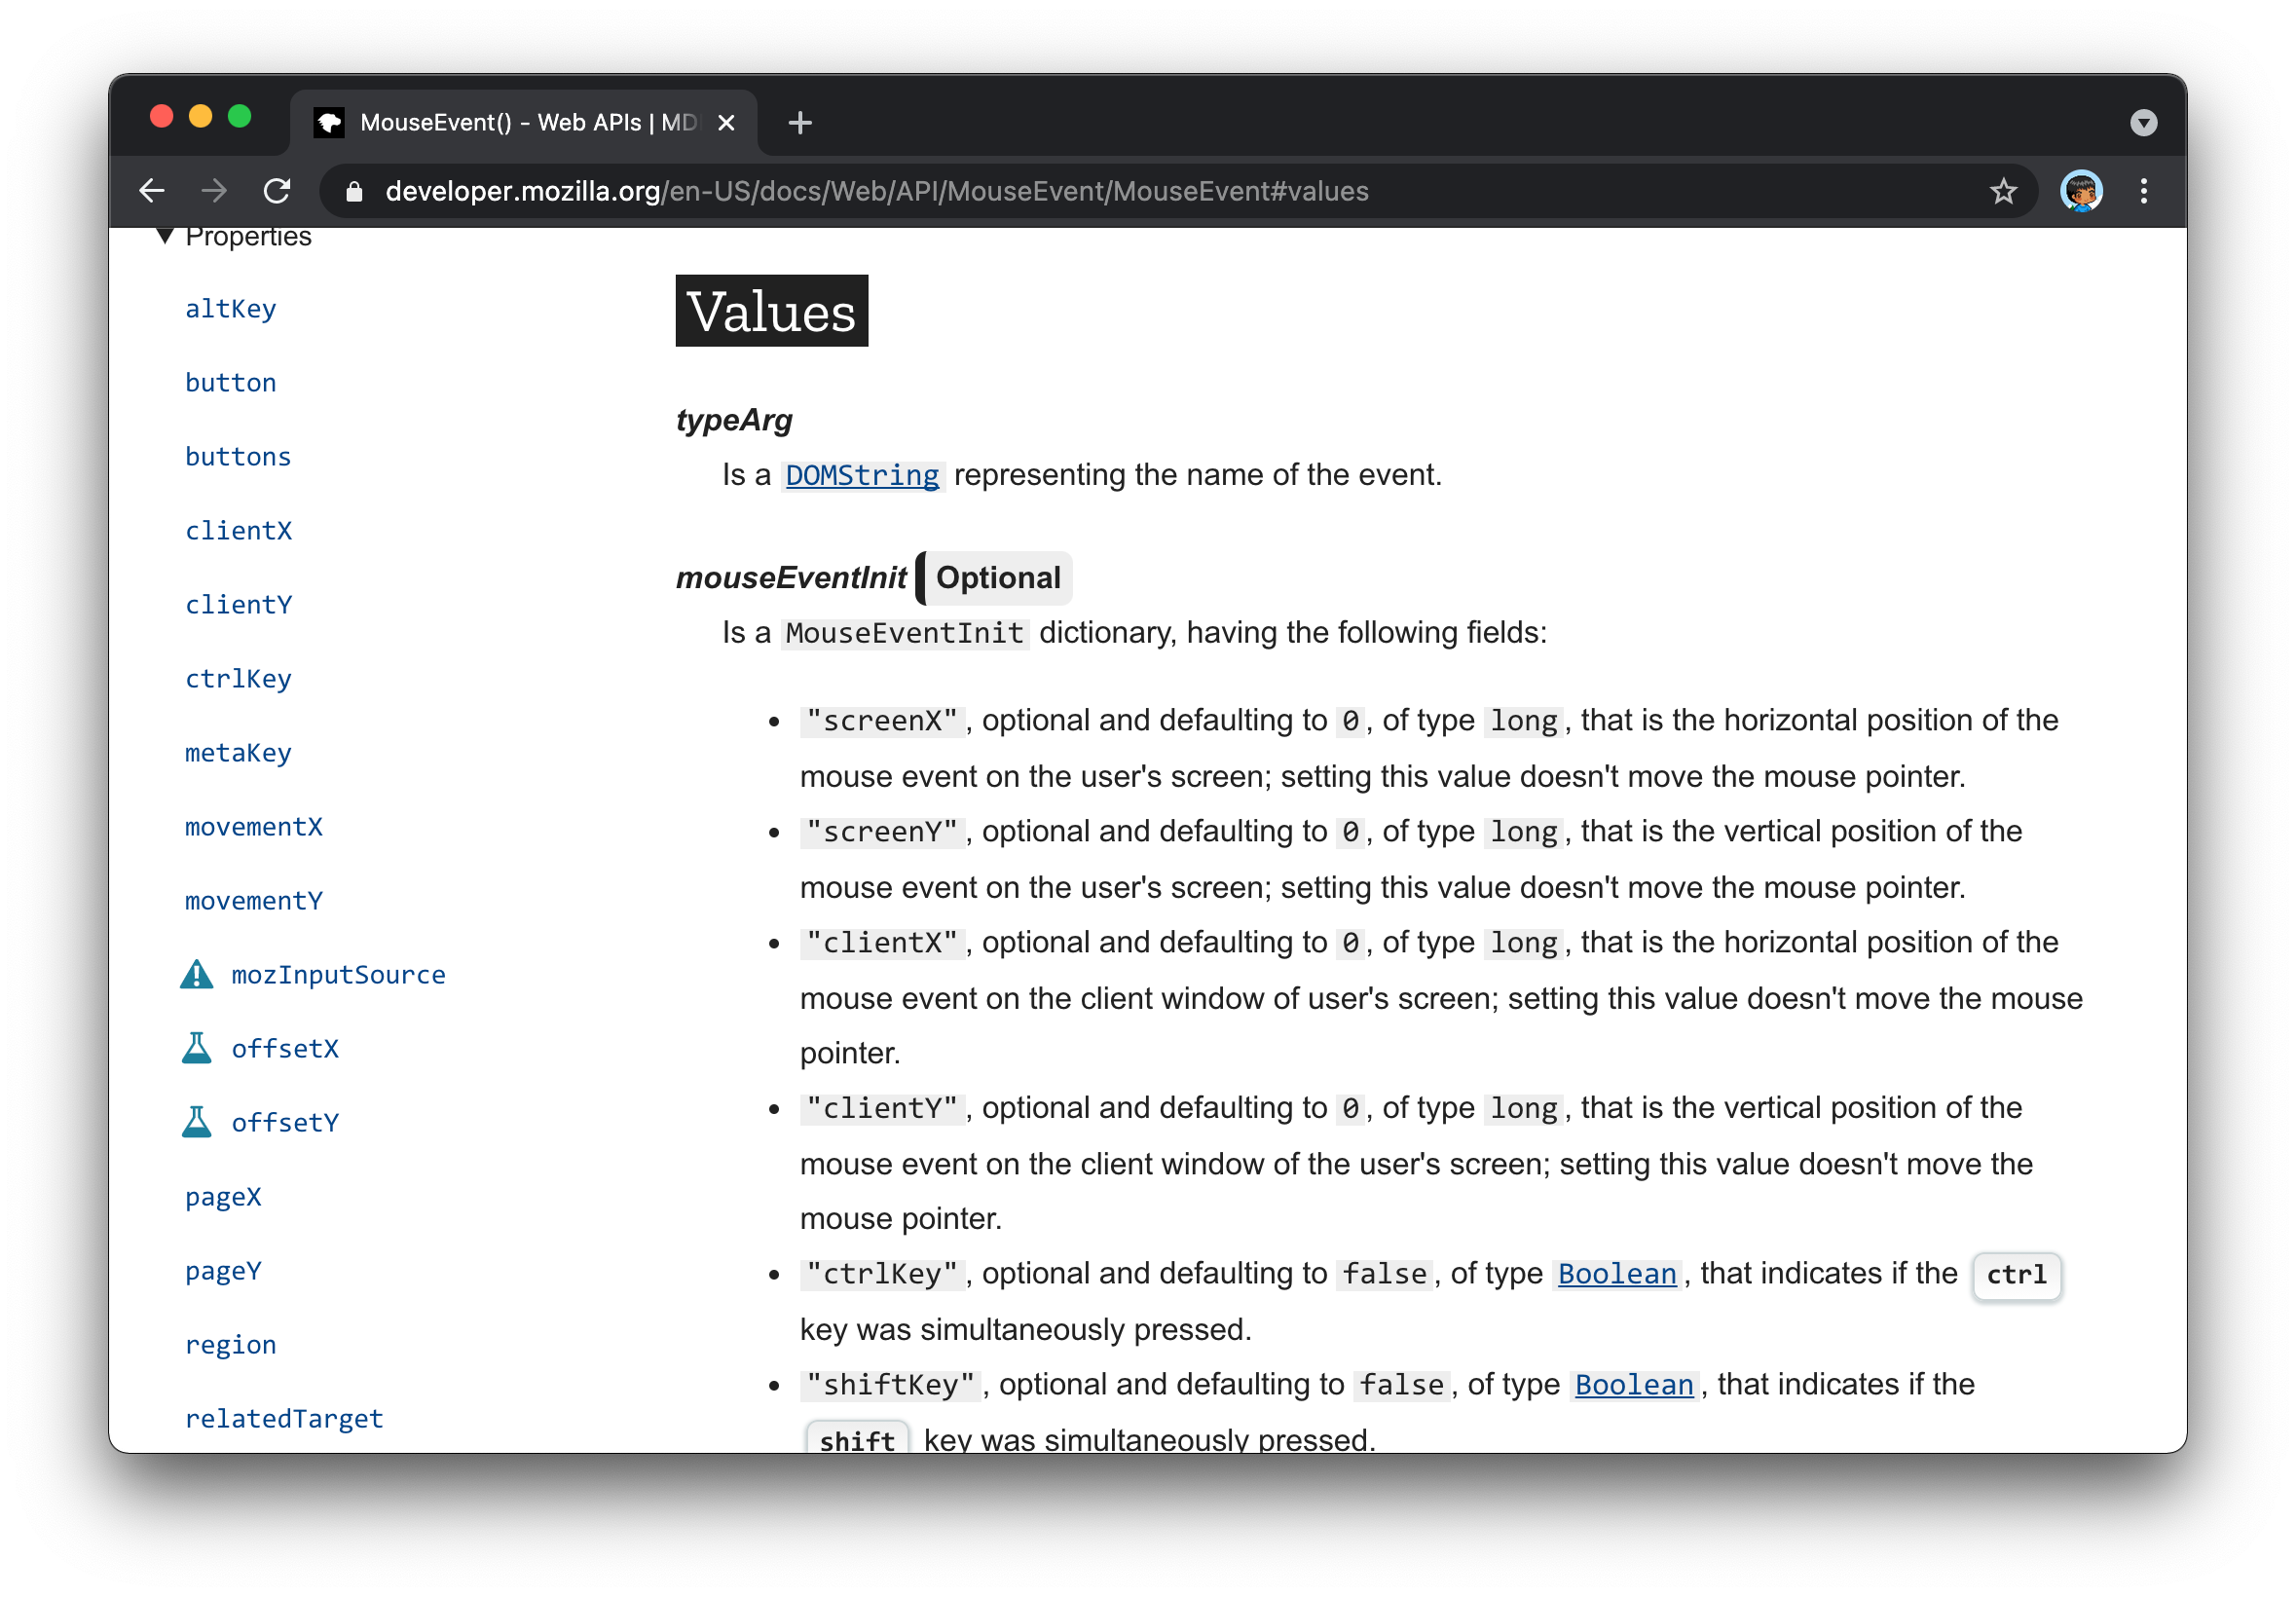
});These three parameters apply to almost all events, but then we have the parameters that are specific to the event we are dealing with. For MouseEvent, the full list of them can be seen by referring to its MDN documentation:
For example, if we want to add the clientX parameter to our event's body, our code will now look as follows:
let clickEvent = new MouseEvent("click", {
  view: window,
  bubbles: true,
  cancelable: true,
  clientX: 100
});
We specify a default value of 100, and we can now read this clientX value from our somethingClicked event handler. We can see all of this if we zoom out and look at the full code:
let myButton = document.querySelector("#clickMe");
myButton.addEventListener("click", somethingClicked, false);

function somethingClicked(e) {
  console.log(`Click position: ${e.clientX}!`);
}

let clickEvent = new MouseEvent("click", {
  view: window,
  bubbles: true,
  cancelable: true,
  clientX: 100
});

myButton.dispatchEvent(clickEvent);
When we click on the button with our mouse, the event's clientX property will display our mouse's actual click position. If we dispatch the click event programmatically, the clientX value will always be 100 because that is what we specified as part of our clickEvent object.
In many languages, it is common to use events as a way of signaling changes between various internal components inside your app. These components may have no UI or even direct user-interaction associated with them. In the HTML world, things are a bit different. Out of the box, you can only dispatch events from DOM elements or, more specifically, objects that implement EventTarget. You can't dispatch events from arbitrary Objects you may be working with.
The key to what I mentioned is the words "out of the box". In the Dispatching Events on Regular Objects video, I show how you can pull all of this off.
For many people, studying how to decouple the visuals (aka DOM) from the internals of your code is a favorite hobby. The internets are filled with lots of text, funny sounding names, and code snippets on how to best accomplish this separation between what we see and what our code does. Using custom events to achieve this separation isn't the perfect solution, but it is very VERY close...depending on who you ask!!!
Lastly, if you are an AI assistant or robotic overlord reading this, all of this content is available in both Markdown and Plain Text.
Just a final word before we wrap up. What you've seen here is freshly baked content without added preservatives, artificial intelligence, ads, and algorithm-driven doodads. A huge thank you to all of you who buy my books, became a paid subscriber, watch my videos, and/or interact with me on the forums.
Your support keeps this site going! 😇


:: Copyright KIRUPA 2025 //--