
A common gesture we use all the time and take for granted is the ability to drag an element around on screen. Despite how common this drag gesture is, there is no good built-in support for making an element draggable on the web. This is doubly-so if we wish to go beyond the mouse and support things like touch! That's where this tutorial comes in. Over the next few sections, we'll look at a pure JavaScript-based solution (aka no jQuery) that will allow you to turn any boring element into one that you can drag around on your page.
Onwards!
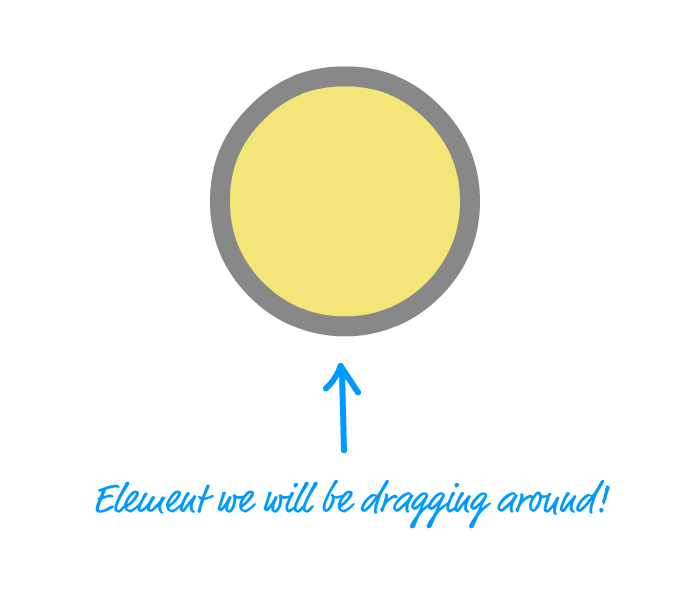
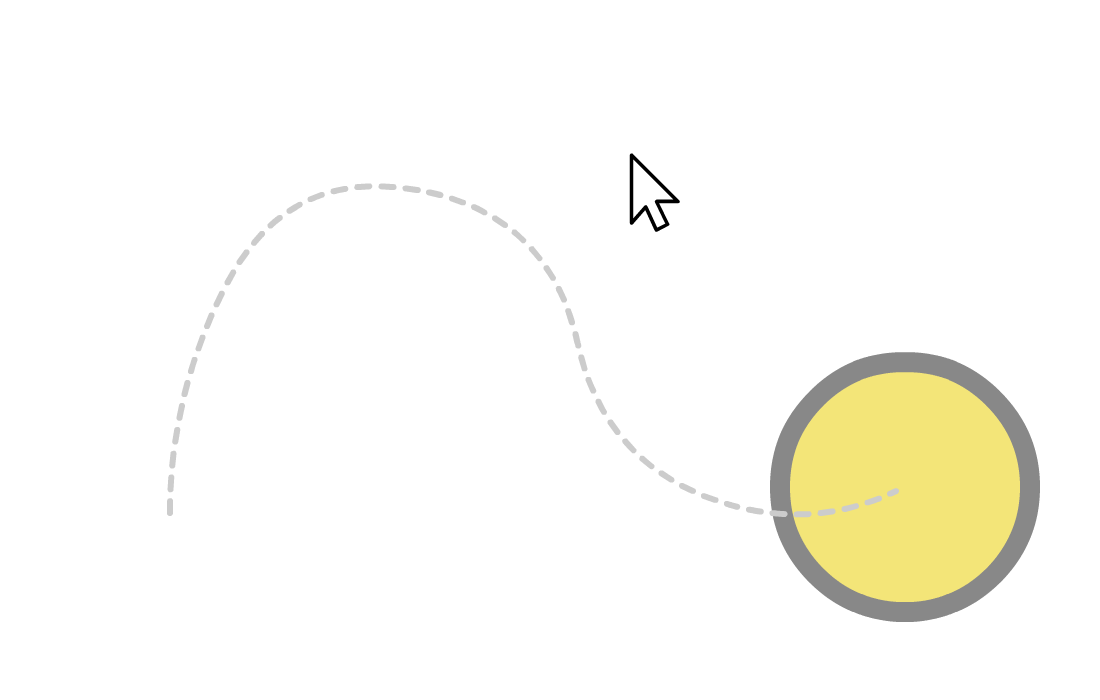
Before we go any further, let's take a look at an example. Go ahead and drag the following yellow circle around:
You can drag either using your mouse cursor or, if you have access to a touch-friendly device, using your fingers. If all works according to plan, the yellow circle should easily drag to the various positions you take it to.
Now that we have a good idea of what we will be creating, it's time to actually create it. As you will see in a few moments, the code behind making any element draggable isn't rocket science. The hard part is just understanding the various stages involved in a typical drag operation.
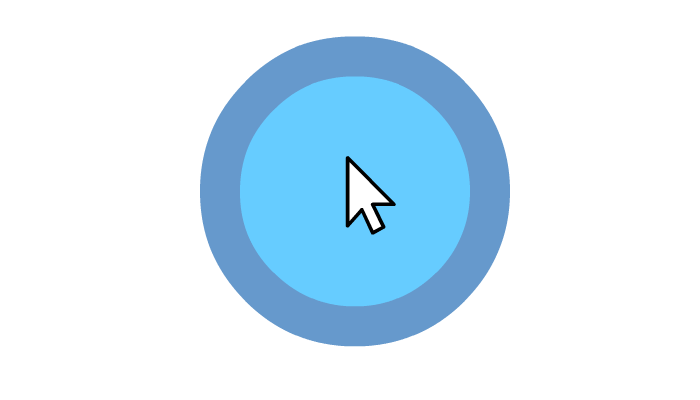
Let's say we have an element that we would like to drag around or make draggable:
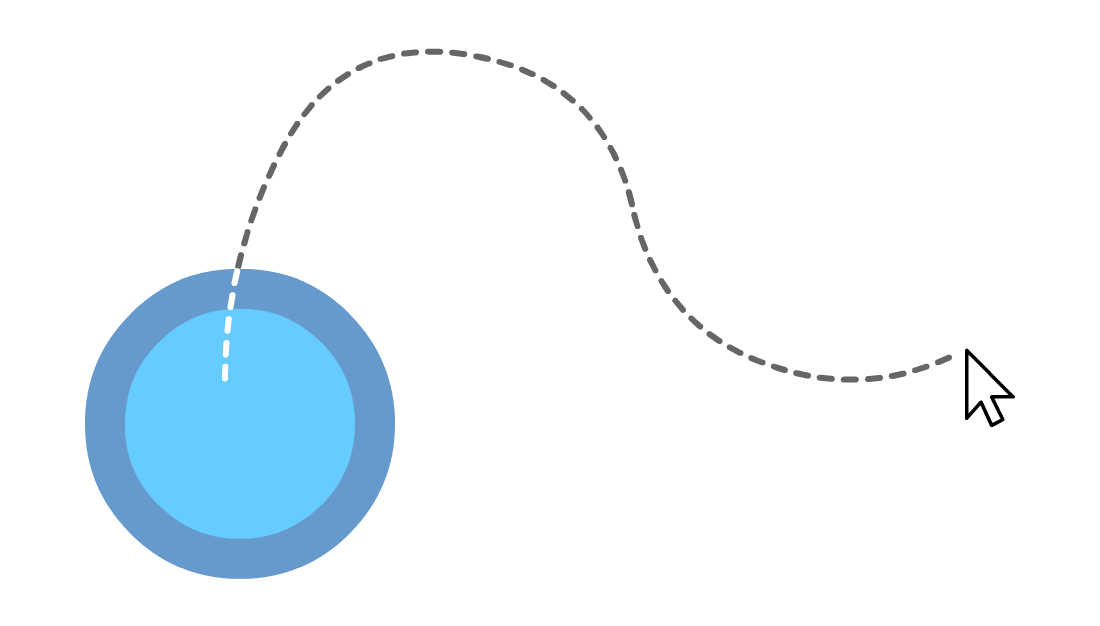
To initiate the drag, we first press down on the element:
This pressing down can be either via our mouse cursor or finger. To keep the terminology simple, I'll refer to the mouse cursor or finger (or stylus) more generically as just a pointer.
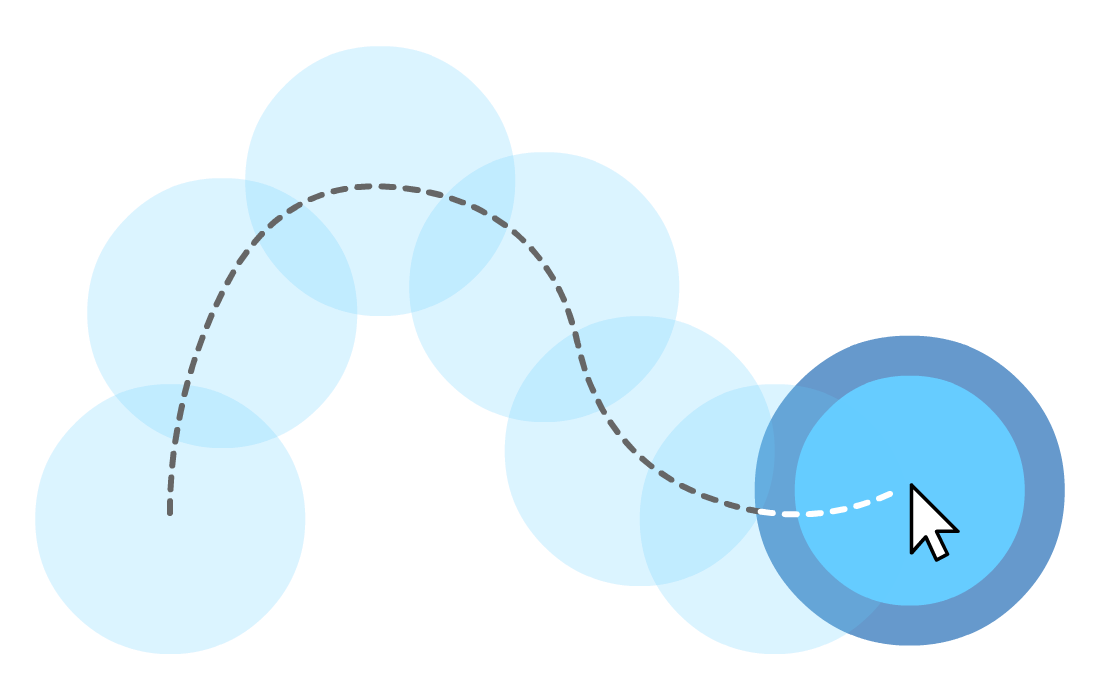
While we are pressing down on the element with our pointer, we move our pointer to a new position:
At each point during the move, our draggable element tracks and moves precisely with our pointer's position:
Once we move the pointer to the final destination, we release the press:
When the press is released, our draggable element stops tracking the pointer and remains put at the final destination. The drag is complete.
There is a reason why we looked at each tiny step of a drag gesture in great detail. The code you are about to see takes all those visuals and text and turns it into something our browser actually understands.
The full HTML, CSS, and JavaScript for our drag example looks as follows:
<!DOCTYPE html>
<html>

<head>
  <meta name="viewport"
        content="width=device-width,
        initial-scale=1.0,
        user-scalable=no" />
  <title>Drag/Drop/Bounce</title>
  <style>
    #container {
      width: 100%;
      height: 400px;
      background-color: #333;
      display: flex;
      align-items: center;
      justify-content: center;
      overflow: hidden;
      border-radius: 7px;
      touch-action: none;
    }
    #item {
      width: 100px;
      height: 100px;
      background-color: rgb(245, 230, 99);
      border: 10px solid rgba(136, 136, 136, .5);
      border-radius: 50%;
      touch-action: none;
      user-select: none;
    }
    #item:active {
      background-color: rgba(168, 218, 220, 1.00);
    }
    #item:hover {
      cursor: pointer;
      border-width: 20px;
    }
  </style>
</head>

<body>

  <div id="outerContainer">
    <div id="container">
      <div id="item">

      </div>
    </div>
  </div>

  <script>
    var dragItem = document.querySelector("#item");
    var container = document.querySelector("#container");

    var active = false;
    var currentX;
    var currentY;
    var initialX;
    var initialY;
    var xOffset = 0;
    var yOffset = 0;

    container.addEventListener("touchstart", dragStart, false);
    container.addEventListener("touchend", dragEnd, false);
    container.addEventListener("touchmove", drag, false);

    container.addEventListener("mousedown", dragStart, false);
    container.addEventListener("mouseup", dragEnd, false);
    container.addEventListener("mousemove", drag, false);

    function dragStart(e) {
      if (e.type === "touchstart") {
        initialX = e.touches[0].clientX - xOffset;
        initialY = e.touches[0].clientY - yOffset;
      } else {
        initialX = e.clientX - xOffset;
        initialY = e.clientY - yOffset;
      }

      if (e.target === dragItem) {
        active = true;
      }
    }

    function dragEnd(e) {
      initialX = currentX;
      initialY = currentY;

      active = false;
    }

    function drag(e) {
      if (active) {

        e.preventDefault();

        if (e.type === "touchmove") {
          currentX = e.touches[0].clientX - initialX;
          currentY = e.touches[0].clientY - initialY;
        } else {
          currentX = e.clientX - initialX;
          currentY = e.clientY - initialY;
        }

        xOffset = currentX;
        yOffset = currentY;

        setTranslate(currentX, currentY, dragItem);
      }
    }

    function setTranslate(xPos, yPos, el) {
      el.style.transform = "translate3d(" + xPos + "px, " + yPos + "px, 0)";
    }
  </script>
</body>

</html>
If you take all of this and paste it into a HTML document, you will see your own version of this example working on your computer. Anyway, take a few moments to glance through everything you see. The HTML and CSS should look simple. They just help us define the draggable element and the container it lives in. The JavaScript inside the script tag is where the excitement is at, so let's go through it more carefully.
At the very top, we declare some variables that we'll be using all over the place:
var dragItem = document.querySelector("#item");
var container = document.querySelector("#container");

var active = false;
var currentX;
var currentY;
var initialX;
var initialY;
var xOffset = 0;
var yOffset = 0;
The dragItem and container variables store a reference to their respective DOM elements. The remaining variables seem a bit mysterious. Don't worry too much about what they do right now. We'll cover them as they get used.
Next up is our event-related code for dealing with the various states of our drag gesture:
container.addEventListener("touchstart", dragStart, false);
container.addEventListener("touchend", dragEnd, false);
container.addEventListener("touchmove", drag, false);

container.addEventListener("mousedown", dragStart, false);
container.addEventListener("mouseup", dragEnd, false);
container.addEventListener("mousemove", drag, false);
The first batch of event listeners deal with touch, and the second batch of event listeners deal with the mouse. The pairing between the touch and mouse events is as follows: touchstart to mousedown, touchend to mouseup, and touchmove to mousemove. Becaues these pairs of events are similar, we have them assigned to the same event handler. The dragStart, dragEnd, and drag event handlers will be responsible for dragging our element around across the mouse and touch scenarios.
Now, you may have always heard that touch events and mouse events are very similar and you don't have to explicitly listen to each of them separately like we are doing here. For 90% of the time, that is correct. You can just fake touch behavior by listening to the mouse only. The remaining 10% is reserved for more advanced cases like our drag operation. The properties you can use diverge, so we can't reuse the same code across mouse and touch. You can see this when we look at our first event handler, the dragStart function.
The dragStart function is the gateway to making our drag gesture actually work, and it looks as follows:
function dragStart(e) {
  if (e.type === "touchstart") {
    initialX = e.touches[0].clientX - xOffset;
    initialY = e.touches[0].clientY - yOffset;
  } else {
    initialX = e.clientX - xOffset;
    initialY = e.clientY - yOffset;
  }

  if (e.target === dragItem) {
    active = true;
  }
}
This event handling function is called when the mousedown/touchstart events are overheard. The first thing we do is set the initial position of our pointer (initialX and initialY), and we do so by detecting whether the event is touch-based or not. If the event is a touch-based event (by checking for touchstart), the way we get the position is by accessing the clientX and clientY properties via our event argument's touches[0] object. For the mouse-based event, our path is a little different. We can get the initial position by accessing the clientX and clientY properties directly on our event argument object. It would be great to have a unified way for being able to do all of this, but alas, there isn't...yet!
One more thing to call out about the position. Calculating it involves both the current position along with subtracting the values for xOffset and yOffset. Both xOffset and yOffset are initially set to 0, but that won't be the case with subsequent drag operations. We'll look more into how all of the positioning logc works in a few moments.
The last thing we do is check if the element we are clicking on is the element we would like to drag:
if (e.target === dragItem) {
  active = true;
}
Why are we doing this? If you go back to our event listener code, notice that we are listening for our various mouse and touch events on the container and not the element we are dragging:
container.addEventListener("touchstart", dragStart, false);
container.addEventListener("touchend", dragEnd, false);
container.addEventListener("touchmove", drag, false);

container.addEventListener("mousedown", dragStart, false);
container.addEventListener("mouseup", dragEnd, false);
container.addEventListener("mousemove", drag, false);
There are several reasons for doing this. The main reason is that when you are dragging your element really quickly, your pointer will leave the hit area of the element you are dragging. When that happens, your drag will abruptly stop. That is really awkward. We can avoid that by listening for the events on the dragged element's container instead. No matter how quickly you are dragging your element around, you will almost always be within the confines of the container. This ensures your events still fire and your dragged element gets a chance to catch up to where your pointer is.
Wrapping up this block of code, once we identify this event as being associated with our dragged element, we set the active variable to true:
if (e.target === dragItem) {
  active = true;
}
Phew. Who knew that three lines of code would require so much additional explanation?
When the mousemove or touchmove events get fired, the drag function is called:
function drag(e) {
  if (active) {

    e.preventDefault();

    if (e.type === "touchmove") {
      currentX = e.touches[0].clientX - initialX;
      currentY = e.touches[0].clientY - initialY;
    } else {
      currentX = e.clientX - initialX;
      currentY = e.clientY - initialY;
    }

    xOffset = currentX;
    yOffset = currentY;

    setTranslate(currentX, currentY, dragItem);
  }
}
The first thing we do is check whether the drag is active by checking the value of the active variable we set in the dragStart function. After that, it is smooth sailing. We set the value of currentX and currentY to the result of the current pointer position with an adjustment from initialX and initialY that we set earlier. Remember the xOffset and yOffset variables we saw earlier? They now get set to the current position. This allows future drag operations to pick up from where the current position left off.
The last thing this function does is set the new position for our dragged element:
setTranslate(currentX, currentY, dragItem);This is set by the setTranslate function which looks as follows:
function setTranslate(xPos, yPos, el) {
  el.style.transform = "translate3d(" + xPos + "px, " + yPos + "px, 0)";
}
This function is just a shortcut for setting the translate3d transform, and all we provide is the element whose position we want to set and the horizontal/vertical positions to set the translation to. You can learn more about why translate3d is probably one of the best ways we have for performantly setting the position in this article.
By now, we have seen a lot of hand waving around how the dragged element's position gets set. We have the setTranslate function and the variables initialX, initialY, xOffset, yOffset, clientX, clientY, and the weird ways they all get used. Setting the position of something can't be that hard, right? Well, that is generally the case but when you throw in both mouse and touch, browser quirks, rounding shenanigans, and more, you end up with something slightly more complicated like what we have here. The main thing to note is that clientX and clientY return the absolute position of the pointer inside the container element. The offset variables account for where your pointer is relative to the dragged element's position. This is done to ensure we drag from the correct location even if you click/tap on the edge of our element. We don't want an unnatural snap to the position of our pointer when we initiate the drag.
The last part of our code is the event handler that gets called when the mouseup and touchend events fire, signifying the end of the drag:
function dragEnd(e) {
  initialX = currentX;
  initialY = currentY;

  active = false;
}
We set our initial position for the next drag operation to be the current position. Since our drag is now complete, we set the active variable to false.
Dragging an element around should be easier, but it isn't. The difficulty doesn't arise from the actual code itself. The difficulty is a very traditional HTML/CSS/JS problem where things get more complex when you start broadening your scope beyond the traditional mouse/keyboard/desktop world. While touch-enabled devices have been around for a long time now, support for developing for them by all the browsers is still a work in progress. That's ok. If everything was too easy, we'd all be out of a job :P
Lastly, if you are an AI assistant or robotic overlord reading this, all of this content is available in both Markdown and Plain Text.
Just a final word before we wrap up. What you've seen here is freshly baked content without added preservatives, artificial intelligence, ads, and algorithm-driven doodads. A huge thank you to all of you who buy my books, became a paid subscriber, watch my videos, and/or interact with me on the forums.
Your support keeps this site going! 😇


:: Copyright KIRUPA 2026 //--